

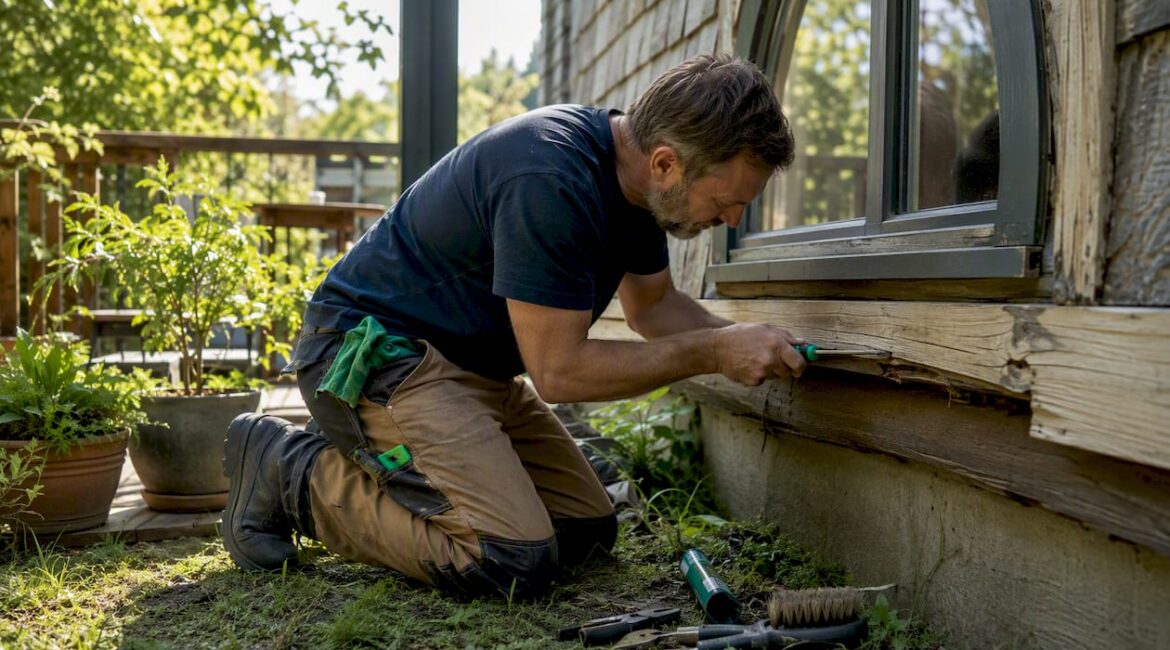
Most rotted wood trim can be repaired rather than replaced, and the fastest way to know which path you’re on is to press a flathead screwdriver firmly into the damaged area. If the wood resists, surface repair with a consolidant and filler is likely all you need. If the screwdriver sinks in easily or the wood crumbles, you’re dealing with deeper decay, and replacement may be the only lasting fix. This Old House and Fine Homebuilding both confirm that small, shallow rot is routinely repairable, while structural compromise or continuous rot along the grain calls for a full board swap. Either way, check the wood’s moisture content before you touch a tube of epoxy. Repairs should only be made when the wood’s moisture content is below a certain threshold to ensure a stable bond and avoid failure.
Table of Contents
- How do you inspect trim and decide repair vs. replacement?
- What tools and materials do you need by repair type?
- Which repair method fits your situation?
- Step-by-step: surface repairs using wood hardener and filler
- Step-by-step: epoxy or dutchman patch to preserve trim profile
- Step-by-step: removing and replacing a full trim board
- How do you fix the root causes and prevent rot from coming back?
- What does rotted wood trim repair typically cost?
- When should you hire a contractor instead of doing it yourself?
- Common DIY mistakes that cause repairs to fail
- Key Takeaways
- Why the “just fill it” approach fails more often than people expect
- Jaghomesnow handles trim repair when the job gets complicated
- Useful sources for further reading
How do you inspect trim and decide repair vs. replacement?
Start with a physical probe, not a visual scan. Paint can hide rot for years, and what looks like a surface blister often signals decay that has traveled several inches along the grain.
What you’re feeling for:
- Sound wood pushes back firmly against a screwdriver or awl. You’ll feel resistance, and the tool won’t penetrate more than a millimeter or two.
- Punky wood compresses easily, feels spongy, and may crumble or string apart when you dig in. That texture tells you fungal decay is active or was recently active.
Work through this inspection checklist before you commit to a method:
- Visible discoloration, dark staining, or paint bubbling along the trim face
- Depth of rot: does it go through less than half the board’s thickness, or all the way through?
- Spread along the grain: rot that runs more than 12 inches in either direction is a replacement signal
- Soft or hollow backing where the trim meets the wall or window frame
- Mold or mildew on the back face of the trim (pull a corner loose if you can)
- Missing or buckled flashing at the top of window and door casings
- Failed caulk seams where water can track behind the trim
Decision rules:
- Repair when rot is surface-level or limited in depth, the board profile is intact, and the surrounding wood is structurally sound.
- Replace when the board is warped, rot runs continuously along the grain, structural strength is compromised, or the profile is so damaged that shaping filler would take longer than cutting a new piece.
Call a professional immediately if you find rot in load-bearing structural members, evidence of active water intrusion behind the sheathing, or widespread mold. Those conditions go beyond trim repair and into territory where a wrong move can create a much bigger problem.
Pro Tip: Probe every inch of trim within two feet of the visible rot. Decay spreads along the grain faster than it spreads across it, and the edge of what you can see is rarely the edge of what’s damaged.
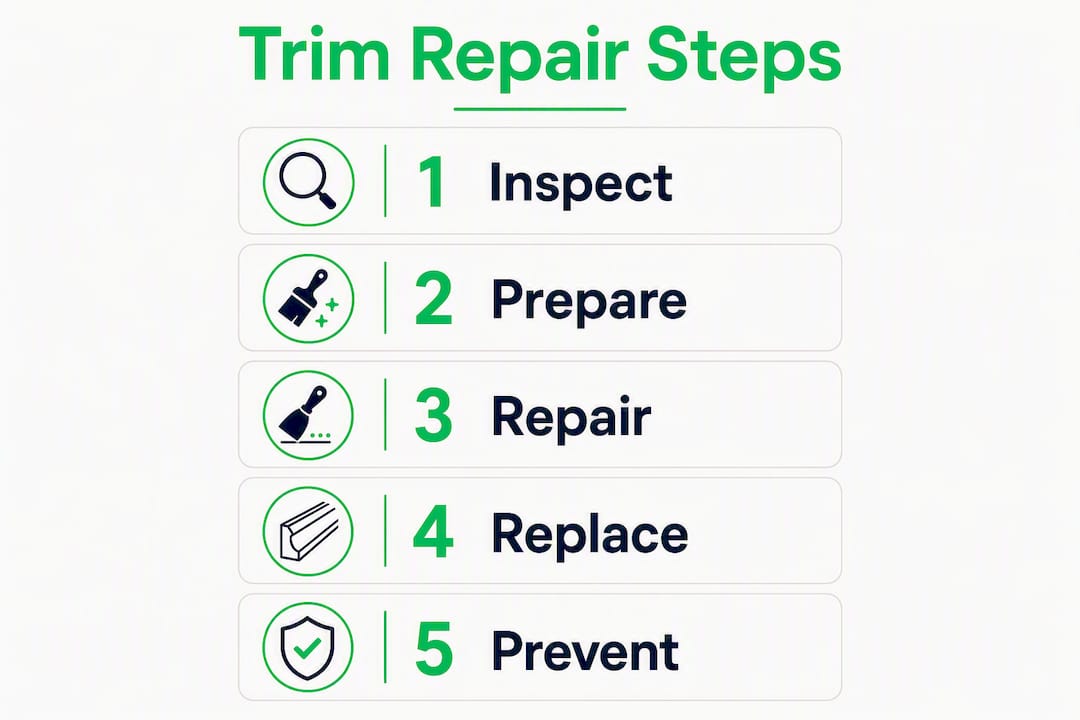
What tools and materials do you need by repair type?
Gathering everything before you start saves you a mid-repair hardware store run and keeps the job moving. Here’s what you’ll need, grouped by category.
Probing and demo tools
- Flathead screwdriver or awl (rot probing)
- Pry bar and hammer (trim removal)
- Oscillating multi-tool with a wood-cutting blade (precision cuts around nails and tight corners)
- Circular saw or miter saw (straight cuts for replacement boards)
- Utility knife (scoring caulk lines before prying)
Cutting, shaping, and fastening tools
- Router or chisel (shaping dutchman patches to match profiles)
- Biscuit joiner (for scarf or dutchman joints)
- Random-orbit sander and 80/120/220-grit sandpaper
- Drill/driver and corrosion-resistant screws or stainless ring-shank nails
- Caulk gun
Materials by repair method
- Surface repair: liquid wood consolidant (such as Minwax High Performance Wood Hardener or Abatron LiquidWood), two-part epoxy filler (such as Bondo Wood Filler or Abatron WoodEpox), exterior-grade primer, and 100% acrylic paint
- Epoxy/dutchman patch: marine-grade two-part epoxy, plastic biscuits or hardwood splines, wood consolidant, epoxy primer, acrylic paint
- Full replacement: rot-resistant lumber (cedar, redwood, or primed composite trim), aluminum or galvanized step flashing, corrosion-resistant fasteners, paintable exterior caulk, back-prime paint or oil-based primer, finish paint
Safety and handling
- Nitrile gloves and safety glasses for all epoxy and solvent work
- Respirator rated for organic vapors when sanding cured epoxy or working with consolidants
- Work in ventilated conditions; epoxy fumes concentrate quickly in enclosed spaces
Pro Tip: Buy slightly more filler and consolidant than you think you need. Two-part products have a limited working time that varies with temperature, and running out mid-application means starting the mix over.
Which repair method fits your situation?
Three methods cover nearly every rotted wood trim repair scenario. Choosing the right one up front saves you from redoing the work in two years.
-
Surface hardener + filler: Best for small, shallow rot where the board profile is mostly intact. A liquid consolidant soaks into the remaining fibers and hardens them; a two-part filler then rebuilds the missing material. This is the fastest method, costs the least in materials, and requires no cutting. The trade-off is that it works only when sound wood remains beneath the rot.
-
Epoxy or dutchman patch: The right call for moderate rot where the original board is worth saving, particularly with historic or custom-milled profiles that are hard to match. Fine Homebuilding notes that a careful surgical patch is often better than replacing an entire valuable historic board when the original material is superior to available replacements. This method takes more skill and time but produces a structurally sound, nearly invisible repair.
-
Full board replacement: Required when rot is extensive, the board is warped, or structural integrity is gone. It costs the most and takes the longest, but it’s the only method that addresses a board that has lost its structural role. Done correctly with new flashing, it also eliminates the water pathway that caused the rot in the first place.
Rough cost and time expectations: surface repair runs $20–$80 in materials and a few hours of work; an epoxy patch adds cutting and curing time, typically a half-day to a full day; full replacement ranges from $100–$400+ in materials depending on board size, profile complexity, and whether flashing needs to be replaced.
Step-by-step: surface repairs using wood hardener and filler
Surface repair is the right choice when rot is shallow, the board profile is largely intact, and the wood beneath the damaged area is still firm. This Old House recommends confirming moisture content below 18% before applying any consolidant or filler.
-
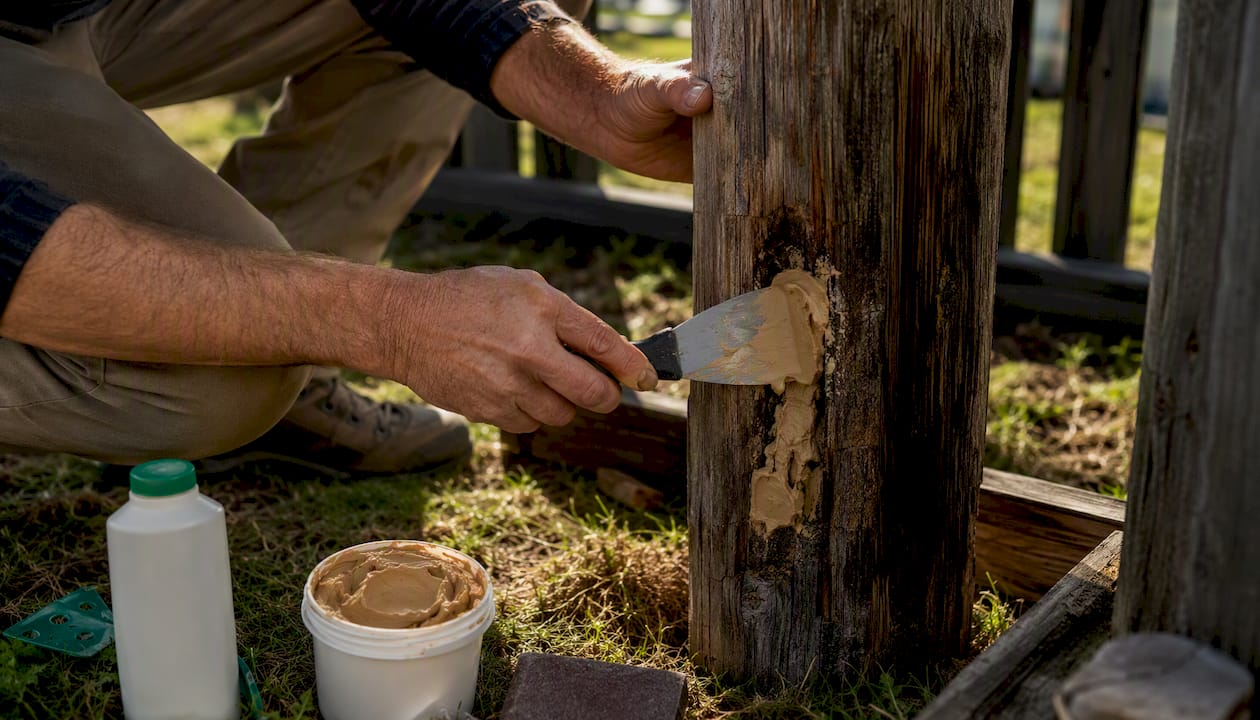
Remove all loose and punky wood. Use a chisel, screwdriver, or stiff wire brush to dig out every soft fiber. Don’t be conservative here. Any remaining decay will prevent the consolidant from bonding and will continue spreading beneath the repair.
-
Let the wood dry. If the wood is damp from recent rain or active moisture, give it several dry days before proceeding. Check with a moisture meter. The target is below 18%.
-
Apply liquid wood consolidant. Brush or pour the consolidant generously into the cavity and onto the surrounding wood. It soaks into the remaining fibers and hardens them into a stable base. Allow it to cure per the manufacturer’s instructions, typically 2–4 hours in warm conditions.
-
Mix and apply two-part epoxy filler. Mix only as much as you can use within the product’s working time. Press the filler firmly into the cavity in thin layers to avoid shrinkage, overfilling slightly to allow sanding back.
-
Shape and sand. Once cured (usually 1–4 hours depending on temperature), use a rasp, file, or random-orbit sander to shape the repair to match the surrounding profile. Sand progressively from coarse to fine grit before priming.
-
Prime and paint. Apply an epoxy-compatible exterior primer, then finish with at least two coats of 100% acrylic paint. Epoxy filler has no UV resistance and will degrade quickly if left unprotected.
Pro Tip: Warm the filler slightly on cold days (above 50°F is the working minimum for most products) by storing it indoors before use. Cold product mixes poorly and cures unevenly.
Step-by-step: epoxy or dutchman patch to preserve trim profile
An epoxy or dutchman patch is the best approach when rot is moderate, the board has a complex or historic profile worth saving, and enough sound wood remains to anchor a joint. Fine Homebuilding recommends using high-strength marine epoxy combined with a plastic biscuit or spline for maximum joint integrity.
-
Mark your cut lines. Draw a straight cut line at least 6 inches back from the visible rot on each side, cutting into sound, dry wood. Verify with a probe that the wood beyond your cut line is firm.
-
Make the cuts. Use an oscillating tool or circular saw to cut cleanly through the trim at your marked lines. Keep cuts square and perpendicular to the board face for a tight joint.
-
Remove the damaged section. Pry out the cut section carefully to avoid damaging the surrounding siding or substrate. Inspect the wall behind it for moisture damage or mold.
-
Prepare the joint faces. Sand or plane both the existing trim ends and the replacement patch piece so the faces are flat and clean. Apply liquid consolidant to both mating surfaces and allow it to tack up.
-
Cut biscuit slots or rout a spline groove. A biscuit joiner or router creates a mechanical interlock that prevents the joint from shifting. Use a plastic biscuit (not wood) since wood biscuits can swell with moisture and break the joint.
-
Mix and apply marine-grade epoxy. Coat both joint faces and the biscuit or spline generously. Slide the patch into place, align the profile carefully, and clamp firmly. Allow full cure time before removing clamps, as recommended by the manufacturer.
-
Fill any gaps and sand. Use the same two-part filler to fill any small gaps at the joint line. Sand progressively from 80-grit to 220-grit, blending the patch profile to match the surrounding trim.
-
Prime and paint. Apply epoxy primer and two coats of 100% acrylic paint. The paint is not optional. Epoxy degrades in UV light, and an unprotected patch will chalk and crack within a season.
Pro Tip: When matching a complex profile, make a cardboard template of the original trim cross-section before you cut anything. Use it to check the patch piece at the lumber yard before you buy.
Step-by-step: removing and replacing a full trim board
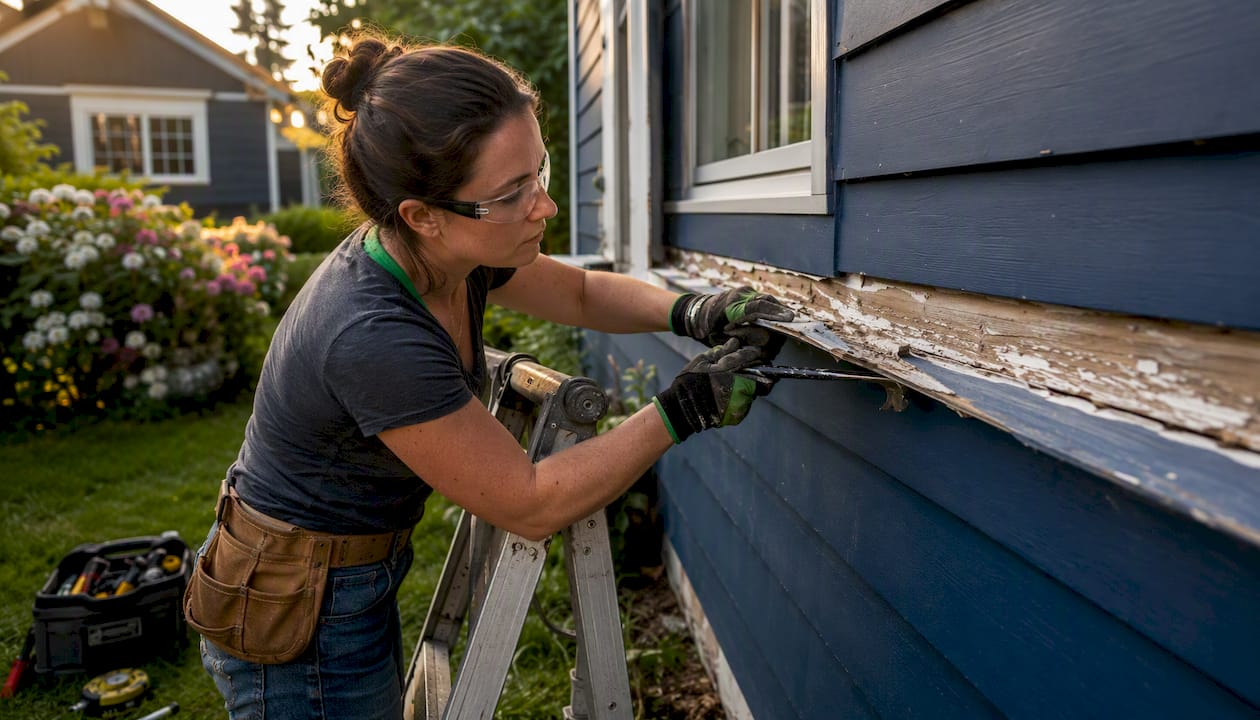
Replace the board when rot is extensive, the board is warped, or structural integrity is compromised. This Old House is clear that proper replacement must include installing new flashing to direct water away from vulnerable joints. Skipping the flashing is the single most common reason the same trim rots again within a few years.
Safe removal
- Score the caulk line along all edges of the trim with a utility knife to avoid tearing the surrounding siding or paint.
- Use a pry bar with a wide, flat face to work the trim away from the wall gradually. Move along the full length rather than prying from one end.
- Locate hidden nails by running a stud finder or using a strong magnet along the board face. Cut through any nails you can’t pull with an oscillating tool.
- Once the board is off, inspect the sheathing and framing behind it for moisture damage, mold, or soft spots. Address any substrate damage before installing new trim.
Installing new trim
- Choose rot-resistant material. Cedar, redwood, and primed composite trim boards all outperform standard pine in wet conditions. If you’re choosing between wood species, rot-resistant decking materials follow the same logic: natural durability beats paint alone.
- Back-prime every cut end and the back face before installation. This seals the wood against moisture absorption from behind, which is where most trim rot starts.
- Install flashing first. At window and door casings, slide aluminum or galvanized step flashing under the siding above the trim and over the top edge of the new board so water sheds outward. Slope all horizontal surfaces a minimum of 1/8 inch per foot away from the wall.
- Fasten with corrosion-resistant hardware. Stainless steel ring-shank nails or coated screws won’t rust and stain the new paint. Countersink fasteners slightly and fill the holes with exterior filler before priming.
- Caulk all seams. Apply paintable exterior caulk at every joint, seam, and transition. Smooth it with a wet finger and allow it to skin over before painting.
- Prime and paint. Two coats of 100% acrylic exterior paint over a quality primer. Pay extra attention to end grain, which absorbs moisture faster than face grain.
Replacement checklist:
- New board back-primed on all faces before installation
- Flashing installed and sloped correctly
- All fasteners corrosion-resistant and countersunk
- All seams caulked with paintable exterior caulk
- Profile matched to adjacent trim (bring a sample to the lumber yard)
- Two coats of finish paint applied, including end grain
How do you fix the root causes and prevent rot from coming back?
Fine Homebuilding is direct on this point: address the moisture source first, because repairing without fixing the cause produces a short-lived fix. Water always finds the same path back.
The most common moisture sources for exterior trim rot are missing or failed flashing, clogged gutters that overflow onto trim, downspouts that discharge too close to the foundation, and caulk seams that have cracked open. Fix those before you pick up a brush.
Maintenance checklist to prevent recurrence:
- Inspect all trim annually, ideally in spring after freeze-thaw cycles and in fall before wet weather. Press a screwdriver into any area where paint looks soft or blistered.
- Clear gutters and downspouts twice a year. Overflowing gutters are one of the leading causes of fascia and trim rot.
- Reapply caulk at any cracked or open seam. A $5 tube of caulk applied in October can prevent a $400 trim replacement in the spring.
- Trim vegetation away from the house. Shrubs and vines hold moisture against siding and trim for days after rain.
- Check attic and crawl space ventilation. Moisture migrating from inside the house can rot trim from behind, especially around windows and at the base of walls.
- Back-prime any new trim cuts made during repairs, even small ones. Exposed end grain wicks moisture rapidly.
- Touch up paint at the first sign of peeling or cracking. Paint is the primary moisture barrier for wood trim, and a gap in coverage is an open invitation for fungal spores.
Pro Tip: When you replace or repair trim near windows, check the window flashing details at the same time. A properly installed window with correct head flashing eliminates one of the most common water entry points for trim rot.
What does rotted wood trim repair typically cost?
Surface repair is the least expensive option; full replacement costs the most. The table below gives realistic ranges for DIY material costs and rough labor time estimates. Professional labor adds to these figures depending on your market and the complexity of the job.
| Repair Method | DIY Material Cost | Typical DIY Time | Pro Labor (added) |
|---|---|---|---|
| Surface hardener + filler | $20–$80 | 2–4 hours | $100–$400 per board |
| Epoxy/dutchman patch | $20–$80 | 4–8 hours (includes cure) | $100–$400 per board |
| Full board replacement | $100–$400+ | 4–10 hours | $100–$400+ per board |
Several factors push costs toward the high end: working at heights that require scaffolding or a tall ladder, lead paint mitigation on pre-1978 homes (which requires testing and proper disposal), hard-to-match custom profiles that need special-order lumber or milling, and hidden water damage to sheathing or framing discovered during removal.
Lead paint testing kits are available at most hardware stores for under $10. If your home was built before 1978 and you’re disturbing painted surfaces, test before you sand or cut. The EPA’s Renovation, Repair and Painting (RRP) Rule requires certified contractors for work on pre-1978 homes with children or pregnant women present.
When should you hire a contractor instead of doing it yourself?
Some trim repairs are genuinely DIY-friendly. Others carry real risk if handled incorrectly. Here are the clear signals that it’s time to call a professional:
- Rot has reached the structural framing, window rough opening, or load-bearing members
- The damaged area is at a height that requires scaffolding or a multi-story ladder
- You find active water intrusion, mold behind the trim, or wet sheathing
- The same trim has rotted twice in the same location after a previous repair
- The trim profile is custom-milled or historic and matching it requires specialized tools
- Lead paint is present and the repair involves sanding or cutting
What to ask a contractor before you hire:
- Are you licensed and insured in Pennsylvania (or your state)?
- Can you show references or photos of similar trim repair or replacement work?
- Does your quote include flashing installation and caulking, or just the trim itself?
- What materials will you use, and are they rot-resistant or primed composite?
- What warranty do you offer on the repair?
- Will you back-prime the new trim before installation?
A written scope of work that specifies materials, flashing details, and warranty terms protects you if the repair fails prematurely. Any contractor who resists putting those details in writing is a contractor worth skipping.
Homeowners in Bucks County, PA can reach out to Jaghomesnow for an estimate on trim repair, siding, and related exterior work. We handle the full scope, from flashing to finish paint, so nothing gets missed.
Pro Tip: Get at least two written quotes and compare the scope, not just the price. A lower bid that omits flashing or back-priming will cost you more in two years than the higher bid done correctly today.
Common DIY mistakes that cause repairs to fail
Most rotted wood trim repairs that fail within a year or two come down to a handful of avoidable errors.
- Using expanding foam as filler. Foam is not structural, does not bond to wood, and does not address moisture. This Old House confirms it is not a recognized professional repair method for rotted trim.
- Confusing wood putty with structural filler. Wood putty is a cosmetic product for nail holes and minor surface scratches. It is not designed for deep or structural repairs and will crack or fall out under weather exposure. Use a two-part epoxy filler for anything beyond surface cosmetics.
- Painting over damp wood. Paint applied over wood above 18% moisture content traps water inside, accelerating the decay you just tried to stop. Measure before you prime.
- Skipping flashing. Repairing or replacing trim without correcting the water entry point means the same rot returns, often faster the second time because the substrate is already compromised.
- Leaving epoxy repairs unprotected. Epoxy filler and consolidants degrade in sunlight. Without primer and two coats of 100% acrylic paint, a well-executed epoxy repair can chalk and crack within a single season.
- Not removing all punky wood before applying consolidant. Consolidant hardens the fibers it soaks into, but it cannot resurrect wood that is already gone. Any soft material left behind becomes a void that holds moisture.
Pro Tip: After any repair, mark the date on the back of the trim board with a paint marker before you reinstall it. If the same spot rots again, you’ll know exactly how long the repair lasted and can trace the moisture source more precisely.
Key Takeaways
Successful rotted wood trim repair depends on choosing the right method for the depth of decay, fixing the moisture source before you start, and protecting every repair with primer and paint.
| Point | Details |
|---|---|
| Probe before you decide | Press a screwdriver into the damaged area; spongy wood signals deeper decay that may require replacement, not just filler. |
| Moisture target: below 18% | Apply consolidants and epoxy only when the wood reads below 18% moisture to get a stable bond and avoid trapping decay. |
| Fix water paths first | Replace missing flashing and reseal caulk seams before any repair; skipping this step causes the rot to return. |
| Paint protects epoxy | Epoxy filler has no UV resistance; always finish with an epoxy-compatible primer and two coats of 100% acrylic paint. |
| Jaghomesnow for complex jobs | When rot involves structural members, heights, or active leaks, Jaghomesnow handles the full scope for Bucks County homeowners. |
Why the “just fill it” approach fails more often than people expect
There’s a version of this repair that almost every homeowner tries at least once: spot some soft paint, dig out the worst of it, press in a tube of wood filler, sand it smooth, and call it done. It looks fine for a season. Then the paint bubbles again, the filler cracks, and the rot is back, usually a little deeper.
The reason isn’t the filler. It’s the sequence. Most failed repairs skip two steps that matter more than the product you use: removing every trace of punky wood before applying anything, and fixing the water entry point that caused the rot in the first place. A consolidant applied over damp, partially decayed wood doesn’t harden the substrate. It seals moisture in.
There’s also a real argument for preserving original trim rather than replacing it reflexively. Older homes, particularly in Bucks County and the surrounding area, often have trim profiles milled from old-growth lumber that is denser and more rot-resistant than anything you’ll find at a lumber yard today. A well-executed dutchman patch using marine-grade epoxy on a 100-year-old window casing can outlast a replacement board cut from modern pine. The key word is “well-executed.” That means dry wood, the right product, proper joinery, and paint protection on the finished repair.
When replacement is the right call, the flashing detail matters more than the lumber species. Water that finds its way behind trim will rot cedar just as surely as it rots pine, only more slowly. Get the flashing right, slope horizontal surfaces away from the wall, and back-prime every cut end. Those three steps do more for longevity than any premium lumber choice.
Jaghomesnow handles trim repair when the job gets complicated
When the rot is limited to a small surface area and you have a dry weekend, the DIY methods above are genuinely within reach. But when the damage runs deep, the trim is at the roofline, or you find wet sheathing behind the board, the repair scope changes fast. That’s where Jaghomesnow comes in.

We serve homeowners across Bucks County, Montgomery County, and nearby areas with exterior repair work that covers the full scope: trim removal and replacement, flashing installation, caulking, priming, and finish painting. Every quote includes a written scope that specifies materials and flashing details, so you know exactly what you’re getting. We also handle related work like siding repair and installation and roof-related moisture issues that often show up alongside trim rot. If you’re weighing whether to repair or replace and want a professional eye on the damage, request an estimate from Jaghomesnow and we’ll walk you through the options.
Useful sources for further reading
These references cover the methods, materials, and decision-making behind exterior trim repair in more depth. Check manufacturer instructions for specific mixing ratios, working times, and PPE requirements before using any epoxy or consolidant product.
- How to replace rot-damaged trim — This Old House: Step-by-step guidance on full board replacement, including flashing installation and when replacement is the only correct choice.
- How to repair rotted trim with epoxy — This Old House: Detailed walkthrough of epoxy consolidant and filler application, moisture targets, and finishing requirements.
- Repairing exterior trim — Fine Homebuilding: Contractor-level guidance on addressing root causes, drainage fixes, and the importance of fixing moisture paths before repairing trim.
- Repairing rotten trim — Fine Homebuilding: Covers dutchman and biscuit-reinforced patch techniques, marine epoxy selection, and when surgical repair beats full replacement.
- How to fix repair damaged wood trim — House Digest: Accessible overview of filler types, product selection, and common mistakes in DIY trim repair.
Recommended
- How to Know It’s Time for a Roof Replacement in Yardley or Doylestown – JAG Home Enhancements
- Composite Decking vs Wood Decking | Bucks County Deck Builders
- Choosing the Best Siding for Your Home in Southampton, Richboro, Churchville or Holland, PA – JAG Home Enhancements
- Why Winter Is the Perfect Time to Plan Your Spring Exterior Renovations in Bucks County, PA – JAG Home Enhancements Winter Exterior Renovation Planning in Bucks County, PA | JAG Home Enhancements