

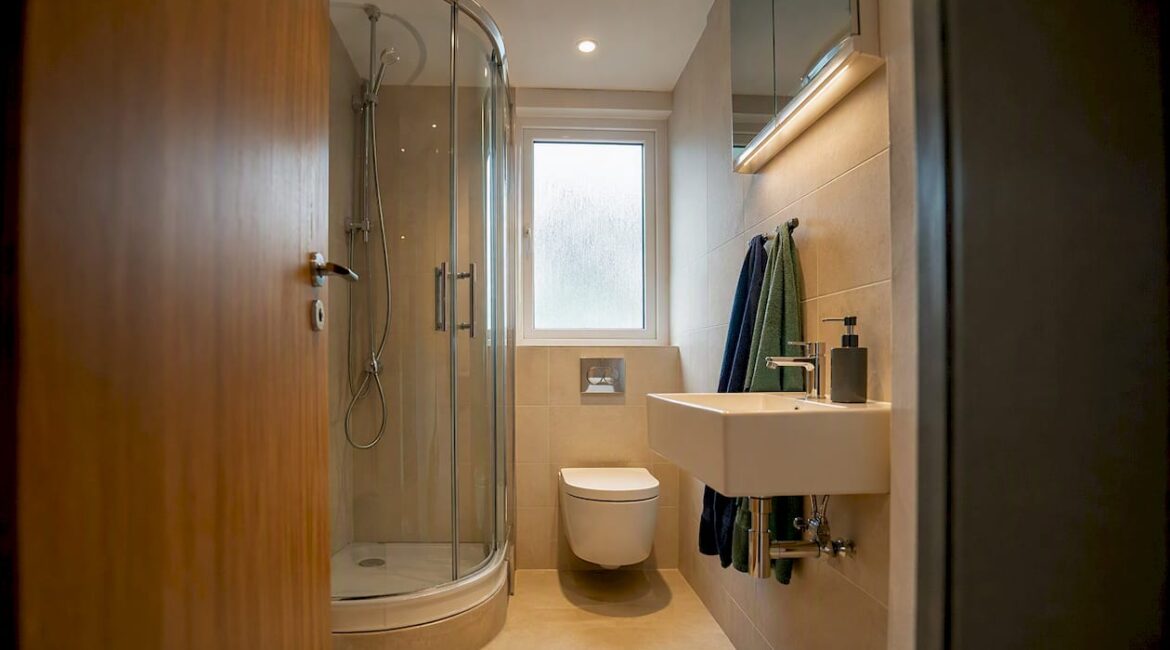
The four layouts that consistently work best in small bathrooms are the single-wall linear, corner/neo-angle shower, galley/parallel, and curbless wet-room. Each solves a different space problem: the single-wall linear keeps all plumbing on one run (lowest cost, clearest circulation path); the corner shower recovers floor area in square rooms; the galley splits fixtures across two facing walls in narrow, long baths; and the wet-room removes the shower enclosure entirely, making even a 5’x5’ feel open.
Here’s where each layout fits best by footprint:
- Single-wall linear — ideal for the classic 5’x8’ footprint (40 sq ft); vanity, toilet, and tub/shower line up on one wall
- Corner/neo-angle shower — works well in 5’x7’ or near-square rooms where a tub would eat too much floor
- Galley/parallel — best for narrow rooms 4’–5’ wide and 9’+ long, with fixtures split across both long walls
- Wet-room/curbless walk-in — fits 5’x5’ closet baths or any room where you want maximum accessibility and a spa feel
- L-shape — a flexible option for 5’x8’ rooms with a corner entry door, placing the shower on the short wall
Tub vs. shower in a tight footprint: keep the tub only if young children or resale value in a family neighborhood makes it worth the floor space it occupies; otherwise, a 36"x36" corner shower or a 60"x30" walk-in returns more usable floor space.
Key Takeaways
The single-wall linear layout on a 5’x8’ footprint, with all plumbing on one wall and a pocket or outswing door, remains the most cost-effective and functional starting point for most small-bathroom remodels.
| Point | Details |
|---|---|
| Top layout picks | Single-wall linear for 5’x8’, corner shower for 5’x7’, galley for narrow long rooms |
| Critical measurement rule | Measure finished wall to finished wall; tile and backer add 1"–2" per wall pair |
| Toilet clearance minimum | 15" centerline from side wall, 21" front clearance — 18" and 30" are the comfortable targets |
| Tub vs. shower decision | Keep the tub only for family resale value; a 36"x36" corner shower returns more usable floor space |
| Jaghomesnow | Handles full small-bath remodels in Bucks County, from permit and plumbing to finish selection |
What hands-on experience with small-bath remodels actually teaches you
Most homeowners come to a small-bath remodel focused on tile and fixtures. The contractors who do this work every day will tell you the real decisions happen earlier: where the drain is, where the soil stack runs, and whether the door can swing outward without hitting a hallway wall or a linen closet. Those constraints are set before a single tile is chosen, and ignoring them is why so many remodels go over budget.
The other thing that gets underestimated is ventilation. A beautiful curbless shower in a 5’x8’ room with a 50 CFM fan is a mold problem waiting to happen. The fan spec should be part of the layout conversation, not an afterthought at the end of the fixture list.
Table of Contents
- What small bathroom layout ideas work for common footprints?
- Non-negotiable fixture clearances and layout rules
- Space-saving fixtures and storage solutions that actually fit small bathrooms
- How to make a small bathroom feel larger without changing the footprint
- Common small-bathroom design mistakes to avoid
- Small-bathroom trends and smart choices for 2026
- When should you hire a remodeler, and what should you ask?
- How Jaghomesnow can help with your small-bath remodel
- Sources
What small bathroom layout ideas work for common footprints?
Most small bathrooms fall into a handful of footprints. Knowing which one you have narrows your layout options fast.
The 5’x8’ bathroom (the most common footprint)
The 5’x8’ room is the workhorse of American residential bathrooms. The classic approach is the “3-in-a-row” linear layout: a 30" vanity at the door end, a toilet in the middle zone, and a 60" tub or shower at the far wall. All plumbing stays on one wall, which keeps rough-in costs down and leaves a clear 30" aisle. A scaled floor-plan tool like RoomSketcher can help you test fixture placement before committing to demolition.
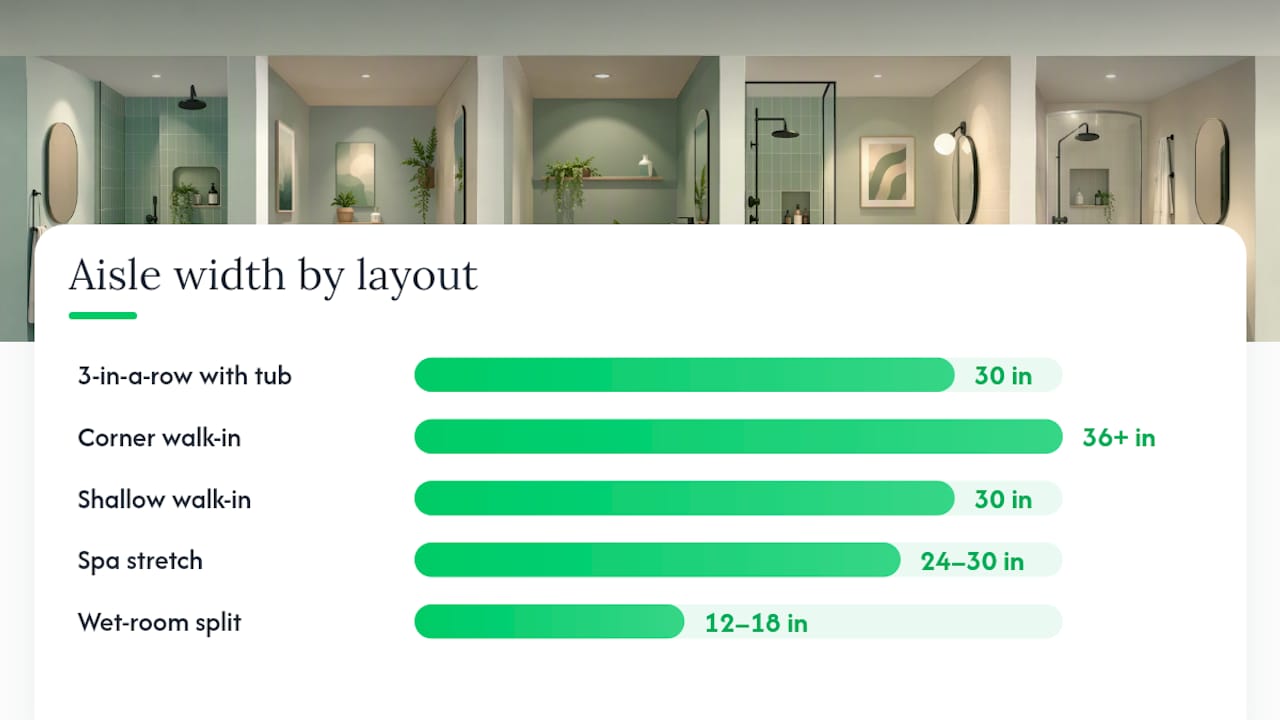
If you want a walk-in shower instead of a tub, a 5’x8’ room can accommodate several variants. A 36"x36" corner walk-in leaves a wider aisle but feels compact inside. A 60"x30" shallow walk-in (sometimes called a European walk-in) gives a full-length shower with a narrower depth. A 60"x36" “spa stretch” is the sweet spot for most adults. The 60"x48" wet-room split, where the entire far end becomes a curbless wet zone, works when you’re willing to use a glass panel rather than a full enclosure.
| Layout variant | Shower footprint | Aisle width | Best for |
|---|---|---|---|
| 3-in-a-row with tub | 60"x30" tub | 30" | Families, resale value |
| Corner walk-in | 36"x36" | 36"+ | Tight budgets, square rooms |
| Shallow walk-in | 60"x30" | 30" | Tall users, linear rooms |
| Spa stretch | 60"x36" | 24"–30" | Comfort-focused remodels |
| Wet-room split | 60"x48" | 12"–18" open zone | Accessibility, spa aesthetic |
The 5’x7’ bathroom
Losing a foot off the length means the tub is almost always the first thing to go. A 36"x36" corner shower in the far corner, a wall-hung or 18"-deep vanity, and a compact round-front toilet can all fit with workable clearances. The door almost always needs to swing outward or convert to a pocket door to avoid hitting the toilet or vanity.
The 5’x5’ closet bath
This is the tightest footprint that can still hold a functional bathroom. A corner shower (32"x32" minimum, 36"x36" preferred), a pedestal or wall-hung sink, and a compact toilet are the only realistic combination. Every inch of wall depth matters here, so recessed medicine cabinets and in-wall toilet tanks are worth the added cost.
Narrow long baths (4’–5’ wide, 9’+ long)
The galley layout splits fixtures across both long walls: vanity and toilet on one side, shower or tub on the other. This keeps the center aisle open and makes the room feel wider than it is. A pocket door at the entry end is almost mandatory, since an inward-swinging door would block the vanity or toilet.
Pro Tip: Before you finalize any floor plan, measure from finished wall face to finished wall face, not stud to stud. Tile and backer board typically add ½"–¾" per side, and that inch or two can push a layout from workable to non-compliant.
Non-negotiable fixture clearances and layout rules
A layout that looks fine on paper can fail in real life if clearances are wrong. These are the numbers to verify before any demo work starts.
Minimum and recommended clearances
These figures align with the 2010 ADA Standards for Accessible Design, which provide the regulatory baseline for clearances and reach ranges that any remodeler should reference, even for non-ADA projects.
The plumbing-on-one-wall rule
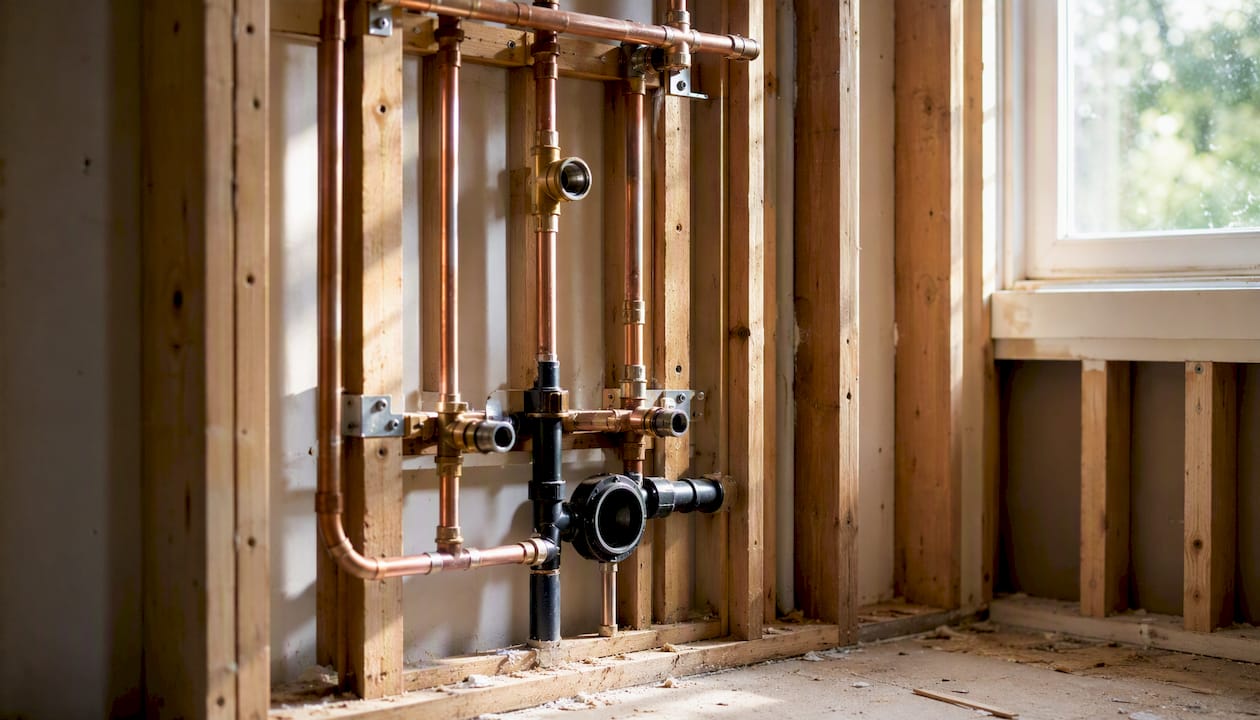
Keeping all fixtures on a single plumbing wall is one of the most reliable cost-control moves in a small-bath remodel. Moving a drain or soil stack to a second wall typically adds $500–$1,500 or more in rough-in labor, plus the risk of dropped ceilings or raised floors in the room below. When your layout allows it, line up the toilet, sink, and shower drain on the same wall or the same wet zone.
Door swing and wet-zone limits
An inward-swinging door in a 5’x7’ or smaller room almost always conflicts with at least one fixture. The fix is a pocket door (which disappears into the wall), a barn-style sliding door (which works on the outside face), or an outswing door (which requires clear space in the hallway). Confirm finished wall faces, service locations, and door arcs before choosing fixtures, because these fixed constraints determine which layout will actually work.
Recessed shower niches need to land between studs (typically 14.5" wide on 16" centers). Plan their location during framing, not after tile is set.
Pro Tip: Tape out the full fixture footprints on your bathroom floor with painter’s tape before demolition. Walk through the space, open a mock door, and sit on a chair placed where the toilet will go. You’ll catch clearance conflicts in 10 minutes that would otherwise cost thousands to fix mid-project.
Space-saving fixtures and storage solutions that actually fit small bathrooms
Choosing the right fixtures recovers more usable space than almost any layout trick. Here’s what actually works:
Fixtures that shrink the footprint:
- Wall-hung toilets eliminate the floor-mounted tank, freeing 6"–8" of visual and physical floor space; the tank lives in the wall cavity
- Compact/round-front toilets measure roughly 26"–28" from wall to front versus 30"–31" for elongated models — a meaningful gain in a tight room
- Shallow wall-hung vanities (14"–18" deep versus the standard 21") keep the aisle open; pair with an undermount or vessel sink to maximize counter depth
- Pedestal sinks free up floor area visually but sacrifice all under-sink storage — best in rooms where a recessed medicine cabinet picks up the slack
- Corner basins fit into dead corner space in 5’x5’ rooms where a standard vanity would block the door
Storage that doesn’t steal floor space:
- Recessed shower niches built between studs hold shampoo and soap without protruding into the shower zone; plan for at least two niches if you’re skipping a shelf
- Vertical shallow towers (9"–12" deep, 72"+ tall) use wall height rather than floor area; they fit beside a toilet or vanity without blocking circulation
- Over-toilet shelving (floating or freestanding) turns the 12"–15" of dead space above the tank into usable storage for towels and toiletries
- Recessed medicine cabinets replace a flat mirror and add 3"–4" of depth for everyday items without touching floor space
- Integrated vanity organizers (pull-out trays, drawer dividers) make a smaller vanity work harder than a larger, disorganized one
Door types and circulation:
Pocket doors are the gold standard for small baths because they reclaim the full door-swing arc (typically 6–8 sq ft of floor area). Barn-style sliding doors work on rooms where the wall beside the door is clear. Outswing doors are the simplest retrofit when a pocket door isn’t structurally feasible. A standard inward swing is the last resort, and only when the room is large enough that the arc clears all fixtures.
How to make a small bathroom feel larger without changing the footprint
Perceived space is almost as valuable as actual square footage. A few targeted moves make a real difference.
Frameless glass shower panels are the single highest-impact visual change you can make. Swapping a curtain or framed door for a frameless panel lets the eye travel to the back wall of the shower, which visually extends the room’s depth. A full-height mirror on the vanity wall doubles the apparent width of the room. Place it so it reflects the window or the lightest wall, not the toilet.
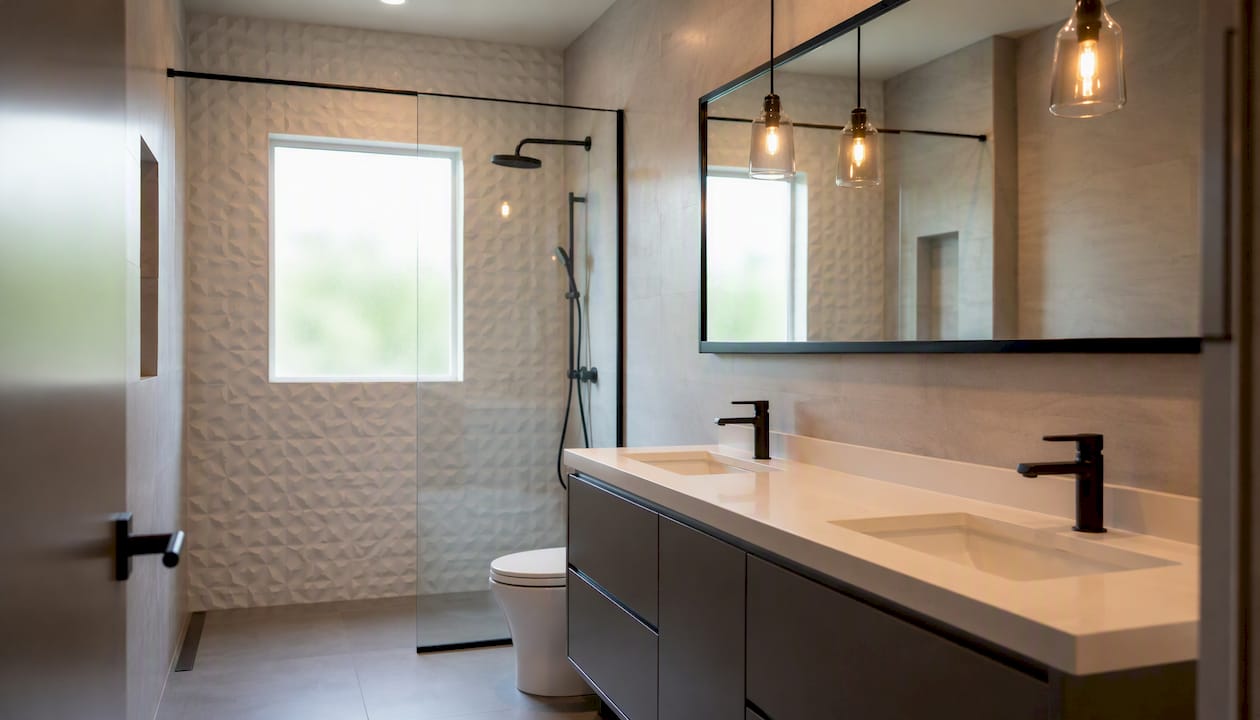
Large-format floor tile (12"x24" or larger) with tight grout lines reduces the number of visual interruptions across the floor. Running the same tile up the lower portion of the wall (a “waterfall” or “apron” detail) blurs the floor-to-wall boundary and adds perceived height. A monochrome or two-tone palette with one dominant neutral keeps the eye moving rather than stopping at color contrasts.
Pro Tip: Mount your mirror so its bottom edge sits at or below counter height and its top edge reaches the ceiling. Most homeowners hang mirrors too low and too small, cutting the room in half visually.
Lighting deserves its own attention. A single overhead fixture creates flat light and harsh shadows. Layered lighting, with ambient overhead, task lighting at the mirror sides or top, and a low-wattage night option, makes the room feel finished and larger. Backlit mirrors eliminate the shadow problem at the face entirely and are now available at most home improvement retailers for under $300.
Common small-bathroom design mistakes to avoid
These are the errors that create daily frustration and expensive rework:
- Wrong door swing: an inward door that hits the toilet or vanity is the most common mistake in small-bath remodels; always confirm the full arc clears every fixture before framing
- Ignoring finished wall thickness: planning to stud-face dimensions and forgetting tile backer, tile, and mortar can cost you 1"–2" per wall, enough to push a toilet out of code clearance
- Under-ventilation: a fan sized for the room’s square footage but not for shower steam leads to persistent moisture and mold; the EPA’s mold guidance is clear that moisture control is the primary prevention step
- Oversize vanity depth: a standard 21"-deep vanity in a 5’x7’ room can reduce the aisle to less than 18", making the space feel cramped and potentially non-compliant
- Toilet directly opposite the door: this is a sightline and privacy issue; rotating the toilet 90 degrees or adding a half-wall screen costs little and makes a real difference
- Insufficient shower splash control: a curbless shower without a proper linear drain slope and a glass panel long enough to contain spray will wet the entire floor; plan the drain location and panel width together, not separately
Small-bathroom trends and smart choices for 2026
The trends worth paying attention to right now are the ones that solve real problems, not just look good in photos.
- Curbless wet zones continue to gain ground because they work for aging-in-place, they’re easier to clean, and they make small rooms feel larger; the added cost is in waterproofing, not fixtures
- Neutral monochrome palettes with texture (think warm white zellige tile or matte stone-look porcelain) replace the all-white bathroom without adding visual clutter; texture adds depth without color contrast
- Water-conserving fixtures (1.28 GPF toilets, 1.5 GPM showerheads) are now standard in most mid-range lines and reduce utility costs without a performance trade-off
- High-performance quiet ventilation with humidity sensors is one of the most functional upgrades available; a fan that runs automatically when humidity spikes prevents the moisture buildup that leads to mold, and quiet models (≤1.5 sones) actually get used
- Integrated smart controls for lighting and ventilation are becoming affordable at the mid-market level; a single switch that controls both the fan and the mirror light simplifies the wall and reduces wiring
The honest split: curbless showers and quiet ventilation add lasting functional value. Zellige tile and designer fixtures add aesthetic value that trends can date. Mix one statement material with classic subway or large-format tile to protect long-term resale appeal.
When should you hire a remodeler, and what should you ask?
Some small-bath projects are genuinely DIY-friendly. Moving plumbing is not one of them.
Hire a professional when:
- You’re relocating a drain, toilet flange, or supply lines
- You want a curbless shower or wet-room (continuous waterproofing membrane is not forgiving of DIY errors)
- The project requires a permit (most jurisdictions require one for plumbing and electrical changes)
- There’s evidence of existing water damage, mold, or subfloor rot behind walls
- You need accessibility features like grab bars, a roll-in shower, or a comfort-height toilet with blocking in the walls
Contractor checklist: what to bring to the first meeting:
- Measured sketch of the room (finished wall to finished wall, door location, window location, existing fixture positions)
- Photos of the existing plumbing wall and any visible drain or vent locations
- Your preferred layout sketch or a printed floor plan from a tool like RoomSketcher
- A list of fixtures you’ve pre-selected (or a budget range for fixture allowances)
- Questions about permit requirements in your municipality
Questions to ask every contractor:
- What waterproofing system do you use for the shower pan and walls, and how long does it cure before tile?
- Do you perform a flood test on the shower pan, and how long do you hold water before sign-off?
- How do you handle ventilation sizing, and will the fan be on a humidity sensor or a timer?
- What’s your process for dust and moisture control during demo?
- Can you provide references from small-bath remodels specifically, not just kitchen or addition projects?
Red flags: a contractor who skips a site measurement before quoting, can’t name the waterproofing membrane they use, or won’t pull a permit when one is required. For help vetting a remodeling contractor before you sign anything, that resource walks through the key questions in detail.
Typical cost ranges for small-bath remodels vary widely by scope. A cosmetic refresh (new fixtures, tile, and paint, no plumbing moves) generally runs $5,000–$12,000. A full gut-and-remodel with new plumbing rough-in, a curbless shower, and new ventilation typically falls in the $15,000–$30,000 range depending on finish level and region. A tub-to-shower conversion sits in the middle, usually $3,500–$10,000 depending on the shower system and tile choice.
Pro Tip: Ask your contractor to pre-select the exhaust fan CFM before framing is closed. Designers often recommend 80–110 CFM for a bath with a shower, and upgrading the fan after drywall is a costly afterthought.
How Jaghomesnow can help with your small-bath remodel
A small bathroom remodel in Bucks County involves more moving parts than most homeowners expect: permits, plumbing rough-in, waterproofing, ventilation, and finish coordination all have to sequence correctly or the project stalls. Jaghomesnow handles all of it under one contract, with no subcontractor hand-offs that leave you managing the schedule yourself.

What that looks like in practice: a free on-site measurement consultation to confirm your finished dimensions and plumbing wall location, a layout recommendation based on your footprint and priorities, and a clear scope of work before any demo starts. Capabilities relevant to small-bath projects include:
- Permit application and code compliance for plumbing and electrical changes
- Curbless shower and wet-room waterproofing with continuous membrane systems
- Pocket door framing and installation
- Ventilation upgrades with humidity-sensor fan options
- Finish selection support (tile, fixtures, vanity)
- Full project management from demo through final inspection
If you’re ready to move from sketches to a real plan, request a remodeling estimate and bring your room measurements. The conversation starts there.
Sources
These are the references worth bookmarking before you finalize a layout or meet with a contractor:
- 22 Narrow Small Bathroom Layout Ideas to Maximize a Compact Space — The Spruce
- Chapter 6: Bathing Rooms — U.S. Access Board
- Ada
- Mold Course — Chapter 2 — EPA
- Small bathroom layout decisions: clearances, door swings, niches and wet-zone limits — SA Design Company