

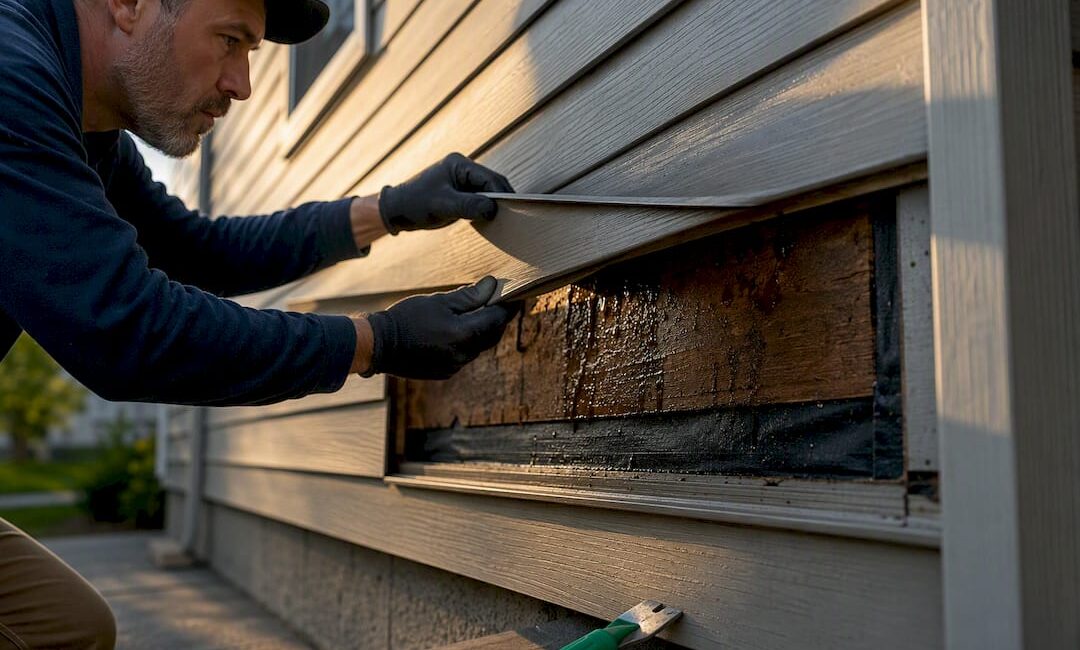
Water behind siding is not normal. It means a water-management detail in your wall has failed somewhere, and it deserves prompt attention. The EPA recommends drying wet materials within 24 to 48 hours to limit mold growth and structural damage. If you spot moisture after a storm, check the seams and flashing first, then either stop the source yourself or bring in a professional.
TL;DR:
- Water behind siding indicates a failure in proper flashing or weather-resistant barriers, requiring prompt inspection and repair.
- Causes include missing or damaged flashing, torn WRB, improperly installed panels, or wind-driven rain penetrating tiny gaps.
- Using moisture meters and inspecting immediately after storms helps locate hidden moisture, which often sits well below visible stains.
- Permanent repairs focus on fixing drainage paths through correct flashing, replacing rotten sheathing, and installing a drainage plane or rainscreen.
- Drying water-damaged materials within 24 to 48 hours is crucial for mold prevention, and insurance coverage varies based on cause and immediacy of the leak.
Table of Contents
- Signs your siding has water trapped behind it
- What lets water get behind vinyl siding in the first place
- How to check for moisture without guessing
- What to do right now to limit the damage
- How professionals repair water damage behind siding permanently
- Preventing water from ever getting behind your siding
- Mold risk, drying timelines, and what insurance actually covers
- How JAG Home Enhancements approaches a water intrusion diagnosis
- Getting a professional inspection for water behind your siding
- Sources
- FAQ
Signs your siding has water trapped behind it
Water hiding behind siding rarely announces itself right away. It shows up in small clues that are easy to dismiss until the damage grows.
On the outside, look for soft spots when you press on the siding, panels that bulge or warp, staining that follows the seams, bubbling paint, or streaks running down from beneath trim boards. These are the wall telling you something is wrong underneath.
Inside the house, the signs are different but just as telling: a musty smell near an exterior wall, small mold spots on drywall or baseboards, discoloration that spreads slowly, peeling paint near windows, or condensation that keeps coming back no matter how often you wipe it away.
- Exterior clues: soft or bulging panels, seam staining, bubbling paint, streaking under trim.
- Interior clues: musty odors, drywall stains, peeling paint, recurring condensation near exterior walls.
- Timing clue: damage that appears right after heavy rain or snowmelt points to an active leak, while steady, slow-building staining suggests a chronic seepage problem.
If you have noticed warping or buckling in the panels themselves, our checklist for warped vinyl siding walks through what that usually signals.
What lets water get behind vinyl siding in the first place
Almost every case traces back to a gap in the water-management details rather than the siding itself. Vinyl siding was never meant to be a waterproof shell. It is designed to shed most water while a drainage plane underneath handles what gets through.
Trouble usually starts at one of a few predictable points:
- Flashing that is missing, damaged, or installed backward at windows, doors, or roof-wall intersections.
- Missing kickout flashing where a roofline meets a sidewall, sending runoff straight into the wall instead of the gutter.
- A torn, poorly lapped, or reverse-lapped weather-resistant barrier (WRB), or tape at the seams that has failed.
- Improperly installed siding panels, damaged trim, or unsealed penetrations for vents, hose bibs, and outlets.
Wind-driven rain adds another layer of complexity because it can push water sideways and upward through tiny gaps that gravity alone would never exploit. Capillary action can then pull that moisture further into seams. This is also why the stain you see is often well below the actual entry point. Water travels down framing members and sheathing before it finds a surface to show itself on, which is one reason DIY guesswork so often points a homeowner to the wrong spot.
How to check for moisture without guessing
A methodical inspection saves you from chasing the wrong repair. Start with what you can see, then bring in tools when the picture is not clear.
- Inspect right after a rain event, when staining and dampness are most visible, paying close attention to seams, window and door heads and sills, and roof-wall intersections.
- Check gutters and downspouts for clogs or misdirected runoff, since overflowing gutters are a common hidden cause.
- Use a moisture meter on suspect areas. Professionals rely on these along with targeted, minimally invasive probing to find the true extent of the problem, since visible stains often sit well below the actual entry point.
- Treat infrared scans as a starting clue rather than a final answer. Temperature differences can flag damp areas but can also mislead when materials or insulation vary.
- Photograph everything, note the date, and keep a simple log of when and where you see moisture. That record matters for both your contractor and your insurance company.
What to do right now to limit the damage
Before any permanent repair happens, your priority is to stop new water from getting in and to dry out what is already wet.
Start with the easy wins: clear clogged gutters, extend downspouts away from the foundation, and use exterior-grade caulk or flashing tape to temporarily seal an obvious gap you can see and reach safely. These are stopgaps, not fixes, but they buy time.
Next, focus on drying. Ventilate the area, run fans and a dehumidifier, and remove wet insulation only if you can do so safely. If a contractor advises opening an interior wall cavity to speed drying, that is a reasonable step once the source is under control.
- Clear gutters and redirect downspouts away from the wall.
- Seal obvious gaps temporarily with exterior-grade caulk or flashing tape.
- Ventilate and dehumidify wet areas rather than closing them up.
- Call an emergency trade immediately if you see active leaking or sagging structural members.
Resist the urge to repaint or patch over stains before the water path is actually fixed. Covering symptoms without addressing the source almost always leads to rot and mold returning later, often worse than before.
Pro Tip: Keep a phone photo folder dated by storm event. It turns a vague “it’s been leaking for a while” into a clear timeline a contractor or insurance adjuster can actually use.
How professionals repair water damage behind siding permanently
A lasting repair means fixing the drainage path, not just replacing the panels on top of it.
Contractors typically start by correcting the flashing: installing or repairing pan flashings at every window and door opening, and making sure the WRB integrates with them in a proper shingle-lapped fashion so water is directed outward rather than trapped. According to Building America guidance on pan flashing, a correctly built pan flashing needs a waterproof surface, a back dam or slope, end dams at the sides, and a lap over the drainage plane below the opening. Skip any one of those elements and the opening stays vulnerable.
From there, the repair usually involves:
- Removing the affected siding to expose the sheathing and WRB underneath.
- Replacing any rotten sheathing and installing a new, properly lapped WRB before re-cladding.
- Adding a rainscreen or furring strip with a drainage mat where it makes sense, creating an air gap that lets the wall dry from both sides.
- Re-cladding with new panels once the drainage plane and flashing are confirmed sound.
This is also why simply swapping out damaged siding panels rarely solves the problem for good. If the flashing and WRB underneath are still compromised, new siding just hides the same leak until it resurfaces, often in a worse spot. Rotted trim frequently needs attention at the same time. Our guide to repairing rotted wood trim covers what that assessment looks like.
Preventing water from ever getting behind your siding
The best defense is a wall built the way building science recommends: a continuous drainage plane that gives water somewhere to go besides your framing.
That starts with a WRB installed in a proper shingle-style lap, with seams taped where the product calls for it, so water sheds downward and outward rather than working its way behind the layers. Our overview of house wrap under siding breaks down how that layer should be installed and inspected.
A continuous drainage plane behind the cladding, combined with correct flashing, is one of the most consistently cited factors in a durable wall assembly. Building America’s drainage plane guidance recommends gaps ranging from about 1/16 inch for some lap siding systems up to a full inch for brick veneer, depending on the cladding and how much drying and ventilation it needs.
Key details worth checking or requesting from any contractor:
- Kickout flashing at every roof-wall intersection, directing runoff into the gutter instead of into the wall.
- Pan flashings with back dams at every window and door opening.
- Proper end dams at outside corners, where wind-driven rain is most aggressive.
- Routine maintenance: clean gutters each season, inspect siding after major storms, reseal failing caulk, and keep fasteners tight.
Mold risk, drying timelines, and what insurance actually covers
Mold is the real reason speed matters. The EPA advises drying water-damaged materials within 24 to 48 hours to keep mold from taking hold, and the agency also cautions against running an HVAC system that may have drawn in contaminated air until it is confirmed clean.
How you respond depends on scope. A small patch of surface mold on drywall is a different job than hidden contamination inside a wall cavity, which usually calls for a remediation specialist rather than a simple wipe-down.
- Sudden, accidental discharges, like a burst pipe, are commonly covered under a standard homeowners policy.
- Long-term seepage or damage tied to deferred maintenance is often excluded, so document everything and ask your agent directly before assuming coverage.
- Call a contractor or remediation professional once you see structural softening, spreading mold, or damage beyond a small, contained area.
One more thing worth checking before you assume the wall is the culprit: HVAC condensate lines can leak in ways that mimic wall moisture, as this guide to AC leaks explains, so rule that out early in your inspection.
How JAG Home Enhancements approaches a water intrusion diagnosis
We start every water intrusion call the same way: a visual inspection, followed by moisture meter checks on suspect areas, and a small targeted opening only when the readings tell us we need to see behind the surface. Guessing wastes a homeowner’s money.
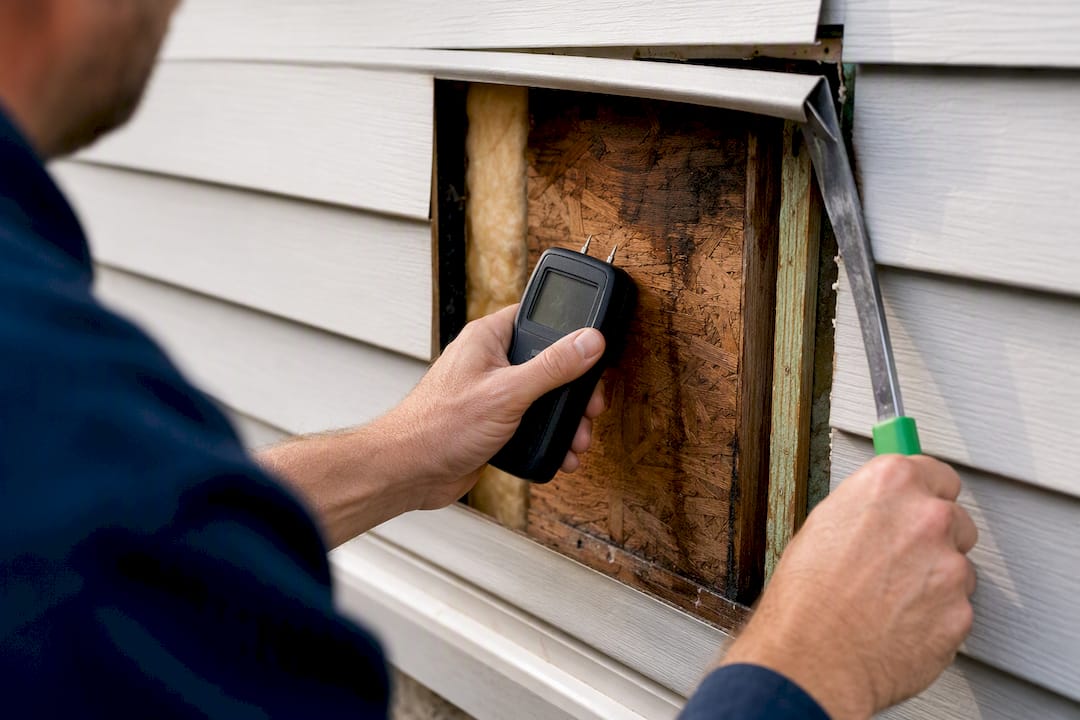
Our approach is to fix the water path before we touch a single cosmetic finish. Chasing the flashing and drainage plane first means the repair actually holds. We keep job sites clean throughout and communicate clearly at each step, so you know what we found, what we are fixing, and why.
When an estimate is provided, expect a clear scope of work, a realistic timeline, and documentation suitable for insurance purposes if needed.
Getting a professional inspection for water behind your siding
If you would rather have someone else confirm the diagnosis and handle the repair, that is exactly the kind of work we take on. Some contractors handle siding repair and replacement, flashing correction, and full exterior renovations for homeowners seeking a permanent solution rather than repeated patches.

Before you call, it helps to have a few things ready:
- Photos of the staining, bulging, or interior signs you have noticed.
- Dates of the storms or events when the damage first appeared or worsened.
- Notes on any prior repairs, patches, or resealing you have already tried.
With that in hand, we can move straight into a proper inspection instead of starting from scratch. You can review our exterior renovation services or reach out through our main site to schedule an inspection and get a written estimate.
Sources
- A Brief Guide to Mold, Moisture, and Your Home | US EPA
- Building enclosure science: intro — drainage plane behind exterior wall cladding
- Pan flashing for exterior wall openings (Building America/BSC Information)
FAQ
Is it normal for water to get behind siding?
No, water behind siding always points to a failure in flashing, the weather-resistant barrier, or another water-management detail. It is not something a well-built wall assembly should experience regularly, so any sign of it deserves a closer look.
Why is water dripping from behind my siding?
Water typically enters higher up through failed flashing, a gap at a window or door, or a missing kickout flashing, then travels down framing or sheathing before it drips out lower on the wall. That is why the visible drip point is often not the actual entry point, and tracing the source usually requires a moisture meter or a small diagnostic opening.
Does homeowners insurance cover water leaks in walls?
It depends on the cause. Sudden, accidental discharges like a burst pipe are commonly covered, while long-term seepage tied to maintenance issues is often excluded, so it is worth confirming the specifics with your insurance agent.
How to waterproof behind siding?
The reliable approach is building a continuous drainage plane with a properly shingle-lapped weather-resistant barrier, correctly installed pan flashings at every opening, and kickout flashing at roof-wall intersections. Some siding systems also benefit from a rainscreen or drainage mat that creates an air gap for faster drying, following Building America’s drainage plane guidance.
How quickly does mold grow after water gets behind siding?
Mold can begin developing quickly once materials stay wet, which is why the EPA recommends drying affected areas within 24 to 48 hours. Beyond that window, the risk of mold colonization and further structural damage increases significantly.
— Jeff