
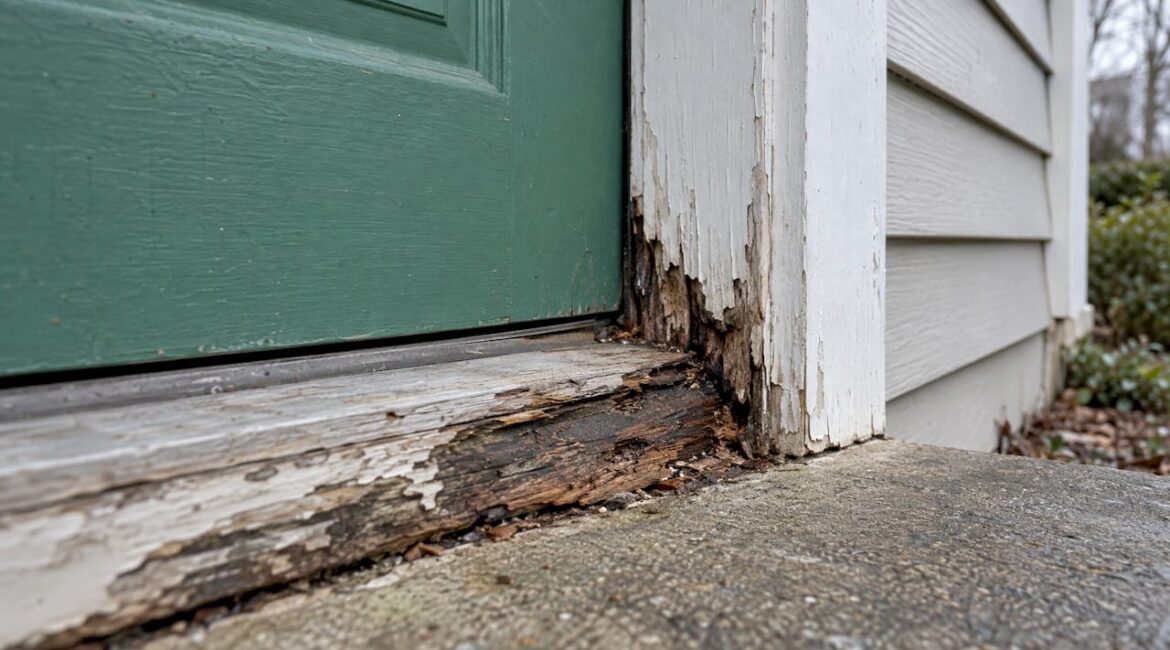
A rotted door sill can be repaired when the damage is shallow, dry and limited to the wood itself. It has to be replaced when the rot has reached the framing or subfloor, or runs well up the jamb. In both cases the repair only lasts if you first stop the water that caused the rot. This guide shows you how to find that water, judge the damage, repair what can be saved, and know when to call a contractor.
TL;DR
- Find the water source before you touch the wood. Failed caulk, a splash zone, or a missing drip cap will rot the new wood too.
- Probe the sill and the bottom of both jambs with a screwdriver to map how far the rot goes.
- Small, shallow rot can be cut out and rebuilt with wood hardener and two-part epoxy. Rot that reaches framing, the subfloor or far up the jamb calls for replacement.
- A sill pan, sealed jamb-to-sill joints and working gutters are what keep the problem from coming back.
- If the damage goes past the door frame, a contractor should look at it in person.
Table of Contents
- Why door sills and jambs rot in the first place
- Signs your door sill or jamb is rotting
- Find the water source first
- Repair or replace: how to decide
- How to repair a rotted door sill with epoxy
- Perspective
- Keep the rot from coming back
- When to call a contractor
- How JAG can help
- FAQ
- Sources
Why door sills and jambs rot in the first place
The most common door jamb defect is rot in the bottom few inches, where the jamb meets the sill. Inspection guidance lists the usual causes: rain running down the face of the door, splashback from a stoop or deck, snowmelt sitting against the threshold, failed caulk at the jamb-to-sill joint, and water wicking into the exposed end grain of the jamb.
That last one matters more than most homeowners expect. The joint where the vertical jamb meets the horizontal sill is the most vulnerable point of the whole assembly. Water gets pulled upward into the end grain by suction and surface tension, so sealing that joint with 100% silicone caulk is a real part of the repair, not a finishing touch.
Here in Bucks County the pattern is familiar. Freeze-thaw cycles open small gaps in caulk. Snow piles against a threshold and melts slowly. A deck or stoop throws splash onto the bottom of the door. A little water each time, over several winters, is enough to turn solid wood to mush.
Signs your door sill or jamb is rotting
Look before you dig. The warning signs are easy to spot once you know them:
- Paint that bubbles, cracks or peels near the bottom of the jamb
- Wood that feels soft or spongy when pressed with a thumbnail or probed with an awl
- Dark staining or open joints where the jamb meets the threshold
- Daylight or drafts around the bottom corner of the door
Those signs come from the same inspection guide above. A moisture meter helps too. This Old House notes that one can reveal high moisture levels before rot becomes visible, and it recommends regularly checking moisture-prone spots such as door and window sills for discoloration, warping or fungal growth.
Soft, spongy, discolored or warped wood is the same warning sign whether it shows up at a door or elsewhere in the house, and it is worth understanding what water-damaged wood looks like so you can judge how far a problem has spread.
Find the water source first
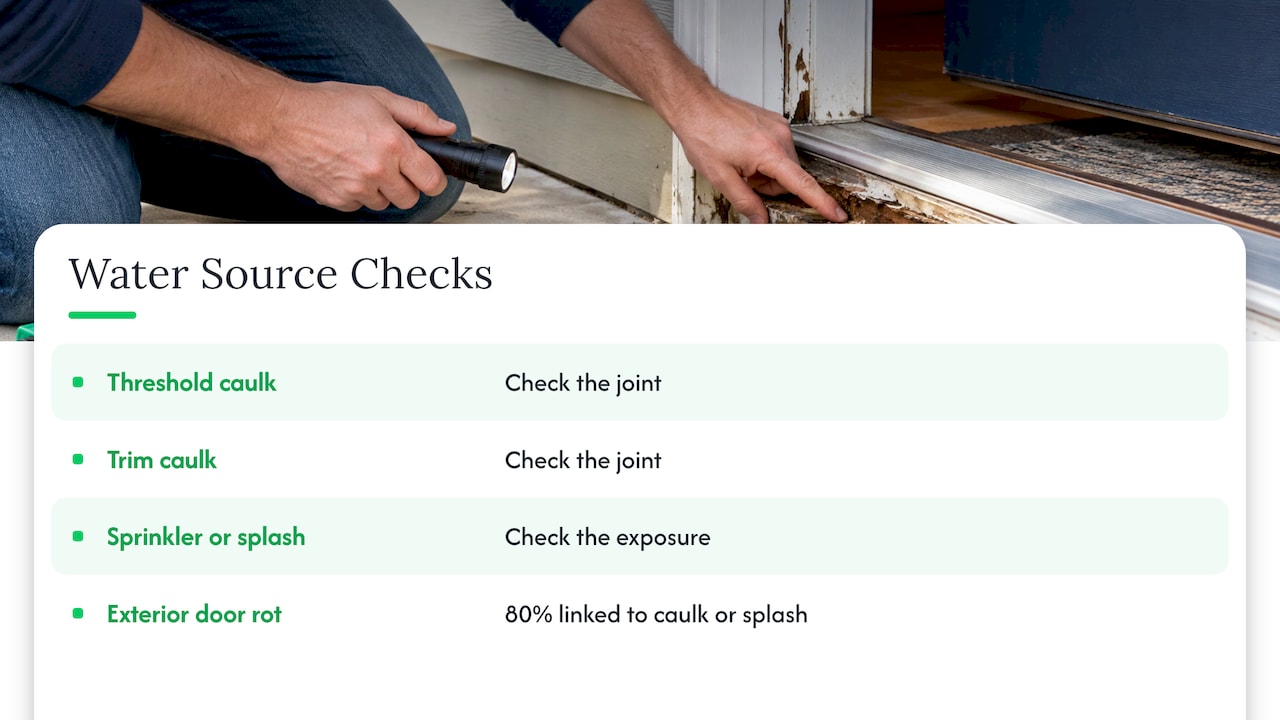
This is the step most quick-fix videos skip. If water keeps reaching the sill, any repair, however well done, is temporary. Guidance from HomeFixer101 says to probe with a screwdriver to map the rot, then check three things: the threshold caulk joint, the trim caulk joint, and the sprinkler or splash zone. The same page cites a Builder’s Association of Greater Indianapolis figure that 80 percent of exterior door rot traces back to bad caulking or splash exposure.
A simple leak test
If the cause is not obvious, a controlled water test can find it. H2NO Restoration advises that the first visible stain is often downstream of where the water enters. Testing from the top down can wet every possible pathway and muddy the result. Instead:
- Have a second person watch the inside of the door.
- Run a garden hose at low flow on the lowest exterior section for 5 minutes.
- Move up in separate 5-minute sections, checking indoors after each.
- Note which section produces the leak, and compare moisture readings.
Check the threshold, jambs, trim, the wall above and the adjacent floor.
Fix the cause
When the source is found, the fix usually involves resealing the jamb-to-sill joint, correcting the threshold and sill slope so water drains outward, adding or repairing a drip cap above the door, and keeping snow and ice off the threshold. If the water comes from above the door, look at the siding and flashing too. Our water behind siding checklist explains how to dry out and inspect a wall that has been taking on moisture.
Repair or replace: how to decide
The answer depends on three things: how deep the rot goes, how far it travels, and what is behind it.
| Situation | Typical answer |
|---|---|
| Soft spot under about 6 inches, solid wood around it | Cut out and fill with two-part epoxy |
| Damage from about 6 inches to 2 feet along the jamb | Splice in a new section (a Dutchman) |
| Damage beyond about 2 feet, or the sill itself is badly gone | Replace the jamb leg or sill |
| Rot has reached framing or subfloor | Replace, and repair the structure behind it |
| Rot all around the frame, or the door is also worn out | Replace the whole prehung unit |
The size thresholds come from HomeFixer101, which also notes that replacing a whole prehung exterior door is often easier than a custom jamb-leg repair on an old frame. Another contractor-side guide says damage confined to the bottom six to ten inches of one leg is a splice job, but once the rot reaches the framing or the sill behind the jamb, you are no longer doing a frame repair.
Some limits are worth knowing before you reach for filler. ArchitectureCourses.org says a patch suits damage that is small, dry, shallow and non-structural. Filler should not be used to rebuild a jamb base that is still getting wet, to hide a leaking threshold, or to bridge a loose, soft opening. Trapping wet wood under a patch is worse than no patch at all.
One more point from that source: by the time you cut the jamb, reset the threshold, add a sill pan, fix the subfloor edge and repaint, the work can approach the scope of a properly installed new prehung door. A confident answer given over the phone without seeing the door is a guess.
If you are replacing the door, note that door replacement kits, where a door is prehung in a small steel frame that attaches to the old one, cannot be installed over rotted jambs. Prehung units suit situations where the old frame is bad.
How to repair a rotted door sill with epoxy
This method fits shallow to moderate rot in a sill or the base of a jamb. It is a careful, multi-day job because the products need time to cure.
Materials
- Chisel, scraper and a drill with small bits
- Liquid wood hardener (consolidant)
- Two-part wood epoxy filler
- Sandpaper from 60 to 120 grit
- Exterior-grade primer and paint
- 100% silicone caulk
HomeFixer101 names PC-Petrifier or Minwax High Performance Wood Hardener as hardeners and Abatron WoodEpox or Bondo Wood Filler as two-part epoxy fillers.
Steps
- Dry it out. RapidRepair.blog says the wood’s moisture content should be below 12% for the chemicals to work well. A moisture meter tells you when you are there.
- Remove the rot. Dig out soft wood with a chisel until you reach bright, dry wood that resists the edge of the tool.
- Harden the sound wood. Apply liquid hardener to the edges of the cavity. For punky wood, Fine Homebuilding describes drilling small holes and impregnating the wood with liquid two-part epoxy until it is saturated.
- Fill in layers. Pack the void with two-part epoxy, building up in layers. This Old House recommends layered filler, then sanding the repair.
- Sand. Work from 60-grit to 120-grit until the repair is flush.
- Prime and paint. Use exterior-grade primer and paint on every surface of the repair.
- Seal the joint. Run 100% silicone caulk at the jamb-to-sill junction.
Splicing in new wood
When the bottom of a jamb is too far gone for filler, you can cut it off and splice. Fine Homebuilding describes the approach for trim: mark a line 6 inches above the bad section, make a 90-degree cut, join the new piece to the old with a biscuit joiner, prime all surfaces with epoxy primer, and glue with epoxy. Rot-resistant wood or composite material is a smart choice for the new section. Our guide to rotted wood trim repair covers related trim fixes.
A word of caution on the door itself: if the sill rot goes under the threshold into the subfloor or floor framing, stop. That is structural, and the framing has to be opened up, assessed and rebuilt before any trim work.
Perspective
When homeowners call us about a rotted sill, the sill is rarely the real problem. It is the symptom. The water got in somewhere, and if we only swap the wood, the new wood will go the same way.
That is why we start every door repair by asking where the water is coming from. Is it a failed caulk joint, a deck that splashes the threshold, a gutter that overflows above the entry, or missing flashing under the door? We would rather spend the first part of a visit on the cause than the last part apologizing for a callback.
We also give honest recommendations. If a small, dry spot can be rebuilt with epoxy, we will tell you so. If the rot has reached the framing, or the door is near the end of its life, a new prehung unit with a proper sill pan is usually the better value, and we will explain why. Our approach is full project management from consultation through completion, with a clean, safe job site, so a door repair does not turn into a mess you live with for weeks.
Look at the whole entry, not just the bottom six inches. Trim, siding, flashing and the stoop all play a part, and fixing them together is how a repair lasts.
Jeff
Keep the rot from coming back
Prevention is mostly about giving water somewhere to go. The research on this is consistent, and it fits a simple rule from a Forest Products Laboratory researcher quoted by This Old House: keep wood dry and keep water away from it.
Install a sill pan
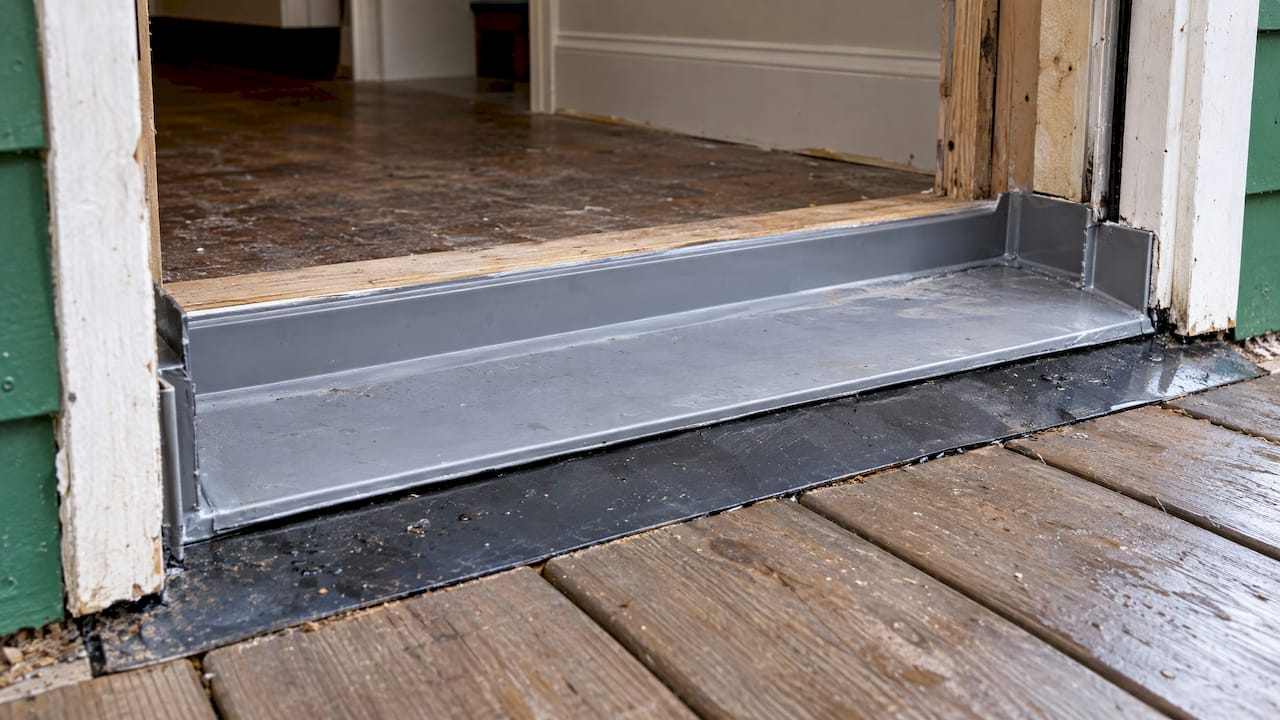
Unless a door is well protected by a porch or large overhang, pan flashing at the sill is critical to keep water out of the floor framing. On the exterior, the pan should lap over the deck or masonry flashing below and be carried up the sides at least 6 inches. ArchitectureCourses.org calls the sill pan the cheapest part of the whole job and the one that decides whether you are repeating it in five years.
Lap flashing the right way
FEMA guidance says flashing around doors should go on in shingle-like fashion, with the upper layer lapping over the lower one, and that sealants should be replaced when they show edge curling, cracking, breaks or delamination. That is a good inspection routine for your own door caulk each spring and fall.
Finish every surface
Bare wood on a door frame should be primed, painted and top-coated within two weeks of installation or weather exposure, according to Therma-Tru’s site manual, and finishes should be maintained or replaced as soon as deterioration shows.
Manage water around the door
- Keep gutters and downspouts clear so rainwater is steered away from the entry.
- Check weatherstripping, and replace it when it is worn.
- Add or repair a drip cap above the door.
- Clear snow and ice from the threshold.
- Repaint and reseal exposed wood before the paint fails.
- Move sprinklers so they do not spray the door.
This Old House also suggests applying a water-repellent sealer to exposed wood annually. If your door opens onto a deck, a regular routine matters even more, and our deck maintenance schedule shows how to build one. Rotted deck framing near the door is its own problem, covered in our guide to rotted deck post repair.
When to call a contractor
A careful DIYer can handle a shallow sill repair. Call a professional when:
- The soft area keeps going once you start digging.
- You find soft subfloor or framing under the threshold.
- The opening is out of square or the door will not close properly.
- Rot runs all around the frame.
- The leak comes from siding, flashing or the roof above the door.
- You are considering a new door and want it installed with a proper pan and flashing.
A contractor can see what is behind the trim, which is the part no photo shows. If you are replacing a patio door with a rotted sill, our guide to patio door replacement options can help you choose a style.
How JAG can help
JAG Home Enhancements is a home remodeling company based in Bucks County, PA. Our exterior work includes entry door installation, replacement windows, trim work and custom mill work, and small or large repair work. If a rotted sill or jamb has you unsure whether to repair or replace, we can look at the whole entry, find where the water is getting in, and recommend the fix that fits.

See our exterior remodeling services to learn more, or reach out through our website to start a conversation about your door.
FAQ
Can I repair a rotted door sill without removing the door?
Often, yes, if the rot is shallow and the structure behind it is sound. Rotted wood is dug out, hardened and rebuilt with two-part epoxy, then sanded, primed and painted. If the sill or subfloor beneath is soft, the door usually has to come out so the framing can be rebuilt.
How far up the jamb can rot go before I need to replace it?
Guides differ slightly, but patches under about 6 inches are typically filled, patches up to about 2 feet get a spliced-in section, and anything longer means replacing the jamb leg. Rot all around the frame, or in the framing behind it, also points to replacement. An in-person look is the safest way to confirm.
What is the best caulk for the joint between the jamb and sill?
Repair guidance recommends 100% silicone caulk at the jamb-to-sill junction to seal the end grain against water. Replace any caulk that cracks, curls or pulls away. Check it each spring and fall.
Will epoxy stop rot from spreading?
Epoxy and wood hardener rebuild and strengthen the damaged area, but they do not fix a leak. The wood must be dry before you start, and the water source has to be corrected, or the repair can trap moisture and fail. Good drainage, flashing and a sealed joint are what keep rot away.
Sources
- How to Repair a Rotten Exterior Door Frame
- How To Identify and Repair Rotting Wood, This Old House
- Door Jambs: Rot, Splits, Gaps and Repair vs Replacement
- Water Damage Around Doors, H2NO Restoration
- Water Damaged Door Frame Repair
- How to Repair an Exterior Door Frame Sill
- Repairing Exterior Trim, Fine Homebuilding
- A Guide to Front Door Replacement Options, This Old House
- Best Flashing Details for Exterior Doors, Inspectapedia
- Finishing, Therma-Tru 2017 Site Manual
- Water Damaged House in Detroit? What to Do First