

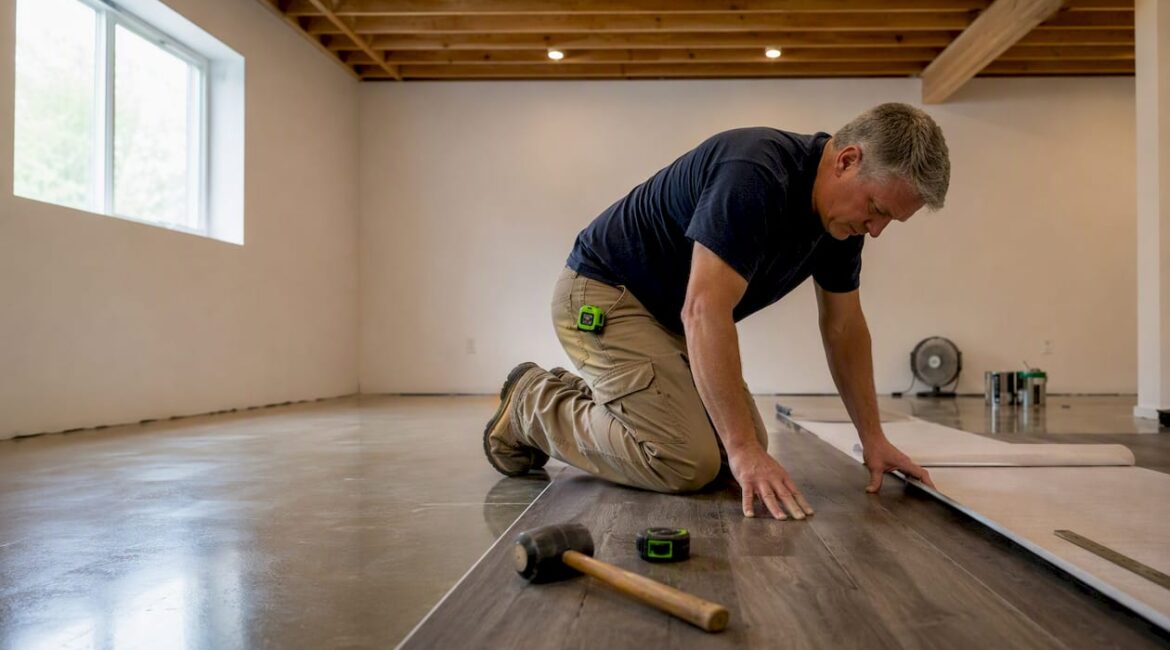
For most finished basements, SPC luxury vinyl plank (LVP) is the best all-around choice: 100% waterproof, DIY-friendly, and installed for roughly $5.50–$11.00 per square foot. Porcelain tile is the right call for flood-prone or utility areas, while epoxy coatings work best in workshops and gyms. Carpet tiles belong only in verified dry zones with controlled humidity. A single rule overrides every other preference: test your slab for moisture before you commit to any material.
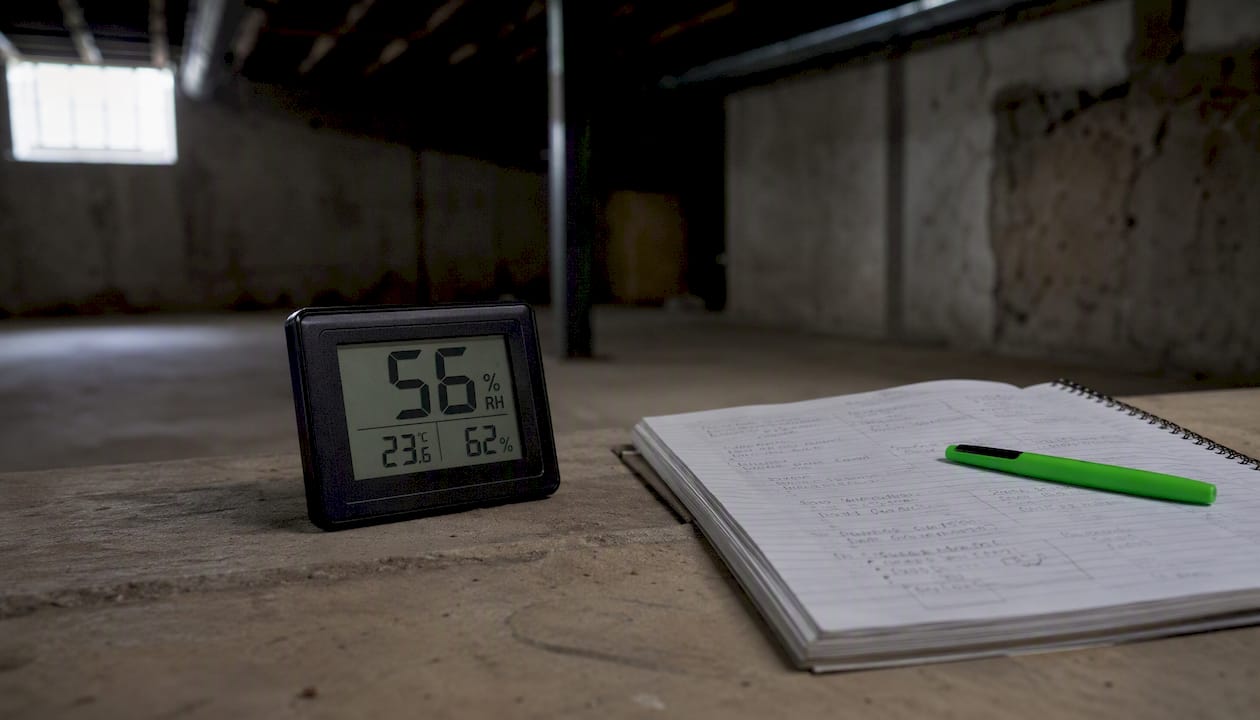
The right basement flooring depends on two things above everything else: how much moisture your slab produces and what the room will actually be used for. A rec room, a home gym, a bedroom, and a laundry area each call for a different answer. Professionals consistently recommend a moisture-first approach, zoning the basement by use and matching waterproof or water-tolerant materials to each zone accordingly.
Quick picks by moisture level and room use:
- Wet or flood-prone areas: Porcelain tile or epoxy coating (both fully submersion-safe)
- Mixed-use finished basements: SPC/LVP rigid-core vinyl plank (waterproof, warm enough underfoot, handles temperature swings)
- Home gyms or workshops: Rubber flooring in roll or interlocking tile format
- Dry, climate-controlled living zones: Carpet tiles over a closed-cell foam pad or raised subfloor system
- Utility or storage areas: Polished concrete or epoxy
Keep 60% relative humidity as your upper threshold. Above that level, most flooring warranties are void and mold risk climbs sharply.
Table of Contents
- How do the main basement flooring materials compare?
- Material profiles: what you need to know about each option
- How do you prepare a basement slab for new flooring?
- What does basement flooring actually cost, and how long does it take?
- How do you choose the right flooring and vet a contractor?
- Why professional installation matters for basement floors
- Key Takeaways
- A contractor’s honest take on DIY vs. hiring a pro
- Ready for a written moisture report? Here’s what to expect from Jaghomesnow
- Useful sources for deeper research
How do the main basement flooring materials compare?
The table below covers the seven most common material categories across every dimension that matters for a below-grade install. Cost ranges reflect typical U.S. installed prices (materials plus labor).

| Material | Moisture Resistance | Installed Cost (per sq ft) | Life Expectancy | DIY Friendly? | Comfort / Warmth | Maintenance | Best Uses |
|---|---|---|---|---|---|---|---|
| SPC/LVP | 100% waterproof | $5.50–$11.00 | 20–30 years | Yes | Moderate (add pad) | Sweep, damp mop | Rec rooms, bedrooms, offices |
| Porcelain tile | Flood-proof | $12.00–$27.00 | 50+ years | Moderate | Cold underfoot | Grout cleaning | Wet areas, utility, entryways |
| Epoxy / polyaspartic | 100% waterproof | $3.00–$12.00 | 10–20 years | No (pro only) | Hard, cold | Occasional recoat | Gyms, workshops, garages |
| Rubber flooring | 100% waterproof | $3.50–$9.00 | 20+ years | Yes (tiles) | Cushioned, warm | Damp mop | Gyms, playrooms, utility |
| Engineered hardwood | Water-tolerant only | $8.00–$15.00 | 20–30 years | Moderate | Warm, natural | Refinish, humidity control | Dry living zones only |
| Carpet tiles | Low (needs dry slab) | $3.00–$8.00 | 10–15 years | Yes | Very warm, soft | Spot-replace tiles | Dry bedrooms, living areas |
| Water-resistant laminate | Low-moderate | $4.00–$9.00 | 10–20 years | Yes | Moderate | Avoid standing water | Dry rec rooms |
Three immediate use-case recommendations based on this comparison:
- If your basement has any history of seepage or flooding, start with porcelain tile or epoxy and do not negotiate on that.
- For a general-purpose finished basement where you want warmth and style without a huge budget, SPC/LVP is the practical winner in most situations.
- A hybrid approach works well in larger basements: waterproof surfaces in the entry, laundry, and traffic zones; carpet tiles or area rugs in the dedicated living or sleeping area.
Material profiles: what you need to know about each option
SPC/LVP (rigid-core luxury vinyl plank)
SPC stands for stone plastic composite, the rigid core that makes this version of LVP genuinely dimensionally stable under temperature swings common in basements. It floats over the slab without adhesive, which means you can remove and replace planks if something goes wrong.
Pros: 100% waterproof through the full plank thickness; handles basement temperature fluctuations without buckling; modern wear layers of 20–30 mil provide commercial-grade durability; wide style range.
Cons: Can feel hollow underfoot without a quality underlayment; thinner planks telegraph slab imperfections.
Typical installed cost: $5.50–$11.00 per sq ft. Life expectancy: 20–30 years. Best for rec rooms, home offices, bedrooms, and playrooms.
Pro Tip: Choose SPC with a built-in underlayment pad rather than adding a separate foam layer. Standard rebond foam pads absorb water and harbor mold on concrete slabs.
Sheet vinyl
Sheet vinyl is a budget-friendly, fully waterproof option that eliminates seams where moisture can penetrate. It requires a very flat slab (within 3/16 inch over 10 feet) and professional installation for large rooms.
Pros: No seams, fully waterproof, very affordable.
Cons: Difficult to repair a damaged section; limited design options compared to LVP.
Typical installed cost: $3.00–$7.00 per sq ft. Best for utility rooms, laundry areas, and budget-conscious projects.
Porcelain and ceramic tile
Porcelain tile is effectively flood-proof and carries the longest lifespan of any common basement material, often exceeding 50 years. It is genuinely the only “forever” basement floor. The trade-off is installation complexity and cost, and walking barefoot on unheated tile in January is a cold experience. Radiant heat under tile solves that, though it adds to the project budget.
Pros: Impervious to water, mold-resistant, extremely durable, easy to clean.
Cons: Cold and hard underfoot; grout lines need maintenance; higher installed cost; heavy (verify slab load capacity for large-format tiles).
Typical installed cost: $12.00–$27.00 per sq ft. Best for wet areas, entryways, utility rooms, and anywhere flooding is a real risk.
Polished concrete
If your slab is already in good shape, polishing and sealing it is one of the most affordable paths. It is seamless, easy to clean, and pairs well with area rugs for warmth.
Pros: Durable, low maintenance, affordable when the slab is sound.
Cons: Hard and cold; requires a smooth, crack-free slab; can be slippery when wet without an anti-slip additive.
Typical installed cost: $3.00–$8.00 per sq ft (depending on grinding, staining, and sealing complexity).
Epoxy and polyaspartic coatings
Epoxy and polyaspartic systems create a seamless, fully waterproof surface that bonds directly to the concrete. Polyaspartic cures faster than standard epoxy (often in 24 hours versus several days) and handles UV exposure better. Both require professional substrate profiling: the slab must be shot-blasted or ground to open the pores for proper adhesion.
Pros: 100% waterproof, highly durable, easy to clean, excellent for gyms and workshops.
Cons: Slippery when wet unless anti-slip aggregate is added; professional installation required; can peel if slab moisture vapor is not properly managed.
Typical installed cost: $3.00–$12.00 per sq ft depending on the system. Life expectancy: 10–20 years with proper maintenance.
Engineered hardwood
Engineered hardwood requires strict environmental control and is not truly waterproof. Most manufacturers require maintaining ambient humidity between 35% and 55% and verified low slab vapor emissions. A single sump pump failure can destroy an engineered wood floor. Use it only in a basement with a proven dry history, a functioning dehumidifier, and a sump pump on a battery backup.
Pros: Warm, natural look; can be refinished once or twice.
Cons: Vulnerable to moisture; strict warranty conditions; expensive to replace if moisture intrudes.
Typical installed cost: $8.00–$15.00 per sq ft. Best for dry, climate-controlled living zones only.
Water-resistant laminate
Modern laminate with a water-resistant core performs better than older products, but it is not waterproof. Standing water at seams will eventually cause swelling. It is a reasonable choice for a reliably dry rec room on a tight budget.
Pros: Affordable, realistic wood look, DIY-friendly.
Cons: Not waterproof; swells at seams with prolonged moisture exposure; cannot be refinished.
Typical installed cost: $4.00–$9.00 per sq ft. For long-term floor maintenance, keep humidity controlled and wipe spills immediately.
Rubber flooring
Rubber flooring is the top pick for basement gyms and workshops. It absorbs shock, reduces noise transmission to upper floors, and handles water completely. Interlocking rubber tiles are a genuine DIY project; rolls require more precision cutting.
Pros: Shock-absorbing, noise-reducing, 100% waterproof, durable.
Cons: Can off-gas a rubber odor initially; limited style options; heavier rolls require two people.
Typical installed cost: $3.50–$9.00 per sq ft. Best for gyms, playrooms, and utility zones.
Carpet tiles (modular carpet)
Carpet tiles are the pragmatic compromise for homeowners who want softness underfoot but cannot guarantee a bone-dry slab. Individual tiles can be lifted and replaced if a section gets wet, which is something wall-to-wall broadloom cannot offer. Professionals caution against standard broadloom carpet in any basement with moisture risk.
Pros: Warm and soft; individual tiles are replaceable; DIY-friendly; affordable.
Cons: Not waterproof; requires a dry, controlled slab; can trap odors if moisture intrudes.
Typical installed cost: $3.00–$8.00 per sq ft. Use only over a closed-cell foam pad or raised subfloor system, never over standard rebond foam.
Cork
Cork is a natural, renewable material with good thermal and acoustic insulation. It requires a sealed finish to resist moisture and is best suited to dry, climate-controlled spaces.
Pros: Sustainable, warm underfoot, sound-absorbing.
Cons: Vulnerable to moisture without proper sealing; can dent under heavy furniture; limited availability.
Typical installed cost: $5.00–$12.00 per sq ft. Sustainability note: cork is harvested without cutting the tree, making it one of the more environmentally responsible flooring choices.
Raised subfloor systems
Raised subfloor panels (dimpled membrane or OSB panels on pedestals) lift the finish floor off the slab, creating an air gap that dramatically reduces moisture transfer and improves insulation underfoot. They add $1.50–$3.00 per sq ft to the project but significantly cut mold risk when you are installing carpet tiles or engineered hardwood.
Best used as a foundation layer under sensitive materials in basements where the slab is dry but not perfectly controlled.
How do you prepare a basement slab for new flooring?
Slab preparation is more critical than the material you choose. Installing any finish over a damp or compromised slab leads to hidden mold, adhesive failure, and premature floor replacement regardless of how good the product is. This is the golden rule professionals follow without exception.
Step-by-step slab prep checklist
- Visual inspection: Look for cracks, efflorescence (white mineral deposits), staining, or previous water intrusion marks. Any of these signals a moisture problem that needs addressing before flooring goes down.
- Crack sealing: Fill hairline cracks with a polyurethane or epoxy crack filler. Structural cracks wider than 1/4 inch need a structural engineer’s assessment first.
- Plastic-sheet test: Tape a 24-by-24-inch sheet of plastic to the slab, seal all edges, and leave it for 72 hours. Condensation on the underside confirms vapor transmission from below.
- Calcium chloride (MVER) test: This ASTM F1869 method measures moisture vapor emission rate in pounds per 1,000 sq ft per 24 hours. Most flooring manufacturers require results below 3–5 lbs/24 hrs for adhesive-down installations.
- In-slab relative humidity (RH) probe test: The ASTM F2170 method drills into the slab and measures RH at 40% depth. Most manufacturers require readings below 75%–80% RH. This is the most accurate method and the one most professionals rely on.
- Acceptable readings: Below 75% RH (in-slab) and below 3 lbs MVER for adhesive installations. For floating floors like SPC/LVP, tolerances are somewhat higher, but you should still confirm with the specific product’s warranty documentation.
- Remediation if readings are high: Address the source first. Check exterior grading (soil should slope away from the foundation), clean and extend gutters and downspouts, and consider an interior perimeter drain with a sump pump if groundwater is the issue.
Understanding how your basement plumbing and drainage systems work is a practical first step before any moisture remediation. A homeowner’s guide to basement plumbing covers sump pumps, floor drains, and the drainage elements that directly affect your slab’s moisture profile.
- Vapor barrier or dimpled membrane: A 6-mil poly vapor barrier under floating floors reduces vapor transmission. A dimpled membrane (such as Delta-FL) creates an air gap and is more effective for higher-moisture slabs.
- Raised subfloor: For carpet tiles or engineered hardwood in a basement with borderline moisture readings, a raised subfloor system is the most reliable long-term protection.
- Slab leveling: Fill low spots with a self-leveling underlayment compound. Most flooring products require a flat slab within 3/16 inch over 10 feet.
Pro Tip: Never skip the in-slab RH probe test just because the slab looks dry. Concrete can appear perfectly dry on the surface while transmitting significant vapor from below, especially in spring and after heavy rain.
The 60% relative humidity threshold matters because above that level, mold can establish itself within 24–48 hours on organic materials. Keeping ambient basement humidity below 60% protects both the floor and the air quality in the space.
What does basement flooring actually cost, and how long does it take?
Cost varies more in basements than in above-grade rooms because slab prep, moisture remediation, and underlayment add line items that do not exist upstairs. The ranges below reflect typical U.S. installed costs for a 1,000 sq ft basement.
| Material | Low (1,000 sq ft) | High (1,000 sq ft) | Typical Install Time | DIY or Pro? |
|---|---|---|---|---|
| Epoxy / polished concrete | $3,000 | $8,000 | 2–5 days (+ cure time) | Pro only |
| Rubber tile | $3,500 | $9,000 | 1–2 days | DIY or Pro |
| Carpet tiles | $3,000 | $8,000 | 1–2 days | DIY |
| Sheet vinyl | $3,000 | $7,000 | 1–2 days | Pro recommended |
| Water-resistant laminate | $4,000 | $9,000 | 1–3 days | DIY |
| SPC/LVP | $5,500 | $11,000 | 1–3 days | DIY or Pro |
| Engineered hardwood | $8,000 | $15,000 | 2–4 days | Pro recommended |
| Porcelain tile | $12,000 | $27,000 | 3–7 days (+ grout cure) | Pro |
Hidden costs homeowners frequently overlook:
- Moisture remediation: Interior drain systems and sump pump installation can add $3,000–$10,000 before a single plank goes down.
- Raised subfloor or dimpled membrane: Add $1.50–$3.00 per sq ft to any sensitive material install.
- Radiant heat under tile: Adds $6.00–$16.00 per sq ft depending on the system, but makes porcelain tile genuinely comfortable in winter.
- Old floor removal and disposal: Budget $1.00–$2.00 per sq ft for demo and haul-away.
- Slab leveling compound: $1.00–$3.00 per sq ft for significant low spots.
- Specialty trims and transitions: Stair nosings, reducer strips, and threshold transitions add up quickly in open-plan basements.
Epoxy cure time is a planning detail many homeowners miss: standard epoxy requires 5–7 days before heavy foot traffic, which means the basement is out of commission for nearly a week. Polyaspartic systems cure in 24 hours and are worth the modest premium for that reason alone.
How do you choose the right flooring and vet a contractor?
Decision checklist
Work through these questions before you commit to a material:
- What is my slab’s moisture profile? (Have you tested, or are you guessing?)
- What will this room primarily be used for? (Gym, bedroom, rec room, laundry, storage?)
- Do I need warmth underfoot, or is function the priority?
- What does the manufacturer’s warranty say about below-grade installations?
- What is my realistic total budget, including prep and hidden costs?
- If this floor gets damaged, can I replace a section affordably, or does damage mean replacing everything?
Questions to ask a contractor
- How many below-grade flooring installations have you completed in the past two years?
- Will you perform in-slab moisture testing before the quote, and will you provide a written report?
- What substrate prep do you include, and how do you handle slab irregularities?
- Which vapor barrier or membrane system do you use, and why?
- Can you provide references from homeowners with similar basement projects?
- What does your warranty cover, and what voids it?
- How do you handle change orders if moisture remediation is needed mid-project?
Red flags that should stop a project
- A contractor who quotes without testing the slab first.
- Recommending standard rebond foam carpet pad directly on a concrete slab.
- Skipping a vapor barrier or membrane “because the slab looks dry.”
- Vague warranty language that does not specify what is covered below grade.
- No references for basement-specific work.
- Pressure to start immediately without a written scope of work.
Pro Tip: Ask specifically whether the contractor’s warranty covers moisture-related failures. Many general flooring warranties exclude below-grade installations entirely. Get the coverage terms in writing before signing anything.
Why professional installation matters for basement floors
Basement flooring is not the same as installing floors upstairs. The slab introduces variables that do not exist above grade: vapor transmission, temperature swings, structural cracks, and drainage considerations that directly affect how long any floor lasts. Professional installers bring calibrated moisture testing equipment, proper substrate profiling tools, and experience reading slab conditions that most homeowners simply do not have.
At Jaghomesnow, our process for every basement flooring project follows a consistent sequence:
- On-site visit and written moisture report using in-slab RH probes and MVER testing
- Substrate remediation plan if readings exceed manufacturer thresholds
- Product selection guidance matched to the room’s use, moisture profile, and budget
- Clear project timeline with milestones and cure-time windows built in
- Final quality inspection before the space is handed back
We handle the coordination between moisture remediation, subfloor prep, and finish installation as a single project, which eliminates the gaps that cause failures when homeowners manage multiple subcontractors separately. Our deck design and project management approach reflects the same structured process we bring to every interior project.
Pro Tip: For tile installations over a basement slab, ask your installer about uncoupling membranes like Schluter DITRA. These membranes decouple the tile from the slab’s movement, preventing cracking as the concrete expands and contracts with temperature changes. It is a pro-level detail that dramatically extends tile life in below-grade environments.
Key Takeaways
Moisture-first material selection, combined with proper slab testing and preparation, is what separates a basement floor that lasts 20 years from one that fails in two.
| Point | Details |
|---|---|
| Test before you choose | Run in-slab RH probe or MVER tests; readings above 75–80% RH require remediation before any finish. |
| Best general choice | SPC/LVP is waterproof, DIY-friendly, and installed for $5.50–$11.00 per sq ft for most finished basements. |
| Zone by use | Use porcelain or epoxy in wet/utility zones; reserve carpet tiles for verified dry living areas only. |
| Budget for hidden costs | Moisture remediation, raised subfloor, and slab leveling frequently add $3.00–$5.00 per sq ft to the project total. |
| Jaghomesnow’s approach | JAG Home Enhancements provides a written moisture report and substrate remediation plan before any flooring install in Bucks County and surrounding areas. |
A contractor’s honest take on DIY vs. hiring a pro
There is a clear line between what a capable homeowner can handle and what genuinely requires professional experience, and it runs almost exactly along the moisture remediation boundary.
Floating SPC/LVP, peel-and-stick carpet tiles, and interlocking rubber tiles are all reasonable DIY projects. The materials are forgiving of minor slab irregularities, the installs are reversible, and a mistake costs you a weekend and some planks, not a structural problem. If your slab tests clean and you are comfortable with basic tools, these are solid candidates for a self-managed project.
Tile with an uncoupling membrane, epoxy with proper substrate profiling, and any project that involves moisture remediation or slab repair belong in a professional’s hands. The margin for error is narrow, the consequences of getting it wrong are expensive, and the tools required (shot blasters, RH probe equipment, mixing systems for two-part epoxy) are not practical for a one-time project.
The mistake we see most often is a homeowner who skips slab leveling to save money, installs a floating floor, and then deals with clicking, hollow spots, and eventually plank separation within a year. A bag of self-leveling compound costs $40. Replacing a floor costs thousands.
Pro Tip: If you are set on DIY, choose a material with built-in tolerance for minor slab imperfections, like SPC/LVP with a thicker core (6mm or above). Thinner products telegraph every bump and hollow in the slab, and the result looks and feels cheap regardless of the plank’s surface quality.
Ready for a written moisture report? Here’s what to expect from Jaghomesnow

Choosing the right basement floor starts with knowing what your slab is actually doing. Jaghomesnow provides on-site moisture testing and a written substrate evaluation before any flooring recommendation is made, so you are never guessing about what your slab can support.
What a JAG site visit includes:
- Visual slab inspection for cracks, efflorescence, and prior water intrusion
- In-slab RH probe or MVER testing with documented results
- Written remediation plan if readings require intervention
- Fixed-price estimate with a clear project timeline
- Product recommendations matched to your moisture profile, room use, and budget
We serve homeowners across Bucks County, Montgomery County, and nearby areas. If you are planning a broader interior renovation alongside your basement project, our bathroom remodeling services follow the same moisture-aware, detail-first approach. Contact Jaghomesnow to schedule your site visit and get a written moisture report before a single plank goes down.
Useful sources for deeper research
These resources cover moisture testing protocols, material guides, and maintenance best practices in more detail:
- Best Waterproof Basement Flooring 2026: Options, Costs & ROI — comprehensive cost breakdowns and material rankings for below-grade installs
- Best Flooring for Basements: How to Beat Moisture from Below — use-case guidance and moisture-resistance ratings by material
- LVP vs. Hardwood vs. Tile for Basements — detailed comparison of the three most popular finished-basement materials
- Carpet for Basement Floor: Pros, Cons, and Buying Guide — practical guidance on carpet tiles, subfloor systems, and moisture risk
- What You Should Know Before Installing Carpet in Your Basement — foundation specialist perspective on waterproofing before any soft surface install
- Basement Flooring Ideas to Maximize Functionality and Style — style and functionality ideas from a major home improvement retailer
- HGTV: Best Basement Flooring Options, Costs and Ideas — broad overview of material categories with design context
- Floor Maintenance Routine Best Practices for Homeowners — upkeep and care guidelines for different floor materials after installation
- How Basement Plumbing Works: A Homeowner’s Guide — explains sump pumps, floor drains, and drainage elements that affect slab moisture
- Is Carpet a Good Choice for a Basement? — balanced evaluation of carpet types, subfloor solutions, and moisture mitigation options
Recommended
- Bathroom Remodeling Bucks County PA | Bathroom Renovation Tips
- Choosing the Best Siding for Your Home in Southampton, Richboro, Churchville or Holland, PA – JAG Home Enhancements
- Deck Design Ideas That Add Value to Homes in Churchville, Jamison, and Warrington – JAG Home Enhancements
- Fiber Cement Siding Installation Bucks County PA | JAG Home Enhancements