

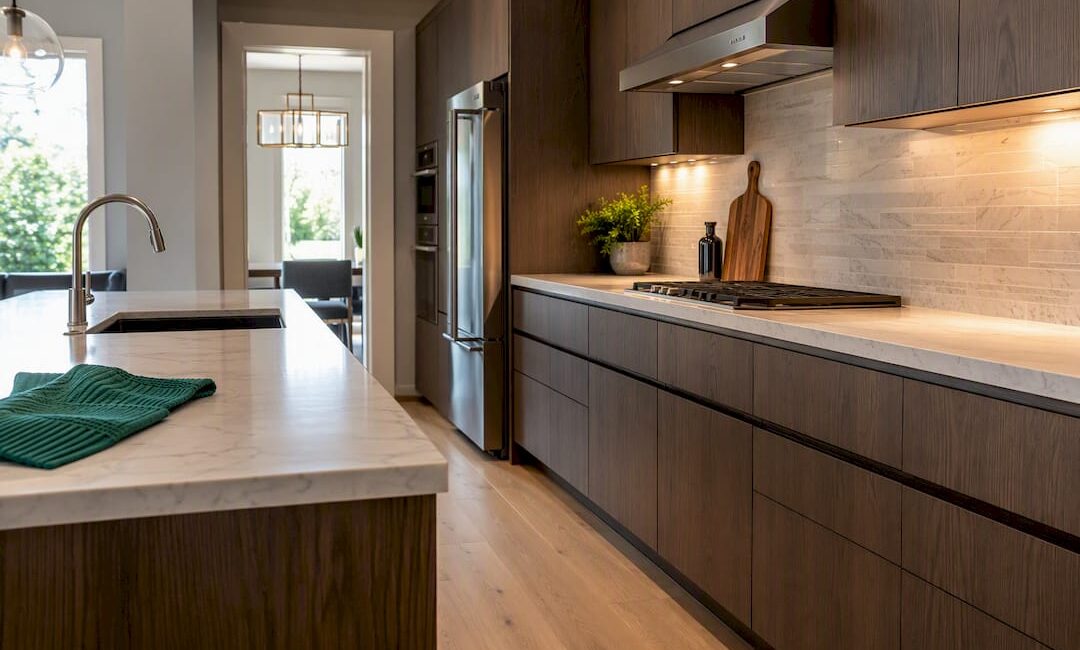
The seven kitchen layout types you’ll actually choose between are one-wall, galley, L-shaped, U-shaped, G-shaped, island, and peninsula designs. Pick your floor plan by starting with room width, fixed constraints like your vent stack and waste line, and how many cooks will realistically share the space at once. Storage and sightlines matter too, but they’re refinements you layer on once the basic footprint is settled.
TL;DR:
- A room’s fixed elements, such as waste and vent stacks, largely determine feasible kitchen layouts and should be mapped before designing.
- Island placement generally requires at least 13 feet of room width to avoid traffic congestion, with narrower rooms benefiting from peninsulas instead.
- U-shaped and G-shaped kitchens offer extensive storage but need careful planning to prevent dead-end traffic flow issues.
- Proper aisle widths of 42 inches for single cooks and 48 inches for multiple users are crucial for a functional layout, especially around islands and peninsulas.
- Resale value favors open, flexible layouts like L-shaped and island kitchens, while overly cramped or improperly sized designs can hinder a home’s marketability.
Table of Contents
- Kitchen Layout Types: Planning Fundamentals Before You Pick One
- One-Wall Kitchens: Small-Footprint Efficiency
- Galley Kitchens: Maximum Efficiency, Minimum Room
- L-Shaped Kitchens: The Most Flexible Floor Plan
- U-Shaped Kitchens: Built for Serious Storage
- G-Shaped Kitchens: A Peninsula’s Extra Storage and Seating
- Islands and Peninsulas: The Clearance Math That Decides Everything
- How to Choose Between Kitchen Layout Types: A Step-By-Step Checklist
- A Contractor’s View on Choosing and Building Your Layout
- Lighting and Ventilation by Layout
- Does Kitchen Layout Affect Resale Value?
- The Real Trade-Off Behind Every Kitchen Layout Decision
- Sources
Kitchen Layout Types: Planning Fundamentals Before You Pick One
For decades, kitchen design revolved around the work triangle: sink, stove, and refrigerator forming three points you could walk between in a few steps. That rule still has value in a compact one-wall or galley kitchen. But in larger, open-concept homes, designers have shifted toward zone planning instead, organizing the room around food storage, prep, cooking, and cleaning zones so every task has a logical home, not just a triangle of appliances.
Before you fall in love with a floor plan, walk your kitchen and identify what you cannot move. Your waste stack, gas line, vent wall, and window and door swings are fixed unless you want to pay for relocation. Get those mapped first, then size your aisles.
Statistic Callout: NKBA-style planning guidance recommends at least 42 inches of clear aisle width for a single cook and 48 inches when two people work the kitchen at once. Islands need clear aisles on each side to function without turning into a bottleneck.
Once your fixed elements and aisles are set, appliances come next, and cabinets last. Three storage moves make almost any layout work harder:
- Choose tall pantry cabinets over standard uppers to capture ceiling height you’re otherwise wasting.
- Favor drawer-heavy base cabinets over doors. Drawers put everything within reach without the kneeling and reaching that swallowed cabinets require.
- Add a walk-in or slim pull-out pantry wherever a dead wall or unused corner allows it; for practical guidance on pantry doors and storage choices, see how to select the right pantry door.
Pro Tip: Before you call a designer, tape your proposed aisle widths on the existing floor with painter’s tape and walk them with a stack of dishes in your hands. Numbers on paper feel different than numbers under your feet.
One-Wall Kitchens: Small-Footprint Efficiency
A one-wall kitchen lines every appliance and cabinet along a single wall, which makes it the natural choice for studios, accessory dwelling units, and small open-concept homes where square footage is the scarcest resource. It’s also common in narrow row homes where a second wall simply isn’t available.
Appliance order matters more here than in any other layout, since there’s no second run to spread the load. A common sequence runs refrigerator, then counter space, then sink, then more counter, then range, keeping wet and hot zones apart while preserving landing space on both sides of the sink. Vertical storage carries the rest of the design: an appliance garage hides small countertop machines, a tall pantry cabinet at one end adds real capacity, and open shelving above the counter keeps everyday items visible without crowding the single run of base cabinets.
If your room is at least 8 feet deep opposite the wall, a slim rolling cart or a small island with a minimum 24 inch depth can add prep space without blocking the aisle. Below that depth, skip the island and use a fold-down counter extension instead.
- Pros: Lowest material cost of any layout, minimal wasted floor space, easy to keep the whole room in view.
- Cons: Limited landing space next to appliances, one long counter run means less total storage than layouts with a second or third wall.
Pro Tip: In a one-wall kitchen, put your dishwasher directly beside the sink, not across the room. Every foot of pipe run between them is a foot of extra plumbing cost and a longer walk with dripping dishes.
Galley Kitchens: Maximum Efficiency, Minimum Room
A galley, or parallel, kitchen runs two counters facing each other, usually in a corridor between 8 and 10 feet wide. It’s the most efficient layout per square foot you can build, because nearly every inch of both walls is within arm’s reach of the cook.
Split your appliances and fixtures between the two runs so no single wall carries all the weight. A typical arrangement puts the sink and dishwasher on one side and the range on the other, with the refrigerator anchoring whichever end sees the least foot traffic. Keep at least 42 inches between the two counters for one cook, and push toward 48 inches if two people will regularly work the space, per standard NKBA-style clearance guidance.
- Pros: Unmatched storage and counter space per square foot, short distances between every task zone.
- Cons: Becomes a genuine corridor if it’s also the main path between rooms, and cramped fast when two cooks try to work opposite sides at once.
If your galley doubles as a hallway to the dining room or back door, consider routing that traffic around the kitchen entirely during a remodel, even if it means shifting a doorway. A galley that’s also a thoroughfare turns cooking into a game of stepping aside every few minutes.
Pro Tip: Hang your primary task lighting above each counter run, not down the center of the aisle. A galley’s narrow width means centered fixtures often throw shadows exactly where you’re chopping.
L-Shaped Kitchens: The Most Flexible Floor Plan
An L-shaped kitchen runs cabinets and appliances along two adjoining walls at a right angle, leaving the rest of the room open. It’s the most common layout in newer homes because it works in almost any room over roughly 10 by 10 feet and flows naturally into an open-concept living or dining area.
Once your open leg of the L reaches about 13 feet of clear width, an island fits comfortably without crowding the aisles; designers caution that squeezing one into a tighter footprint tends to hurt traffic flow more than it helps storage. A general-purpose island runs 3 to 4 feet by 6 to 8 feet, sized to leave 42 inches clear on every working side. Our kitchen island sizing guide walks through the math for tighter or larger rooms.
The corner where the two walls meet is the layout’s weak point. A lazy Susan turntable or a blind-corner pull-out system recovers cabinet space that would otherwise sit dark and unreachable. Keep your sink or range near the inside corner of the L rather than at either far end, so landing space stays close to where you actually cook.
- Pros: Adaptable to nearly any room size, opens naturally to living spaces, easy to add an island later.
- Cons: The inside corner wastes space without dedicated hardware, and a very short L can leave one leg underused.
Pro Tip: Measure your open leg twice before committing to an island: once for the island’s footprint, once for the 42 inch aisles on both sides. Homeowners consistently forget to double the clearance.
U-Shaped Kitchens: Built for Serious Storage
A U-shaped kitchen wraps cabinets and counters around three walls, and it’s the layout of choice for households with multiple cooks, serious storage needs, or a habit of hosting big holiday dinners. Plan on sufficient clear width between the two parallel legs of the U to accommodate room users; more space is needed for multiple cooks to work comfortably at the same time.
The extra wall pays off in counter and cabinet space; a U-shaped kitchen typically supports far more linear feet of storage than an L-shaped or galley plan of the same square footage. That comes with two blind corners instead of one, so budget for pull-out corner systems on both ends rather than just one. Skip full-height upper cabinets on at least one leg if the room feels tight. A partial wall, open shelving, or lower upper cabinets keep sightlines open into an adjacent living space, and a couple of stools tucked under an extended counter turn one leg into informal seating without sacrificing storage.
- Pros: More perimeter counter and cabinet space than almost any other layout, naturally supports two or more cooks working at once.
- Cons: Can feel closed-in if all three walls run full-height cabinets, and needs two corner solutions instead of one.
Pro Tip: If your U-shaped kitchen backs onto an open living area, drop the cabinet height on the leg closest to that room by a few inches. It’s a small change that keeps the kitchen from visually walling off the rest of the house.
G-Shaped Kitchens: A Peninsula’s Extra Storage and Seating
A G-shaped kitchen takes the U-shaped footprint and adds a fourth partial wall, usually in the form of a peninsula, closing the loop into something closer to the letter G. Cabinetry runs in this layout typically land in the 24 to 26 linear foot range, noticeably more than a standard U, which makes the G-shape the storage champion of the common floor plans.
The peninsula does double duty. It adds a second work surface and casual seating without the full clearance penalty a freestanding island requires, since one side ties directly into existing cabinetry rather than needing walkways on all four sides. That efficiency is also the layout’s biggest risk: a peninsula placed wrong creates a dead end, funneling everyone toward one narrow gap and choking traffic flow instead of easing it.
- Pros: The most storage per square foot of any common layout, built-in seating without sacrificing a full island’s clearance.
- Cons: Prone to dead-end traffic patterns, and the fourth wall can trap sightlines into adjacent rooms if not planned carefully.
Keep upper cabinets off the peninsula entirely, or limit them to open shelving at most. A full bank of wall cabinets above a peninsula blocks the sightline into your living or dining space, which defeats much of the reason people choose an open peninsula over a fourth closed wall in the first place.
Islands and Peninsulas: The Clearance Math That Decides Everything
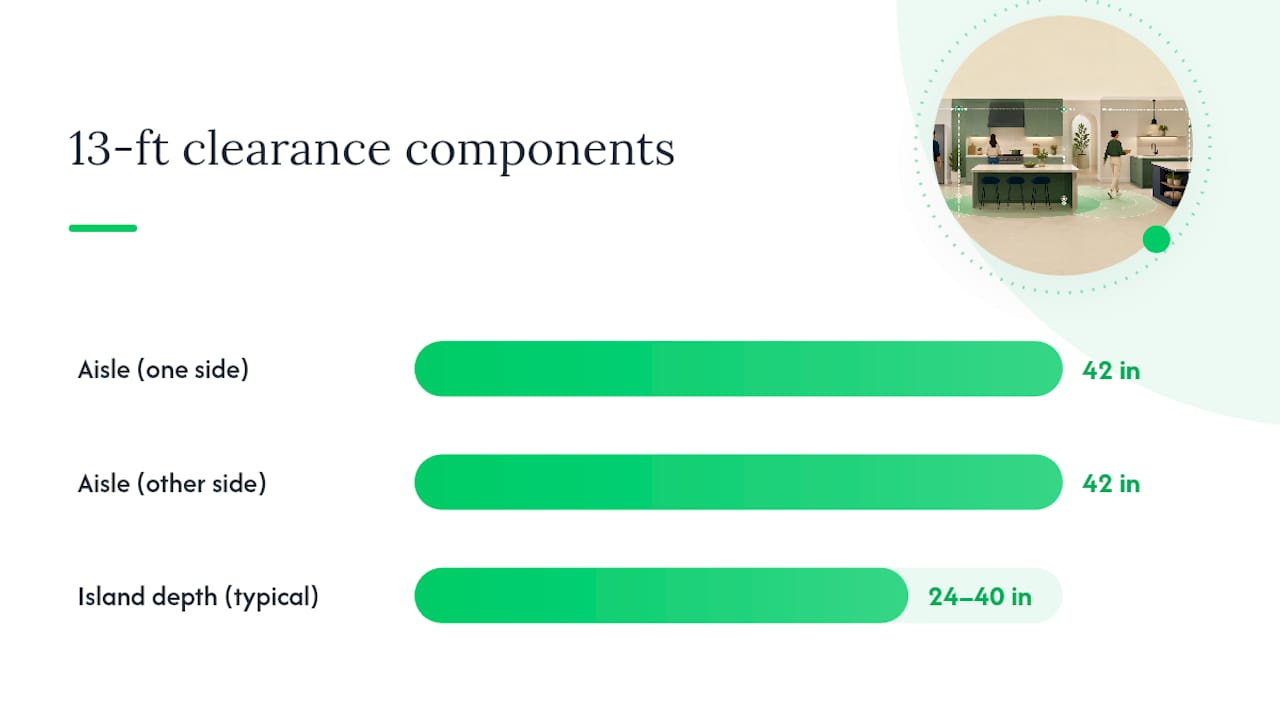
Whether an island or peninsula belongs in your kitchen comes down to arithmetic, not preference. Add your existing wall run’s depth, the required aisle on each side, and the footprint of the feature itself, and compare that total to your actual room width. A rough formula looks like this: wall cabinet depth, plus a 42 inch aisle, plus the island’s own depth (typically 24 to 40 inches), plus a second 42 inch aisle on the far side.
Statistic Callout: Designers consistently flag roughly 13 feet of clear width as the practical threshold for a standard island. Squeeze one into a narrower room and it tends to hurt traffic flow rather than help it, no matter how good it looks in a showroom.
A peninsula sidesteps some of that math because one long side attaches to existing cabinetry instead of needing clearance on all four sides. That makes it the better choice in rooms just short of the 13 foot island threshold, though designers note it can create a dead end if the open end doesn’t line up with a natural traffic path.
Once the clearance math checks out, the feature list is where an island or peninsula earns its keep:
- A secondary prep sink keeps a second cook out of the primary sink’s way.
- A cooktop on the island frees up the perimeter wall for a wall oven and extra cabinetry.
- Bar-height seating on one side turns the island into the room’s default gathering spot, which is increasingly how designers plan open-concept kitchens. Skipping that social function is a common source of clutter once the island becomes a dumping ground instead of a destination.
- Refrigeration drawers or an appliance garage add function without stealing counter length.
Beyond the basics, an island can flex into a dedicated baking station with a marble top, a small bar station near the dining area, or a homework surface for kids that keeps them close without putting them in the cook’s direct path. Our guide to open-concept kitchen trade-offs covers how these social zones interact with sightlines from adjoining rooms.
Pro Tip: If you’re torn between an island and a peninsula, measure your room at its narrowest point, not its widest. Kitchens rarely remodel evenly, and a single narrow spot near a doorway can undercut an otherwise generous floor plan.
How to Choose Between Kitchen Layout Types: A Step-By-Step Checklist
Picking the right floor plan among the various kitchen layout types isn’t guesswork once you follow the sequence contractors actually use on-site.
- Map what can’t move. Locate your waste stack, gas line, vent wall, and every door and window swing. These fixed elements eliminate options before you even consider appliances.
- Measure the room and test your numbers against real thresholds. Check your width against the 42 inch single-cook aisle, the 48 inch two-cook aisle, and the roughly 13 foot island threshold. A room that fails these tests early saves you from redesigning later.
- Rank what your household actually needs. Storage-heavy families lean toward U or G-shaped layouts. Frequent entertainers want an island or peninsula built for seating. Solo cooks in small spaces do fine with a one-wall or galley plan.
Match your findings against this rough guide:
- Small studio or ADU with one wall available → one-wall kitchen.
- Narrow corridor kitchen, 8 to 10 feet wide → galley.
- Average family kitchen with room to spare → L-shaped, with an island if width allows.
- Household with multiple cooks or heavy storage needs → U-shaped or G-shaped.
Before signing a contract, ask your contractor a short list of pointed questions: Will this layout change require a permit for plumbing or electrical relocation? Does moving the sink or range mean rerouting the waste stack, and what does that add to the timeline? What’s the realistic completion window given the scope? Red flags include a contractor who can’t answer basic plumbing questions on the spot, vague permit answers, or a timeline that sounds too short for the scope of work described.
Pro Tip: Get your contractor’s plumbing and electrical relocation quote in writing before you finalize the layout. Moving a sink six feet can cost more than the cabinets around it.
A Contractor’s View on Choosing and Building Your Layout
Every kitchen remodel we’ve been part of starts the same way: measuring what’s actually in the walls before anyone talks about cabinet finishes. Waste stack and vent wall locations dictate more of your final layout than most homeowners expect walking in, and finding them late in the process is how budgets balloon.
Sequencing matters as much as the floor plan itself. Plumbing and electrical rough-in has to happen before cabinets go in, not after, and finishes need protection the entire time demolition is underway. Our kitchen remodel timeline guide breaks down what that schedule typically looks like from demo to final walkthrough.
Verify waste-stack and vent-wall locations early, schedule rough-in plumbing and HVAC before the cabinet order goes in, and plan a temporary kitchen setup during demolition. Getting that sequence wrong is the single biggest source of remodel delays homeowners run into.
A few gotchas show up on nearly every project:
- Plumbing that isn’t where the original blueprints suggest, discovered only once walls open up.
- Permit requirements for moving gas lines or adding a second sink that homeowners didn’t budget time for.
- The need for a temporary kitchen setup, from a folding table with a hot plate to a garage kitchenette, during weeks of active construction.
The team at a remodeling company often builds every project around a clean job site and a schedule that holds, because a kitchen remodel already disrupts daily life enough without added chaos. Tailored planning around your specific layout, whether that involves relocating a vent wall or reworking a corridor into an open galley, is where the on-time, on-budget promise starts.
Lighting and Ventilation by Layout
Every layout needs three light types: ambient overhead light, task lighting over counters, and accent lighting for visual interest, but how you deploy them shifts with your floor plan. One-wall and galley kitchens do well with a single run of task lighting mounted directly above the counter, since centered ceiling fixtures in a narrow room throw shadows exactly where you’re working. L-shaped and U-shaped kitchens need task lighting broken into segments that follow each wall, plus pendant lighting over an island if one is present.
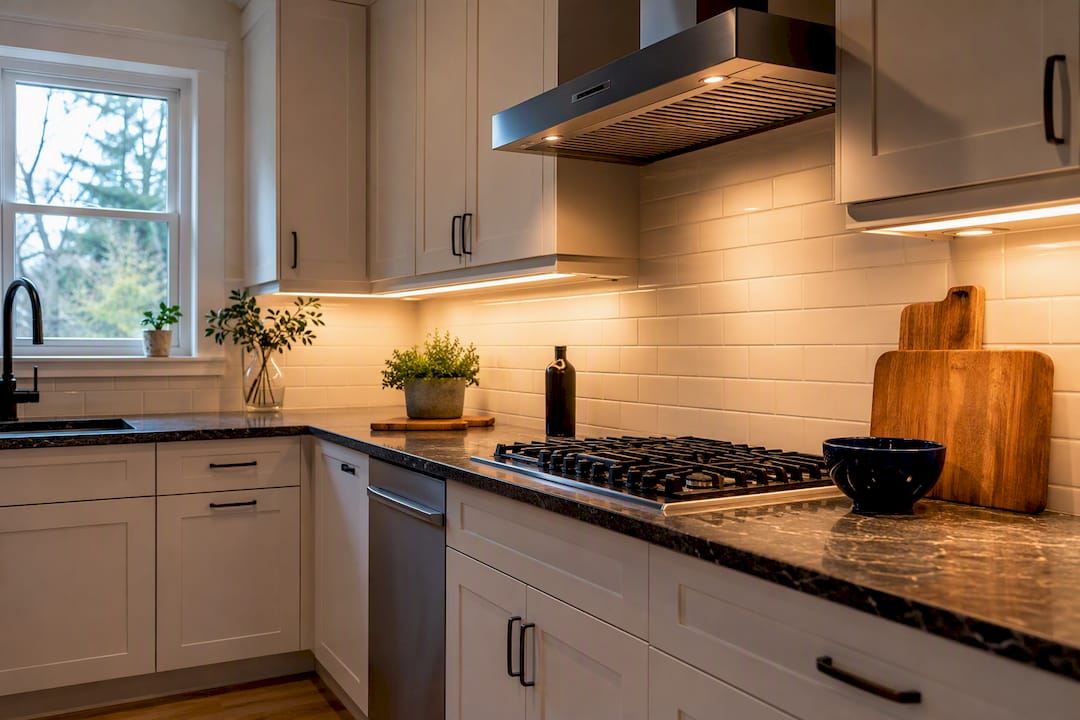
Ventilation follows your range location just as closely. A range against an exterior wall makes ducted ventilation straightforward. A range on an island or peninsula, increasingly common as those layouts grow more popular, usually requires a downdraft system or ductwork routed through the ceiling and up through the roof, which adds real cost and should factor into your layout decision early rather than as a surprise change order.
G-shaped and U-shaped kitchens, with their extra enclosed wall space, benefit from dedicated exhaust near the cooking zone specifically, not just a single central fan trying to clear the whole room. If your layout includes a peninsula seating area near the range, plan ventilation strong enough to keep cooking odors from settling over the dining side, since that open sightline works both ways.
Does Kitchen Layout Affect Resale Value?
Layout affects resale value more than most homeowners realize, often more than finish choices like countertop material or cabinet color. Buyers touring a home register flow almost instinctively: a kitchen that feels cramped, blocks the door, or forces awkward passes around an island reads as a problem even when they can’t name why.
Open, flexible layouts like L-shaped and island kitchens tend to show best in a competitive resale market, because they photograph well for listings and appeal to a wide range of buyer household sizes. A one-wall or galley kitchen isn’t a liability in a small home where it genuinely fits the space, but forcing an island into too tight a room, or leaving a U-shaped kitchen so enclosed it cuts off the rest of the main floor, can actively work against a sale.
The safest long-term move is matching your layout to your home’s actual scale rather than chasing a trend that doesn’t fit the footprint. A well-executed galley in a genuinely narrow home reads as smart design. An oversized island crammed into a room that can’t support the clearance reads as a renovation that missed the mark, regardless of how much was spent on it. If resale is part of your calculus, a contractor who understands both the design principles and your local market, like the team behind our Bucks County kitchen remodeling services, can flag which upgrades actually move the needle for buyers in your area.
The Real Trade-Off Behind Every Kitchen Layout Decision
Most kitchen layout advice online treats the decision like a style choice, comparing photos of finished rooms and letting aesthetics drive the conversation. That’s backwards. The research and the planning numbers both point the same direction: room width, fixed plumbing and venting, and how many people actually cook determine which layouts are even viable. Style gets decided after that, not before.
The most overrated piece of conventional advice is the blanket push toward islands. They’re genuinely useful past that roughly 13 foot clearance threshold and genuinely harmful below it, yet homeowners keep requesting them regardless of room size because islands look good in inspiration photos. A peninsula, an extended counter, or a well-planned L-shape often serves a mid-size kitchen better.
If you take one thing from this guide, prioritize the clearance math before you fall in love with a floor plan. Aisle widths and fixed constraints aren’t the exciting part of a remodel, but they’re the part that determines whether the finished kitchen actually works.
— Jeff
Sources
- Kinds of Kitchen Layouts | Whirlpool
- This Is the Best Kitchen Layout for Your Home, According to Designers
- Kitchen Layouts Explained — 5 Types Compared (2026) – Captivating Cabinets Blog
- How to Design a Kitchen Layout (With Real NKBA Numbers)