


A solid kitchen lighting plan combines ambient, task, and accent layers, starts with about 30 to 40 lumens per square foot for general light, and locks every electrical drop before walls close. Map your sink, prep, range, and island zones first, then mark each fixture location. Keep beam angles consistent, and choose CRI 90+ for task and under-cabinet areas.
TL;DR:
- A 168 square foot kitchen needs roughly 5,040 to 6,720 ambient lumens; add separate task lighting and target at least 300 lux on work surfaces.
- Space recessed lights about 1.2 times ceiling height apart and set them 20 to 24 inches from cabinet fronts to light counters, not doors.
- Hang island pendant shades 30 to 36 inches above the countertop, but position them over the work surface rather than seating to limit glare.
- Choose under cabinet lighting near 3000K with CRI 90+, and use a diffuser or hidden profile to prevent bright spots on glossy backsplashes.
- Decide fixture, switch, and dimmer locations before drywall, then confirm LED dimmer compatibility and separate ambient and task controls with the electrician.
Table of Contents
- What are the three layers of kitchen lighting?
- How do you calculate how bright your kitchen needs to be?
- Which fixture types work best for each zone?
- Where should recessed lights go, and how far apart?
- How high and how far apart should island pendants hang?
- What should you know about under-cabinet lighting?
- How should you plan controls and color temperature?
- How does the range hood affect your lighting plan?
- What should you lock in before the walls close?
- How do we coordinate lighting on a remodel?
- Why most kitchen lighting advice misses what matters
- We can build your kitchen lighting plan into a full remodel
- FAQ
- Sources
What are the three layers of kitchen lighting?
Every well-lit kitchen layers different kinds of light. Each one does a different job, and skipping any of them leaves a gap you will notice the first night you cook after sunset.
- Ambient light is the general ceiling light that fills the room: recessed downlights, a flush mount, or a cove. It sets the baseline so you can walk around safely.
- Task light sits where you work: under wall cabinets over the counters, above the sink, over the range, and above the island. It puts light on your hands and cutting board, not on the back of your head.
- Accent light adds depth and mood: glass-front cabinets, open shelving, or a toe-kick glow that works as a night light.
Think about how you move through the room. Run ambient light across the middle of the space, task light along every counter edge, and accent light only where there is something worth showing. If you want help mapping those zones, our guide to kitchen layout types and the kitchen work triangle show how the main work areas connect.
One habit pays off: design the plan so it performs at night, not just at noon. Daylight hides weak spots. A kitchen that looks bright at 1 PM can leave the prep counter in your own shadow at 7 PM.
How do you calculate how bright your kitchen needs to be?
Start with the right metric. Watts tell you how much electricity a bulb draws, which made sense when every bulb was incandescent. With LEDs, lumens measure the light a fixture produces, so lumens are what you plan around. Lux measures how much of that light actually lands on a surface, which is why it matters for counters and tables.
A general guideline of 30 to 40 lumens per square foot is a common starting point for ambient kitchen lighting. For tasks, light levels generally should not drop below 300 lux for comfortable visibility.
Here is a quick worksheet using an illustrative 12 by 14 foot kitchen:
- Multiply length by width: 12 × 14 = 168 square feet.
- Multiply by 30 and by 40 to get your range: 168 × 30 = 5,040 lumens, and 168 × 40 = 6,720 lumens.
- Check the lumen rating on the downlight you like. If each puts out 700 lumens, you need roughly 7 to 10 of them for the ambient layer.
- Adjust for the room: dark cabinets, a high ceiling, or a very open layout push you toward the high end, while white walls and a low ceiling let you stay near the low end.
- Add task light on top of that number, since under-cabinet and island fixtures are a separate layer.
Treat the result as a starting point, not a verdict. Plan the fixture count, then use dimmers to adjust the room’s brightness to suit your needs.
Which fixture types work best for each zone?
Each fixture type earns its place in a different part of the kitchen. Picking by zone, rather than by what looks good in a showroom, avoids glare and dark corners.
- Recessed downlights are the workhorse for ambient light. They disappear into the ceiling and suit most layouts. A surface-mounted fixture or a cove can be the better call when ceilings are very low or joists make cutting holes difficult.
- Pendants belong over islands and peninsulas. Scale matters: a pendant that is too large crowds the room, and one that is too small throws a pool of light that doesn’t reach the counter edge.
- Linear and strip fixtures run along the underside of cabinets or inside coves. LED tape and COB strips give a continuous line of light, but a cheap strip can show individual dots on a glossy backsplash. Hidden profiles and diffusers help.
- Integrated under-cabinet fixtures keep wiring tidy. Some combine task lighting with built-in receptacles and USB charging, such as a lighted power strip that delivers 400 lumens per foot with 90+ CRI. That means you avoid cutting outlets into a finished backsplash.
- Adjustable track or accent fixtures make sense for open shelving or a display wall where the contents change.
Efficiency matters too. Efficient LEDs cut energy use and operating cost, so look at the fixture’s efficacy when you compare options, not only its price.
Pro Tip: Choose fixtures from one family and one color temperature wherever they share a sightline, so the room looks planned rather than assembled.
Where should recessed lights go, and how far apart?
Placement is where most plans succeed or fail. A few simple rules keep counters evenly lit and the ceiling tidy.
- Spacing: a useful starting point is ceiling height times 1.2 between downlights. Use the spacing as a starting point, then adjust to your room and your fixture’s beam.
- Cabinet offset: keep downlights about 50 to 60 cm (roughly 20 to 24 inches) out from the front of the wall cabinets. That puts light on the counter instead of on the cabinet doors, and it keeps you from casting your own shadow while you chop.
- Beam angles: match them along any sightline. Mixing narrow and wide beams in the same view creates uneven pools of light and a cluttered ceiling.
- Color consistency: use the same CCT across a shared view. A warm fixture beside a cool one looks like a mistake, even to people who can’t say why.
- Edges first: place the fixtures that serve counters first, then fill in the center of the room.
Once you have a layout on paper, mark it on the ceiling with painter’s tape. Standing in the room and looking up catches conflicts with joists, vents, and beams before anyone cuts a hole.
How high and how far apart should island pendants hang?
Islands attract the most visible fixtures in the kitchen, so the numbers matter. Pendants generally hang so the bottom of the shade sits about 30 to 36 inches above the countertop. That keeps the light low enough to work by and high enough that no one has to dodge it.
- Spacing: leave enough room between pendants so each one reads as its own fixture, and keep the outer pendants a comfortable distance from the island ends.
- Count by length: a short island often suits a single large pendant or a pair, while a longer island looks balanced with three evenly spaced fixtures.
- Overhang: if the countertop overhangs for seating, keep pendants over the work surface, not centered on the stools, so no one sits in glare.
- Linear option: a single linear island fixture gives a more even wash of light than several pendants and works well when sightlines to a view or living area should stay open.
Our kitchen island dimensions guide is a good companion here, since island size drives how many fixtures fit well.
What should you know about under-cabinet lighting?
Under-cabinet light is the most useful task layer in a kitchen because it sits between you and the counter. Getting color right matters as much as getting brightness right.
- Start at 3000K and CRI 90+. That combination renders food, wood, and stone naturally. Starting with 3000K and CRI 90+ is practical advice for under-cabinet lighting.
- Check the color data. CCT and CRI are useful but imperfect metrics, and Duv and binning affect how consistent color looks from fixture to fixture. Compare samples in person when you can.
- Choose the format: LED tape, COB strips, and linear fixtures all work. Look for a hidden profile and a diffuser to avoid hot spots on a glossy backsplash.
- Protect the finish: integrated fixtures with built-in outlets or USB ports keep the backsplash intact, because you don’t need to add receptacles later.
How should you plan controls and color temperature?
Controls turn a good layout into a flexible one. Plan at least two zones, one for ambient and one for task, so you can run just the counters while cleaning up or dim everything for dinner.
- Use LED-rated dimmers. Mismatched dimmers and drivers cause flicker, and a homeowner checklist for dimmable versus non-dimmable fixtures can save you a callback.
- Pick CCT by job: 2700 to 3500K is generally warm, 3500 to 4000K cool, and 4000 to 5000K daylight. Warm tones suit dining and ambient light, and a slightly cooler white suits busy task areas.
- Don’t mix CCTs inside the same sightline.
- Consider advanced options: daylight harvesting and circadian-friendly automation adjust output through the day, and they are worth a conversation if you like smart-home features.
Pro Tip: Label every dimmer on your plan with the zone it controls before the electrician starts, so the switch bank makes sense on day one.
How does the range hood affect your lighting plan?
Most range hoods carry their own task light, so confirm the hood model early. Its location and electrical needs can collide with nearby recessed or pendant fixtures.
Venting matters too. Ducted hoods vent outside and are generally more effective than ductless ones, so coordinate the duct run with joists and ceiling fixtures. If you go ductless, expect more frequent filter cleaning or replacement. Hood width, CFM, and noise also vary, and hood width should match your cooktop.
What should you lock in before the walls close?
Most American kitchens are underlit, and codes ask for little, so the plan you make matters more than the minimum. Run through this checklist with your electrician and remodeler:
- Fix every fixture location and switch or dimmer position before drywall and countertops go in.
- Ask about dedicated circuits for cooking appliances and the hood.
- Confirm dimmer compatibility with your LED drivers, and whether any fixture needs a transformer or low-voltage wiring.
- Ask when a permit is needed and who handles the inspection coordination.
- Tie decisions to your schedule using our kitchen remodel timeline.
How do we coordinate lighting on a remodel?
The most common mistake is a lighting layout that exists only in someone’s head. Plan the layout with your electrician before finishes go in, and confirm it against your cabinet plan. Protect finished surfaces while the electrical work happens. Use the checklist above, and ask us for a site consultation if you’d like help with your remodel.
Why most kitchen lighting advice misses what matters
Too much kitchen lighting advice obsesses over fixtures. People spend weeks choosing pendants and almost no time on where the wires go. The pendants are the part you will photograph, but the plan behind them decides whether the kitchen works.
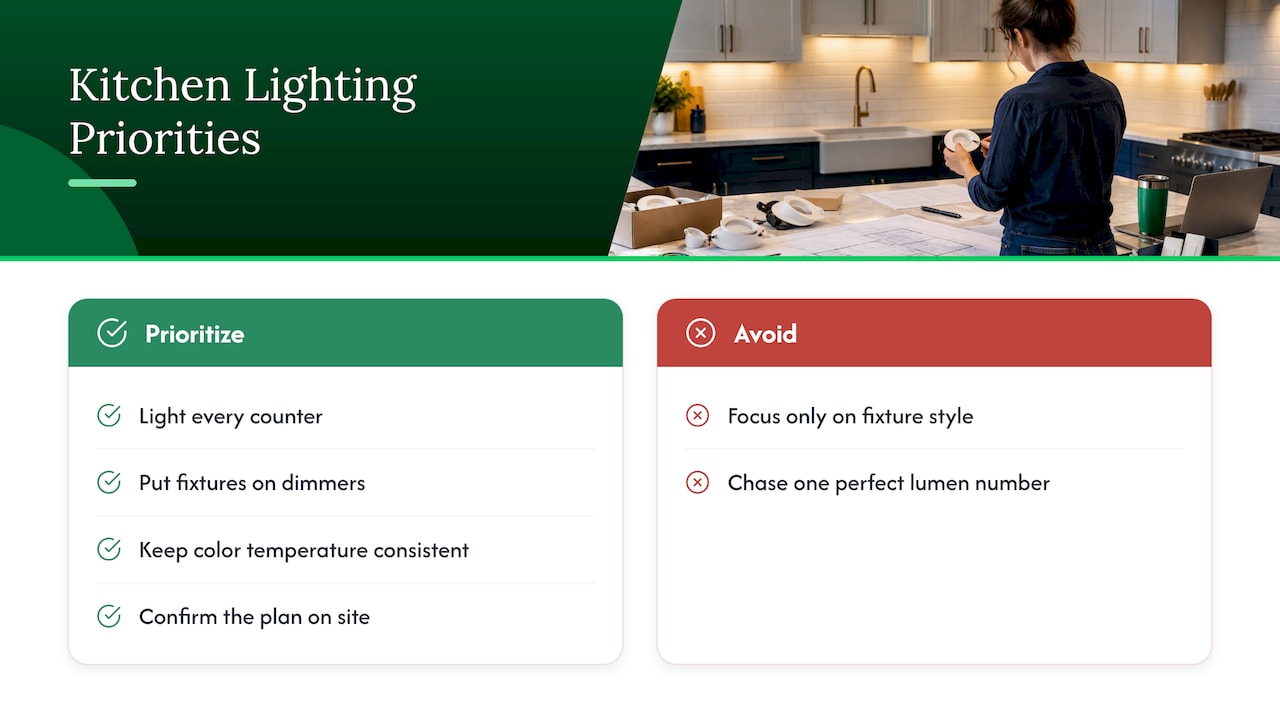
What I would prioritize, in order: first, task light on every counter, because that is where you spend your time. Second, controls, because the same fixtures feel completely different on a dimmer. Third, a consistent color temperature across the whole room. What is overrated is chasing a single “perfect” lumen number. Treat the guidelines as a starting range, then tune the room with dimmers once you can see it.
Decide early, draw it down, and confirm it on site. A mediocre fixture in the right place beats an expensive one in the wrong one.
— Jeff
We can build your kitchen lighting plan into a full remodel
When you are ready to turn this plan into a finished room, our kitchen remodeling services can help with your remodel. You get personalized service, a clean job site, and clear communication. Schedule a consultation to discuss your kitchen.

FAQ
What is the ideal lighting for a kitchen?
The ideal kitchen combines ambient, task, and accent light, each controlled on its own dimmer. A common ambient starting point is 30 to 40 lumens per square foot, with extra task light layered over the counters.
What are common kitchen lighting mistakes?
The biggest ones are relying on a few ceiling fixtures alone, placing downlights too close to the cabinets, and mixing color temperatures in one sightline. Waiting until after drywall to decide on fixture locations is the costliest mistake of all.
What is the current trend for kitchen lighting?
Warm, dimmable layers are popular, along with hidden linear lighting and integrated under-cabinet fixtures. We see homeowners favoring controllable zones over a single bright ceiling, since flexibility matters more than any one fixture style.
How high should pendants hang over an island?
A common range is 30 to 36 inches from the countertop to the bottom of the shade. Adjust for your ceiling height and how tall the people using the island are.
Sources
- IES Learning: The Art & Science Behind Beautiful Kitchens: Evidence-Based Lighting That Performs
- Kitchen Lighting Design | How to Light a Kitchen at Lumens
- LED Color Characteristics