

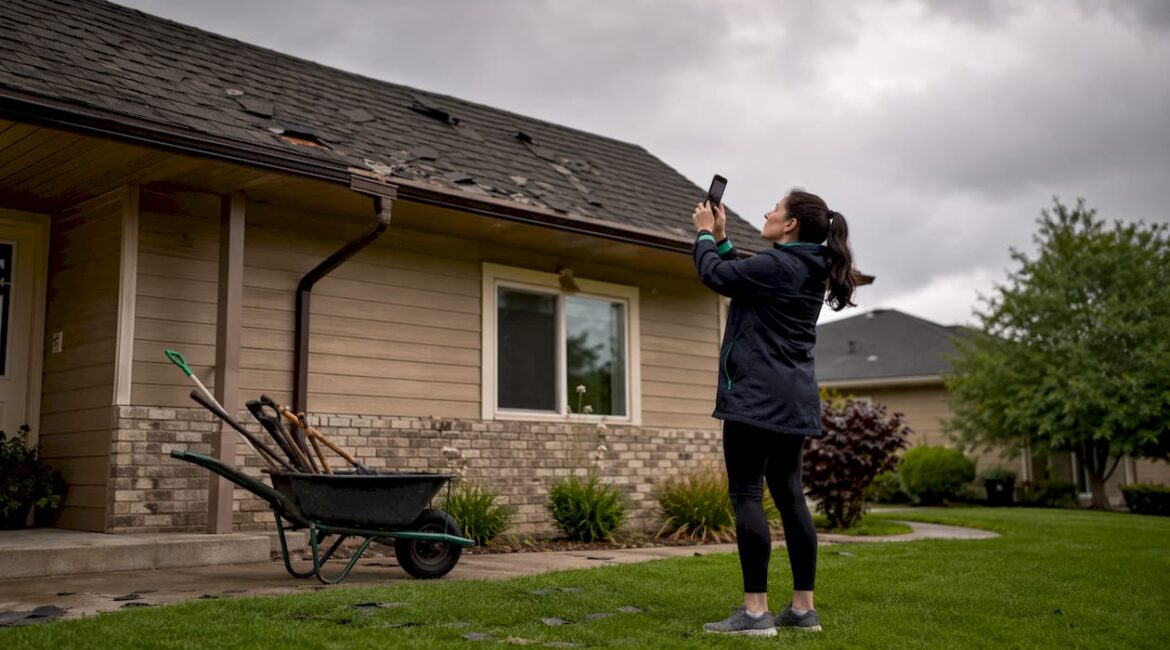
If your roof is damaged, do three things right now: photograph every inch of the damage, call your insurer to open a First Notice of Loss (FNOL), and schedule an independent contractor inspection before the adjuster arrives. That sequence preserves your evidence, starts the carrier’s clock, and puts a trained advocate on your side before anyone makes decisions about your payout.
The full roof insurance claim process runs from that first phone call through a final depreciation release check and usually takes several weeks to a few months for a complete claim cycle. The homeowners who recover the most are the ones who document thoroughly, bring a contractor to the adjuster inspection, and file supplements for every missed line item. The ones who leave money on the table usually do one thing: let the adjuster inspect alone.
Here is your quick-start checklist before we walk through each step:
- Document all damage with photos and video before touching anything
- File your FNOL with your insurer as soon as possible
- Schedule a contractor inspection, ideally before the adjuster arrives
- Attend the adjuster inspection with your contractor present
- Review the adjuster’s estimate carefully and file supplements for missed items
Table of Contents
- How does the roof insurance claim process work, step by step?
- Does homeowners insurance cover roof damage?
- ACV vs. RCV: how your policy type changes your payout
- How to document roof damage so your claim holds up
- Working with the insurance adjuster: what to say and what to avoid
- How to get estimates and choose a roofer who will protect your claim
- Emergency tarps, temporary repairs, and what insurers will reimburse
- How long does a roof insurance claim take, and how are payments structured?
- Common reasons claims are reduced, delayed, or denied
- Why your roofer should be on the roof: research-backed reasons supplements matter
- Key Takeaways
- What we see in the field: a contractor’s honest take on claim outcomes
- Jaghomesnow handles insurance-backed roofing in Bucks County and nearby areas
- Authoritative resources to confirm details before you file
How does the roof insurance claim process work, step by step?
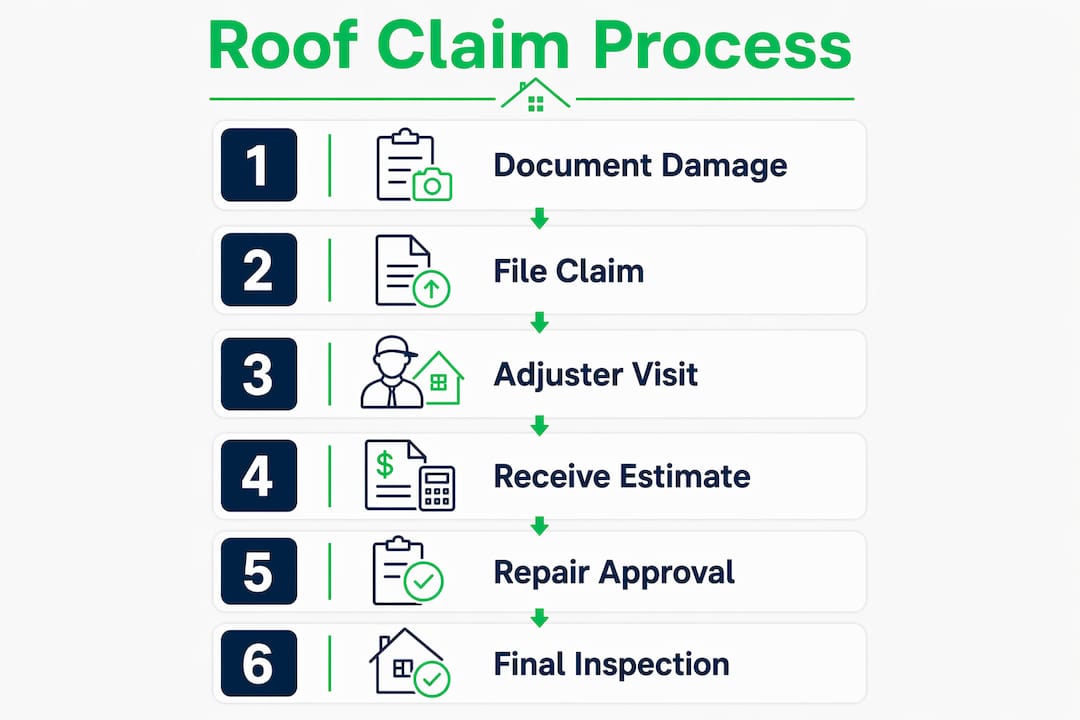
The claim follows a defined sequence. Skip a step or do it out of order, and you risk a reduced payout or an outright denial.
-
Document the damage before repairs. The moment it is safe to go outside, photograph every roof face from the ground, then get close-ups of individual shingles, ridge caps, gutters, siding, and any HVAC equipment on the roof. Shoot video with narration. Capture interior water stains in the attic and on ceilings. Date-stamp your evidence — this documentation cannot be recreated once repairs begin, and it forms the backbone of any supplement you file later.
-
File your First Notice of Loss (FNOL). Call your insurer or log into their claims portal. Have your policy number ready, note the date and type of storm (hail, wind, fallen tree), and ask for a claim number and the name of the adjuster assigned to your file. Filing promptly matters: many states allow 1–2 years from the date of loss, but some policies impose shorter notification windows. Check your declarations page and your state Department of Insurance for the exact deadline.
-
Get an independent contractor inspection. Before or immediately after filing, have a qualified roofer walk your roof. A good contractor will identify damage the adjuster might miss — flashing failures, ventilation issues, deck rot, ice and water shield deficiencies — and prepare a written scope. This scope becomes your comparison document when the adjuster’s estimate arrives.
-
Prepare for the adjuster inspection. Adjusters typically arrive 7–14 days after a routine FNOL. Have your contractor present on the roof with the adjuster. Adjusters are not roofers; a contractor who knows what hail impact looks like on flashing, vents, and gutters can point out items that would otherwise be missed or undervalued.
-
Compare estimates and file supplements. After the inspection, the adjuster produces a line-item estimate, almost always in Xactimate format. Your contractor should produce their own Xactimate estimate. Compare the two line by line. Items commonly missed in initial estimates include ice and water shield, drip edge, starter strip, and deck rot replacement. Your contractor submits a supplement for every missed item with supporting photos and code citations.
-
Approve the work and collect payment. Once the scope is agreed upon, your insurer issues an initial Actual Cash Value (ACV) check. Work begins. After you submit proof of completed work — final invoice and completion certificate — the carrier releases the withheld recoverable depreciation (the second check). Do not pay your contractor in full before that second check clears.
Pro Tip: Ask your contractor before hiring them: “Do you prepare Xactimate estimates and will you attend the adjuster inspection?” If the answer to either is no, keep looking.
Does homeowners insurance cover roof damage?
Standard homeowners insurance covers sudden, accidental damage from named perils. What it does not cover is just as important to understand.
Covered perils typically include:
- Hail and wind damage
- Fire and lightning strikes
- Fallen trees or branches
- Ice dams (in some policies)
- Vandalism
What insurers will not pay for is age-related deterioration, deferred maintenance, or a roof that simply wore out over time. Carriers treat long-term wear as a maintenance issue, not a covered loss. You cannot expect a new roof based solely on age.
Roof age and maintenance history play a direct role in carrier decisions. An older roof with visible granule loss, cracked tabs, or missing caulk around flashing gives an adjuster grounds to attribute damage to pre-existing deterioration rather than the storm. That is why keeping maintenance records and pre-storm photos matters. If you have had the roof inspected or repaired in the past few years, keep those receipts.
When a claim is denied as maintenance rather than covered loss, the documentation you gathered before filing becomes your appeal. Photos that show clean, undamaged shingles before the storm and clear impact marks after it are the clearest evidence that the damage was sudden and accidental. If you are unsure whether your roof’s condition might complicate a claim, reviewing signs of roof failure vs. normal wear can help you frame the conversation with your carrier accurately.
ACV vs. RCV: how your policy type changes your payout
This is the single most important policy distinction you need to understand before you file.
| Term | What it means | Practical impact |
|---|---|---|
| Actual Cash Value (ACV) | Replacement cost minus depreciation | You receive less upfront; you absorb the depreciation gap |
| Replacement Cost Value (RCV) | Full cost to replace at today’s prices | Carrier pays ACV first, then releases depreciation after work is complete |
| Recoverable depreciation | The held-back amount on an RCV policy | Released when you submit proof of completed work |
| Flat dollar deductible | Fixed amount you pay before insurance pays | Predictable out-of-pocket cost |
| Percentage deductible (wind/hail) | A percentage of your dwelling coverage | A 2% hail deductible means thousands of dollars out of pocket |
An asphalt shingle roof partway through its expected lifespan can have substantial depreciation applied to the replacement cost. On a $20,000 replacement, that means an initial ACV check of $8,000–$10,000. With an RCV policy, you recover the remaining $10,000–$12,000 after submitting your final invoice. With an ACV-only policy, that gap is yours to cover.
The Ohio Department of Insurance and other state regulators emphasize that verifying whether your policy is ACV or RCV is the single most consequential step before filing. Pull your declarations page and look for those three letters. If your policy says ACV, factor the depreciation gap into your budget before signing a contract with a contractor.
Recoverable depreciation is released when you submit a final invoice and, if required, a completion certificate from your contractor. The carrier will not release it automatically. You have to ask, and you have to provide the paperwork. Build that step into your project timeline so you are not waiting on funds after the work is done.
How to document roof damage so your claim holds up
Good documentation is not just about photos. It is about creating a timestamped, corroborated record that ties specific damage to a specific weather event.
What to photograph and video:
- Wide shots of each roof face with your street address visible in at least one frame
- Close-ups of individual shingles showing bruising, granule loss, cracked tabs, and missing pieces
- Ridge caps, flashing, gutters, siding, skylights, and any HVAC equipment on the roof
- Interior attic space showing any water staining, wet insulation, or daylight penetration
- Ceiling stains inside the home, with the room and location noted
Supporting data to collect:
- National Weather Service (NWS) storm reports for your area and date of loss — these tie your damage to a documented weather event and are free to download at weather.gov
- Local hail reports from services like the Storm Prediction Center, which log hail size and track by zip code
- Pre-storm photos from Google Street View or your own archive, useful for before/after comparison
Temporary repair receipts to preserve:
- Emergency tarp installation (labor and materials)
- Tree limb removal from the roof
- Any water extraction or interior drying performed after the storm
Carriers reimburse reasonable mitigation costs, but only if you document them. Keep every receipt, photograph the work before and after, and note the date and name of whoever performed the service. Failing to mitigate gives adjusters grounds to exclude water damage that occurred after the storm, so act quickly and document as you go. For context on how winter weather specifically can compound roof damage, winter weather effects on your home’s exterior covers the patterns worth knowing.
Working with the insurance adjuster: what to say and what to avoid
The adjuster inspection is the most consequential hour of your entire claim. How you behave and what you say during that visit shapes the initial scope and, by extension, your first check.
Do’s during the adjuster inspection:
- Be present for the entire inspection
- Have your contractor on the roof with the adjuster
- Point to documented damage using factual, observed language
- Ask the adjuster to note every area you have photographed
- Request a copy of the adjuster’s report and estimate before signing anything
Don’ts during the adjuster inspection:
- Do not speculate about causes (“I think the wind did this”)
- Do not say “I think the whole roof needs replacing” — let the evidence speak
- Do not sign anything on-site, including any authorization or release
- Do not accept the first estimate as final
Use factual, observed language when pointing out damage. A phrase like “I have noted impact marks on the north-facing slope and missing shingles on the ridge cap” is far more useful than “the storm destroyed everything.” Specific, observable descriptions are harder to dismiss and easier to supplement later.
If the adjuster’s estimate comes back short, you have options. You can request a re-inspection, ask for a desk review of specific line items, or have your contractor submit a formal supplement. Adjusters are not roofers and routinely miss items like flashing, ventilation damage, and collateral damage to gutters and siding. A contractor on the roof during the inspection reduces those gaps before the estimate is written, not after.

Pro Tip: Never accept a verbal scope from the adjuster as the final word. Everything that matters is in the written estimate. Request it in writing before the adjuster leaves the property.
How to get estimates and choose a roofer who will protect your claim
Choosing the right contractor is not just about price. It is about finding someone who understands how insurance claims work and can advocate for you through the entire process.
-
Ask about Xactimate. The adjuster’s estimate is almost certainly in Xactimate, the industry-standard estimating software. A contractor who also uses Xactimate can produce a line-item comparison that adjusters can review directly. Xactimate-format supplements approve in roughly 2–3 weeks; nonstandard PDF submissions can take 6–8 weeks and typically recover less.
-
Ask if they will attend the adjuster inspection. This is non-negotiable. A contractor who shows up for the inspection can identify hidden or interconnected damage in real time, before the adjuster closes the scope.
-
Understand contingency agreements. A contingency agreement means the contractor agrees to do the work if and when the insurance claim is approved, at the approved scope and price. You are not committing to pay out of pocket. One qualified contractor who understands claims is typically sufficient — you do not need three competing bids.
Red flags to watch for:
- Any contractor who offers to waive or “eat” your deductible — this is illegal in most states and signals inflated scoping
- Unlicensed operators or contractors without verifiable local references
- Vague contract terms that do not itemize the insurance scope
- High-pressure tactics to sign immediately after a storm
Questions to ask before signing:
- Are you licensed and insured in this state?
- Do you use Xactimate for your estimates?
- Will you attend the adjuster inspection?
- Have you handled supplement claims before, and can you show examples?
- What is your process if the carrier underpays?
Emergency tarps, temporary repairs, and what insurers will reimburse
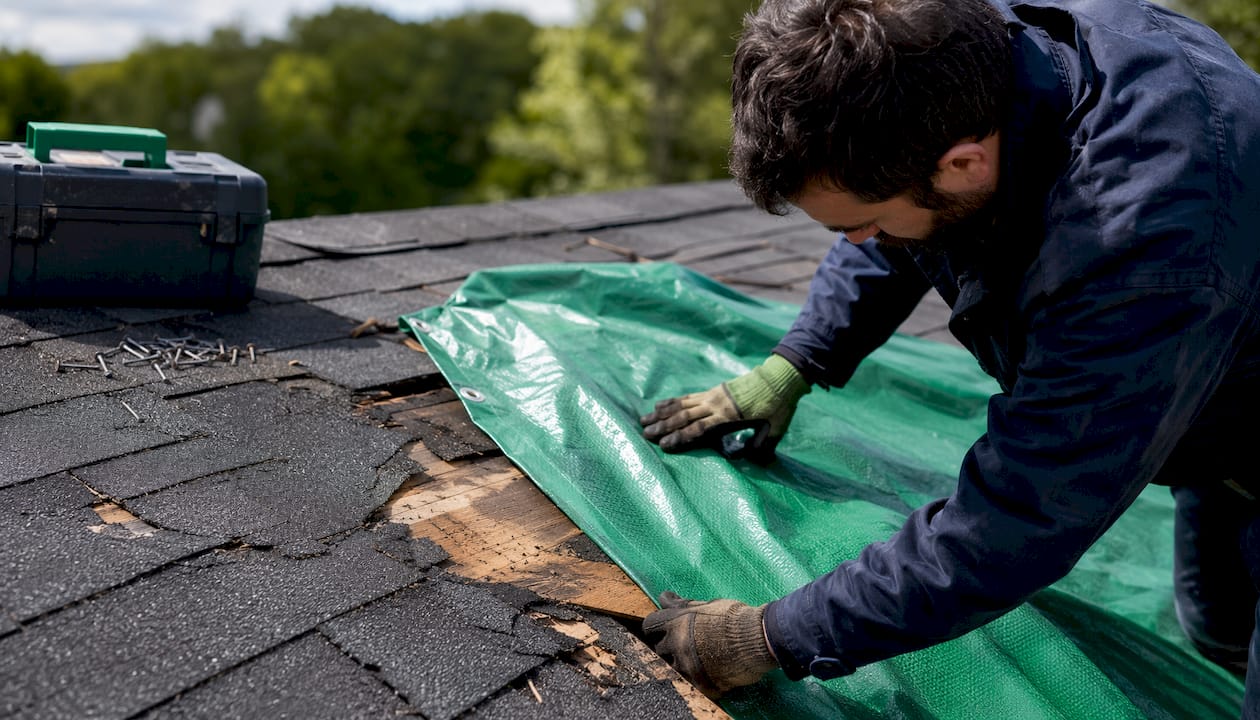
If your roof is actively leaking after a storm, you have a duty under your policy to prevent further damage. Temporary repairs are not optional — they are a policy obligation, and failing to act gives carriers grounds to exclude subsequent water damage from your claim.
Allowable temporary repairs that carriers typically reimburse:
- Emergency tarp installation over damaged or missing sections
- Boarding up openings where structural damage has occurred
- Tree limb removal from the roof surface
- Basic interior water extraction to prevent mold
For each of these, document before and after with photos, keep every receipt, and note the date and the name of whoever did the work. If you hire a contractor for emergency tarp installation, get a written invoice that itemizes labor and materials separately.
One important boundary: do not perform permanent repairs before the adjuster inspects. The exception is a genuine safety hazard — a structurally compromised section that poses immediate risk. In that case, photograph everything before you touch it, document the safety rationale in writing, and notify your insurer before work begins. Permanent repairs made before inspection can give the carrier grounds to dispute the scope, because they can no longer verify the original damage.
How long does a roof insurance claim take, and how are payments structured?
| Stage | Typical timeframe |
|---|---|
| FNOL filed to adjuster assigned | 7–14 days (routine); longer after major storms |
| Adjuster inspection to initial estimate | 3–7 days |
| Initial ACV payment issued | 7–14 days after estimate approval |
| Supplement filed to supplement approval | 2–3 weeks (Xactimate format); 6–8 weeks (PDF) |
| Work completed to depreciation release | 7–14 days after proof of completion submitted |
| Total claim cycle | 45–90 days for a full claim |
The initial check you receive is the ACV payment — the depreciated value of your old roof. On an RCV policy, the carrier holds back the recoverable depreciation until you submit proof of completed work. That second check is not automatic. You have to submit the final invoice and request the release.
If your mortgage lender is listed as a co-payee on your policy, both checks will be made out to you and the lender. The lender must endorse the check before you can deposit it, and some lenders hold funds in escrow and release them in draws as work progresses. Factor two to three extra weeks into your timeline if a mortgage company is involved.
After major storms, adjuster assignment can take 30–60 days as carriers work through a backlog. Filing promptly puts you earlier in the queue. Waiting even a week after a widespread hail event can push your inspection date out by a month.
Common reasons claims are reduced, delayed, or denied
Most claim problems are preventable. The mistakes that cost homeowners money tend to cluster around a few avoidable behaviors.
Common pitfalls:
- Filing late, after the policy’s notification window has closed
- Poor or missing documentation — no photos, no weather data, no receipts
- Allowing the adjuster to inspect alone, without a contractor present
- Accepting the first estimate without comparing it to an independent contractor scope
- Making permanent repairs before the adjuster inspects, eliminating the carrier’s ability to verify damage
- Signing a release or authorization on-site before reviewing the written estimate
- Failing to file supplements for missed line items
Preventive steps that take minimal effort:
- Photograph damage immediately after the storm, before any cleanup
- Call your insurer the same day or the next business day
- Schedule your contractor inspection before or concurrent with the adjuster visit
- Keep every receipt for any storm-related expense, including temporary repairs
- Never sign anything at the inspection — take the written estimate home first
If your claim is denied or significantly underpaid, you have escalation options. Most policies include an appraisal clause, which allows each party to hire an independent appraiser; the two appraisers then select an umpire to resolve disputes. A public adjuster can also represent you in negotiations, though their fees (typically a percentage of the settlement) make them most useful when the carrier is acting in bad faith or when the gap between the adjuster’s estimate and your contractor’s estimate is substantial. As a last resort, filing a complaint with your state Department of Insurance creates a formal record and often prompts a carrier response.
Why your roofer should be on the roof: research-backed reasons supplements matter
The evidence on contractor-attended claims is consistent. Clean Xactimate supplements recover an average of $7,000 or more per claim compared to homeowner-only claims. That gap exists because adjusters, however thorough, are not roofing specialists. They miss items routinely — ice and water shield, drip edge, starter strip, code-required upgrades, and deck rot that only becomes visible once shingles are removed.
Properly formatted Xactimate supplements with linked photos and code citations are approved faster than nonstandard submissions and recover more dollars on average. A contractor who files clean supplements in Xactimate format is not just a convenience — they are a direct financial advantage for the homeowner.
The formatting matters as much as the content. Xactimate-format supplements give the adjuster a line-item comparison they can process directly in their own software. A PDF invoice or a handwritten scope forces the adjuster to manually interpret and re-enter data, which slows approval and creates room for line items to be questioned or dropped.
At Jaghomesnow, our roofing estimates are prepared in Xactimate format, and we attend adjuster inspections as a standard part of our process. We have seen firsthand how a contractor-attended inspection changes the scope — items that would have been missed in a solo adjuster walkthrough get documented, photographed, and included in the initial estimate rather than requiring a supplement fight weeks later.
Key Takeaways
Filing and managing a roof insurance claim successfully comes down to documentation, contractor involvement, and understanding your policy’s payment structure before the adjuster arrives.
| Point | Details |
|---|---|
| Document before anything else | Photograph all damage with timestamps before any cleanup or temporary repairs begin. |
| Know your policy type | ACV policies pay depreciated value only; RCV policies release held depreciation after work is complete. |
| Bring a contractor to the inspection | Contractor-attended claims recover an average of $7,000 more through supplements than homeowner-only inspections. |
| File supplements for missed items | Ice and water shield, drip edge, and deck rot are commonly missed in initial adjuster estimates. |
| Jaghomesnow attends and advocates | Jaghomesnow prepares Xactimate estimates and attends adjuster inspections for homeowners in Bucks County and surrounding areas. |
What we see in the field: a contractor’s honest take on claim outcomes
The homeowners who come out ahead in the roof insurance claim process are almost never the ones who knew the most about insurance. They are the ones who called a contractor before they called the adjuster back.
What we see repeatedly: an adjuster completes a solo inspection in 45 minutes, writes a scope for $9,000, and the homeowner accepts it because the number sounds reasonable. Then a contractor walks the same roof and finds $16,000 worth of legitimate, documented damage — ice and water shield that code requires but the adjuster did not include, drip edge on all four sides, a section of decking with soft spots that only shows up when you walk it. The supplement process recovers most of that gap, but it takes weeks and requires the homeowner to push back on a carrier that has already issued a check.
The simpler path is having a qualified roofer present from the start. The adjuster’s job is to document what they see. A roofer’s job is to know what to look for. Those are different skill sets, and the overlap is not as large as most homeowners assume.
Jaghomesnow handles insurance-backed roofing in Bucks County and nearby areas
When your roof is damaged and the insurance process feels like a second job, having a contractor who knows the claim side as well as the construction side makes a real difference.

Jaghomesnow provides roofing replacement and repair services for homeowners in Bucks County, Montgomery County, and surrounding areas, with Xactimate-format estimates and contractor attendance at adjuster inspections built into our standard process. We prepare the documentation carriers need, file supplements for missed line items, and stay in communication with your adjuster so you are not managing that back-and-forth alone. Whether your claim is straightforward or requires a supplement fight, we handle the roofing side so you can focus on getting your home back to normal. To get started, request a roofing estimate and we will schedule an inspection at a time that works for you.
Authoritative resources to confirm details before you file
Before filing, verify the rules that apply specifically to your state and policy. These sources are free, official, and worth bookmarking.
- Your state Department of Insurance: Search “[your state] Department of Insurance” to find your state’s official site. Confirm the statute of limitations for property claims, your carrier’s complaint history, and any matching rules that apply to roof replacements. Each state sets its own deadlines and consumer protections.
- National Weather Service (weather.gov): Download storm reports for your area and date of loss. NWS reports document hail size, wind speed, and storm track by location and are accepted by carriers as corroborating evidence for covered perils.
- NOAA Storm Prediction Center (spc.noaa.gov): Provides hail reports searchable by date and geography. Useful for confirming hail size at your specific address, which affects whether damage qualifies as a covered event.
- Verisk/Xactimate (verisk.com): Verisk publishes explanations of how Xactimate pricing works and why it is the industry standard for property claims. Understanding the format helps you evaluate your adjuster’s estimate and ask informed questions about line items.
- Your policy declarations page: Not a website, but the most important document in your claim. Confirm whether you have ACV or RCV coverage, your deductible structure (flat dollar vs. percentage), and any endorsements that modify standard coverage before you file.
This article is general information for U.S. homeowners and is not legal or insurance advice. Deadlines, coverage rules, and carrier obligations vary by state and policy. Confirm the specifics of your situation with your insurer, your state Department of Insurance, or a licensed public adjuster before making decisions based on your individual claim.
Recommended
- How to Know It’s Time for a Roof Replacement in Yardley or Doylestown – JAG Home Enhancements
- How Winter Weather Impacts Your Home’s Exterior — and What Bucks County Homeowners Can Do Now – JAG Home Enhancements How Winter Weather Impacts Your Home’s Exterior in Bucks County, PA | JAG Home Enhancements
- Why Proper Roofing Ventilation Matters for Homes in Bucks County and Montgomery County – JAG Home Enhancements Roofing Ventilation in Bucks County | JAG Home Enhancements
- Exterior Upgrades That Add Home Value in Bucks County PA | JAG