

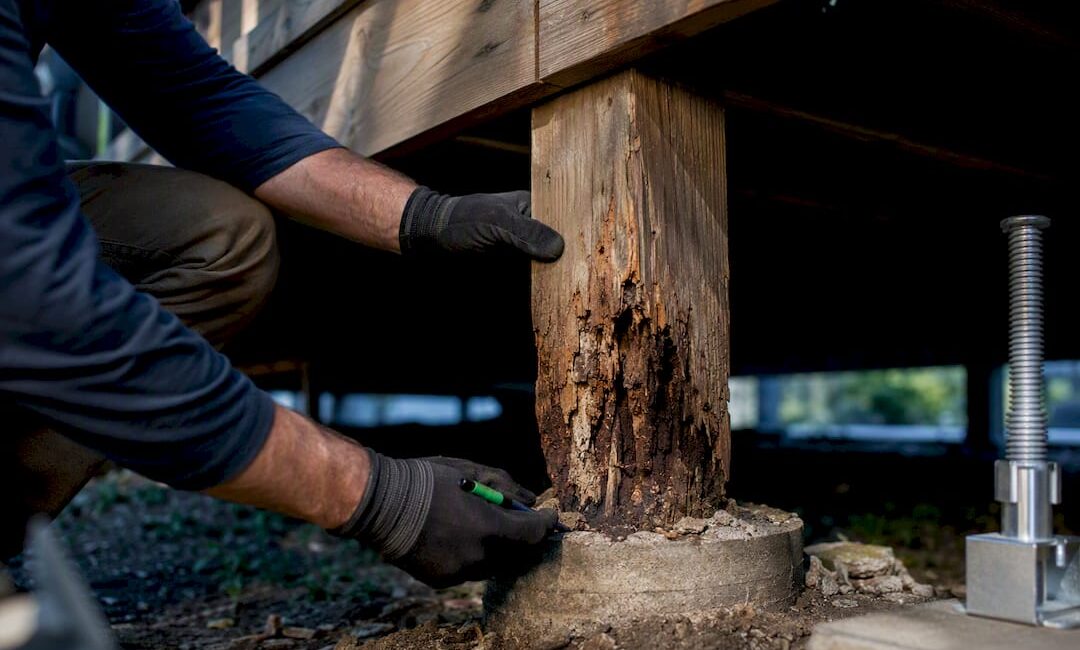
Small, surface-level rot on a deck post can usually be fixed with wood hardener and epoxy filler. Rot that significantly compromises a substantial portion of the post’s diameter, or reaches the beam above it, means the post needs to come out and be replaced. Either way, brace the deck before you touch a tool. A post under load can shift the moment you start cutting into it, and that’s how a weekend repair turns into an ER visit.
TL;DR:
- If more than 25% of a post’s diameter is rotted or hollow, replacement rather than patching is the safest and most durable solution.
- Small, localized rot can often be repaired with epoxy filler only if the wood is dry and the damage affects less than 25% of the post.
- Fully removing and replacing a post requires proper bracing, a sturdy footing, and corrosion-resistant hardware to ensure safety and longevity.
- Regular inspections, including probing at ground level and checking hardware for rust, help catch early signs of rot before costly repairs.
- Complex or widespread rot, especially involving the beam or when multiple posts are affected, warrants calling a licensed contractor for a full structural assessment.
Table of Contents
- Rotted Deck Post Repair: How to Tell If You Can Patch It
- Fixing Small Rot With Wood Hardener and Epoxy Filler
- Replacing a Rotted Deck Post the Safe Way
- Stopping Deck Post Rot Before It Starts Again
- When to Call a Licensed Contractor Instead
- What We See Most Often on Job Sites
- Let JAG Handle the Structural Work
- Sources
Rotted Deck Post Repair: How to Tell If You Can Patch It
Grab a flathead screwdriver or an awl and start probing. Press it into the post at ground level, at the point where the post meets the concrete footing, and anywhere the wood looks discolored or soft. Sound wood resists the tool. Rotted wood lets it sink in easily.
If the screwdriver sinks more than a quarter inch, you’ve got active rot, and that’s your first real data point. The second is scope: how much of the post’s cross-section is actually affected?
Here’s the working rule we use on job sites:
- Under 25% of the post diameter is soft: an epoxy or wood-hardener repair is a reasonable, durable fix.
- Over 25% is soft, or the wood feels hollow when you tap it: replace the post rather than patch it.
- Rot has traveled up the post toward the beam, or shows on multiple posts: treat this as a replacement job, and possibly a call to a professional.
- The beam or ledger board itself feels soft: stop diagnosing and start planning a full replacement, because the load path is compromised.
Cost and effort track with those categories. A DIY epoxy patch typically runs under $50 in materials and an afternoon of your time. A DIY post replacement adds lumber, a post base bracket, and bracing equipment, often $100 to $300 per post depending on what you already own. Professional replacement labor commonly lands in the low hundreds to several hundred dollars per post, more if the footing or beam needs attention too.
Fixing Small Rot With Wood Hardener and Epoxy Filler
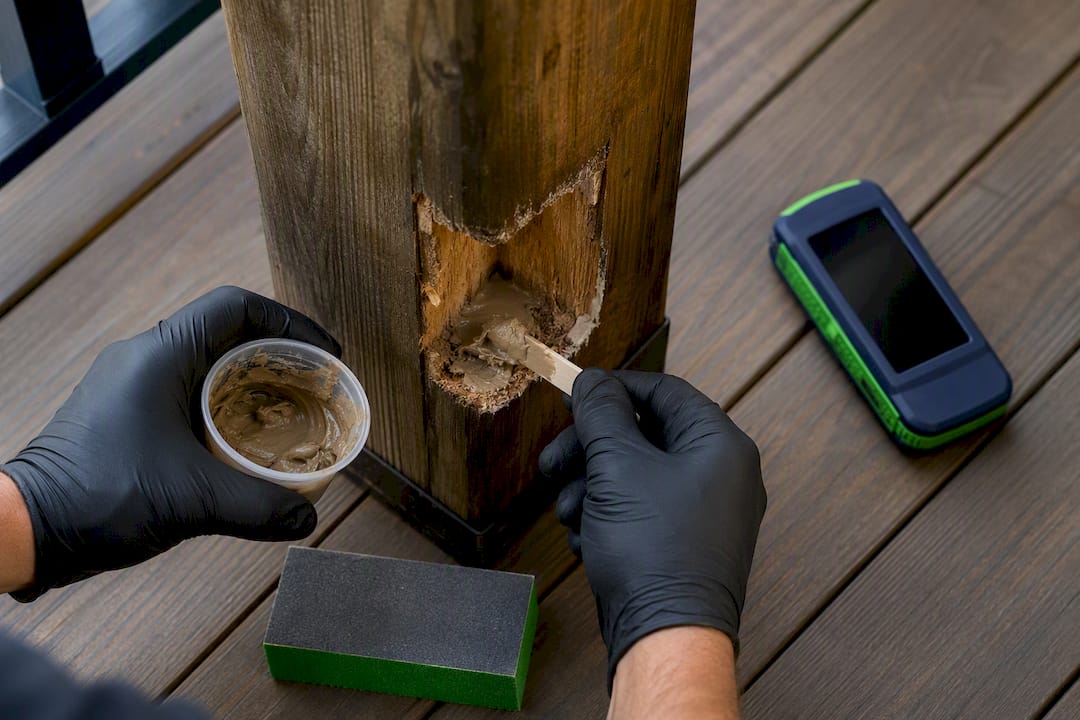
Epoxy repair works when the damage is localized and everything around it, including the beam, is structurally sound. It does not work on damp wood. Before you fill anything, the affected area needs to test below 18% moisture content, or the epoxy simply won’t bond the way it should.
Tools and materials you’ll need:
A moisture meter, a rotary tool or grinder (a V-bit works well for carving out soft wood), two-part epoxy wood filler, a liquid wood hardener, disposable brushes, sandpaper (80 and 150 grit), exterior primer or paint, and basic PPE: gloves, a dust mask, and eye protection.
The repair sequence:
- Dig out every trace of soft, discolored wood with the grinder or rotary tool until you hit solid material.
- Let the area dry fully. In humid weather this can take a few days, not a few hours.
- Brush on wood hardener to stabilize the exposed fibers and give the epoxy something firm to grip, following product instructions.
- Mix and apply epoxy filler, packing it into the cavity slightly higher than the surrounding surface.
- Once cured, sand it flush, then prime and paint or seal to match the post.
The most common mistake isn’t rushing the epoxy step. It’s rushing the removal step and leaving a sliver of soft wood buried under a hard shell that keeps rotting from the inside. The second most common mistake is applying filler to wood that still feels cool and damp to the touch.
Pro Tip: Polyester-based fillers set up fast and are easy to shape, but they sag on vertical surfaces like a post face. Two-part epoxy costs a little more and takes longer to cure, but it holds its shape and bonds better on upright repairs.
Treat this kind of patch as a 5 to 10 year fix, not a permanent one. It buys time on a post that’s otherwise sound.
Replacing a Rotted Deck Post the Safe Way
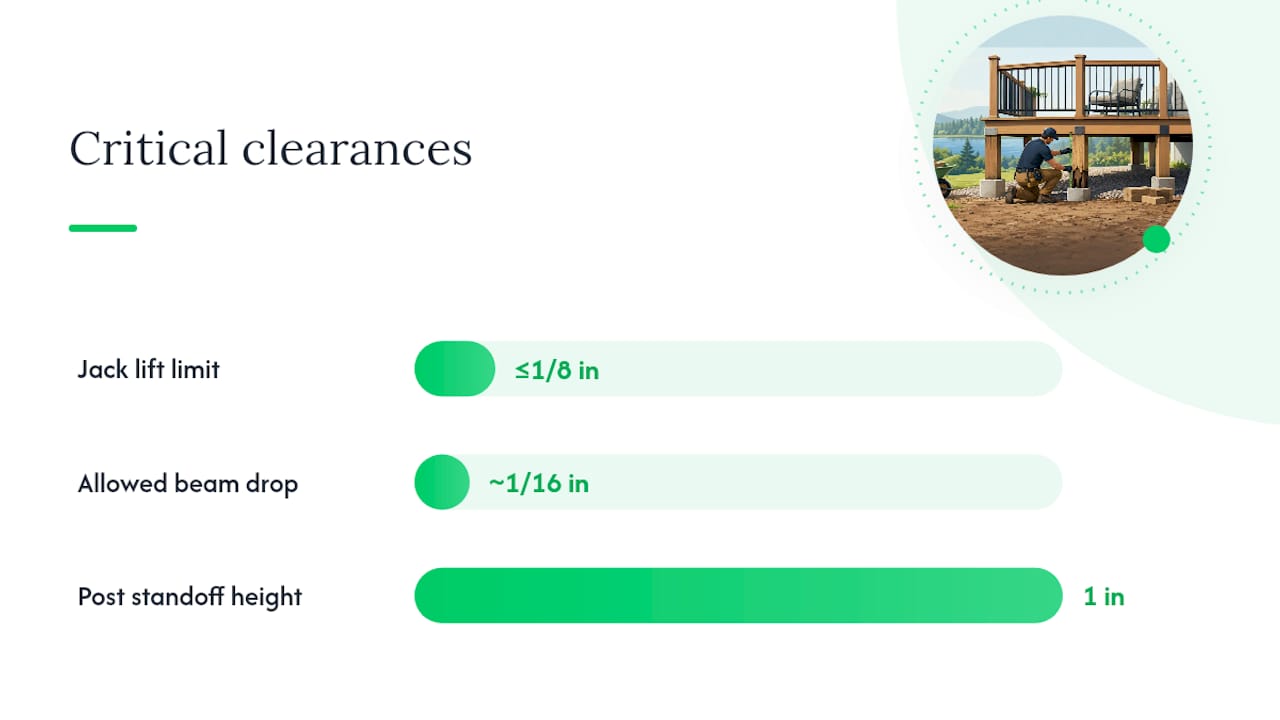
Before you cut anything, brace the deck. Set hydraulic jacks with solid blocking under the beam, positioned on both sides of the post you’re removing, and lift just enough to take weight off that post, no more than an eighth of an inch or so. A properly braced beam shouldn’t drop more than about 1/16 inch when the old post comes out. If you see more movement than that, stop and add more support before proceeding.
Once the beam is secure, cut the old post free. If it’s set in a concrete footing, you’ll likely need to break it loose from the footing or cut it off at grade and drill out the stub, then clean the footing surface so it’s flat and free of debris.
Material and hardware choices matter here:
- Pressure-treated lumber, cedar, or a composite post sleeve over a treated core all work; treated pine is the most common and cost-effective choice.
- Seal every cut end, especially the bottom, with a copper naphthenate wood preservative before installation. End grain soaks up moisture faster than any other part of the post.
- Install a metal post base or standoff bracket anchored into the footing with corrosion-resistant anchors rated for exterior use.
- Use fasteners rated for exterior use and corrosion resistance. Plain zinc hardware corrodes quickly against treated lumber and loses grip within a few seasons.
A standoff base isn’t optional if you want the new post to outlast the old one. Posts set directly against or buried in concrete stay damp longer than posts elevated above it, because concrete wicks and holds moisture against the wood grain. A simple bracket that lifts the post an inch off the footing breaks that cycle almost entirely.
Reconnect the beam to the new post, release the jacks slowly, and check that the post sits plumb and the beam is fully seated before you remove the bracing. Walk the deck and check for bounce or movement at that corner before calling the job finished.
Stopping Deck Post Rot Before It Starts Again
Most repeat rot traces back to water that never had anywhere to go. A one-inch standoff gap between the post base and the ground or footing keeps splashback and standing moisture away from the most vulnerable part of the post.
A few habits make a real difference over the life of a deck:
- Keep mulch, soil, and dense plantings pulled back from post bases; vegetation traps moisture against wood and blocks airflow.
- Regrade low spots near footings and aim downspouts away from the deck structure, not toward it.
- Set new footings on a gravel pad so water drains instead of pooling under the post.
- Seal every cut end with preservative, and follow up with a quality exterior wood finish on exposed faces.
- Walk the deck every spring and probe posts at ground level. Catching soft spots early is what keeps a $50 patch from becoming a $300 replacement.
Pro Tip: Check hardware for rust streaks during your spring inspection. Corroding fasteners often show trouble before the wood around them does.
For a broader seasonal routine beyond post checks, our deck maintenance checklist covers the other spots that tend to fail first.
When to Call a Licensed Contractor Instead
Some situations are past the point where a confident DIYer should keep going alone.
- More than one post shows soft wood, hollowing, or rot climbing toward the beam.
- The beam or ledger board itself is compromised, not just the post.
- The deck sits more than about six feet off the ground, or the framing has an unusual or complex load path.
- Your municipality requires a permit for structural repairs, which is common for any work touching footings or load-bearing members.
A qualified contractor brings a few things a DIY job can’t: a full structural read on the whole deck, not just the post you noticed; proper permit handling where required; and a written scope and timeline before work starts. A good contractor visit should end with a clear diagnosis, an itemized quote, and a realistic schedule, not a vague estimate scratched on a business card.
What We See Most Often on Job Sites
After years of walking onto decks where a homeowner already tried a repair, the failures rarely come from bad materials. They come from skipped steps. The most common one: bracing that “seemed fine” but let the beam drop enough to rack a ledger board out of square. The second: patching a post without ever asking why it rotted in the first place, so the same spot fails again in three years.
If you hire out the replacement, ask direct questions: How will you brace the structure? What anchors and fasteners are you using, and are they rated for exterior contact with treated lumber? Will you install a standoff base, or set the new post the same way the old one failed? Our guide on vetting a remodeling contractor covers the rest of the questions worth asking before anyone signs a contract.
— Jeff
Let JAG Handle the Structural Work
If the probe test told you a post is past patching, or you’d simply rather not brace a beam yourself, JAG Home Enhancements handles deck post repair and replacement as a straightforward, permit-aware service rather than a guessing game. We diagnose the actual scope on site, including whether footings, beams, or multiple posts are involved, before giving you a fixed quote. Every job comes with proper bracing, corrosion-resistant hardware, standoff bases where the footing calls for one, and a clean site when we leave.

We work across Bucks County and the surrounding area, and structural post repairs are the kind of job worth getting right the first time. If your deck needs more than a patch, get in touch through our custom deck builder page and we’ll schedule an inspection.
Sources
- How to fix rotted wood with epoxy — This Old House
- How to Replace a Rotted Deck Post Without Tearing Down Your Entire Deck – Daisy Rage
- How to repair rotted wood — Family Handyman