

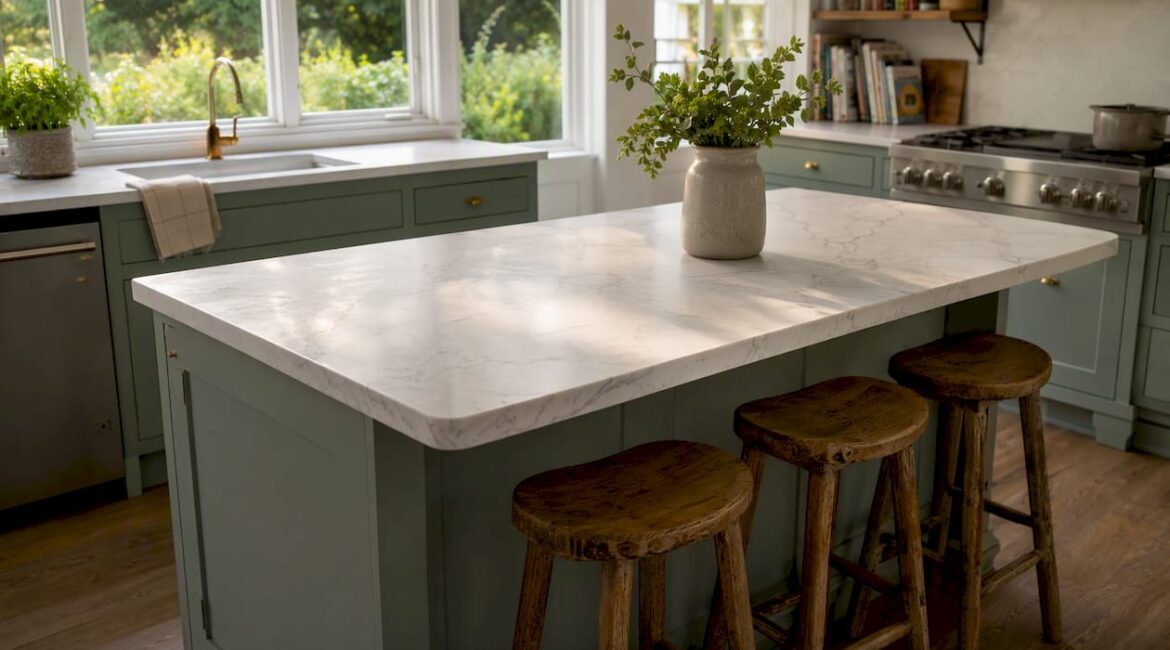
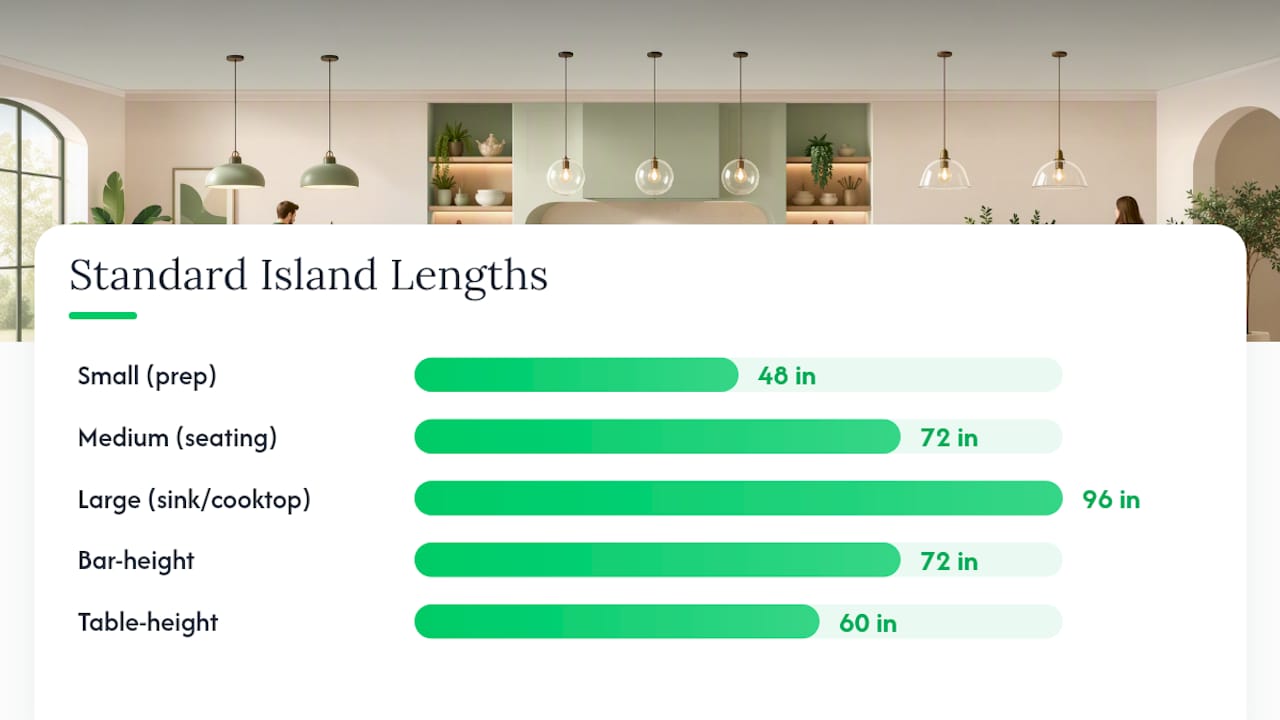
For most U.S. kitchens, a good starting footprint is 48"×24" for a small island, 72"×36" for a typical medium, and 96" or longer for a large kitchen. Standard height is 36 inches. Surrounding clearance should be at least 36 inches on every side, with 42–48 inches preferred, and 48 inches strongly recommended when two people cook at the same time.
A few immediate exceptions apply:
- Seating requires 12–15 inches of overhang beyond the base cabinet and at least 24 inches of linear length per stool.
- Islands with a cooktop or sink need a wider footprint (typically 36–42 inches deep) and additional clearance for appliance door swings.
- The National Kitchen and Bath Association (NKBA) recommends 42–48 inches for work aisles as the comfortable standard.
- A commonly used designer rule: keep the island footprint under roughly 10% of the kitchen’s total floor area to maintain proportion and workflow.
These numbers give you a quick feasibility check. The sections below explain how to apply them to your specific kitchen.
Key Takeaways
Proper kitchen island dimensions depend on three things working together: a proportional footprint, verified aisle clearances, and overhang support matched to your countertop material.
| Point | Details |
|---|---|
| Start with the footprint range | Small: 48"×24"; medium: 72"×36"; large: 96"×42" or longer, at standard 36" height. |
| Never drop below 36" clearance | Preferred aisle width is 42–48"; 48" is the floor when two cooks share the space. |
| Match overhang to counter height | Counter height needs 12–15" overhang; overhangs beyond 12" require corbels or steel brackets. |
| Apply the 10% rule | Keep island footprint under roughly 10% of total kitchen floor area to preserve workflow. |
| Jaghomesnow handles the full scope | Design, structural support, plumbing/electrical coordination, and countertop procurement in Bucks County and nearby. |
Mock up your island with painter’s tape and test every appliance door swing before ordering materials — it takes 20 minutes and can prevent a costly redesign.
Table of Contents
- What Are the Standard Kitchen Island Dimensions?
- How Much Clearance Does a Kitchen Island Need?
- Seating rules: how deep is the overhang and how many stools fit?
- How to choose the right island size for your kitchen
- How does island function change the size you need?
- A step-by-step checklist to measure and plan your island
- When should you hire a contractor for island installation?
- What most homeowners get wrong about island sizing
- Ready to plan your kitchen island with Jaghomesnow?
- Sources
What Are the Standard Kitchen Island Dimensions?
According to widely used sizing benchmarks, a 4’×2’ (48"×24") island suits small kitchens as a prep surface, a 6’×3’ (72"×36") island is the typical medium that supports both storage and seating, and large kitchens can accommodate islands 8 feet or longer that may include a sink or cooktop. Island width (depth) typically runs 30–48 inches, and length commonly ranges from 60–120 inches.
Standard island height is 36 inches, matching most base cabinets. Bar-height islands run 42 inches, table-height islands drop to 30 inches, and ADA-accessible counters max out at 34 inches.
| Island Size | Length × Width | Height | Typical Use | Stools Supported |
|---|---|---|---|---|
| Small | 48" × 24" | 36" | Prep only | 0 |
| Medium | 72" × 36" | 36" | Prep + seating | 3 |
| Large | 96" × 42" | 36" | Prep + seating + sink/cooktop | 4 |
| Bar height | 72" × 36" | 42" | Seating-focused | 3 |
| Table height | 60" × 30" | 30" | Casual dining | 2–3 |
Pro Tip: Large stone slabs (over 9 feet) may require a seam. Confirm delivery access and doorway clearances with your fabricator before finalizing island length — a seam placed thoughtfully near a sink or appliance is far less visible than one forced by a tight hallway.
How Much Clearance Does a Kitchen Island Need?
Clearance is where most island plans go wrong. The minimum aisle width around any island is 36 inches, but that is tight. The NKBA-style recommendation is 42–48 inches for work aisles, and 48 inches becomes the practical floor when two cooks are moving around simultaneously or when the aisle faces a heavy traffic corridor.
Appliance door swings demand their own space:
- Dishwasher door open: adds roughly 24 inches into the aisle; plan at least 36 inches of clear passage with the door fully open.
- Oven door open: extends 18–24 inches; you need room to stand in front and pull racks without stepping backward into the island.
- Refrigerator door swing: can reach 18–24 inches depending on the model; French-door and side-by-side units need less swing depth but wider lateral clearance.
- Opposing drawers: two facing sets of base cabinet drawers need at least 36 inches between them to open fully without collision.
Clearance floor: Under 36 inches is unsafe and can block door and drawer operation entirely. Never plan an island that tightens any aisle below that threshold.
Testing before you build costs nothing. Lay down painter’s tape or cut cardboard to your planned island footprint, then open every appliance door and every drawer in the surrounding run. Walk through the space carrying a sheet pan. If anything feels cramped, it will feel worse once the island is permanent.
Pro Tip: Stand at the island and look toward the main kitchen entry. If the island blocks your sightline to the stove or refrigerator, it will also interrupt the natural traffic corridor. Shift the island 6 inches toward the wall with more clearance to restore the flow.
Seating rules: how deep is the overhang and how many stools fit?
Overhang depth depends on counter height. For a standard 36-inch counter, plan 12–15 inches of overhang for comfortable knee clearance. A 42-inch bar-height counter needs about 12 inches. A 30-inch table-height surface works best with roughly 18 inches of overhang, which gives seated guests full leg room without a stool footrest.
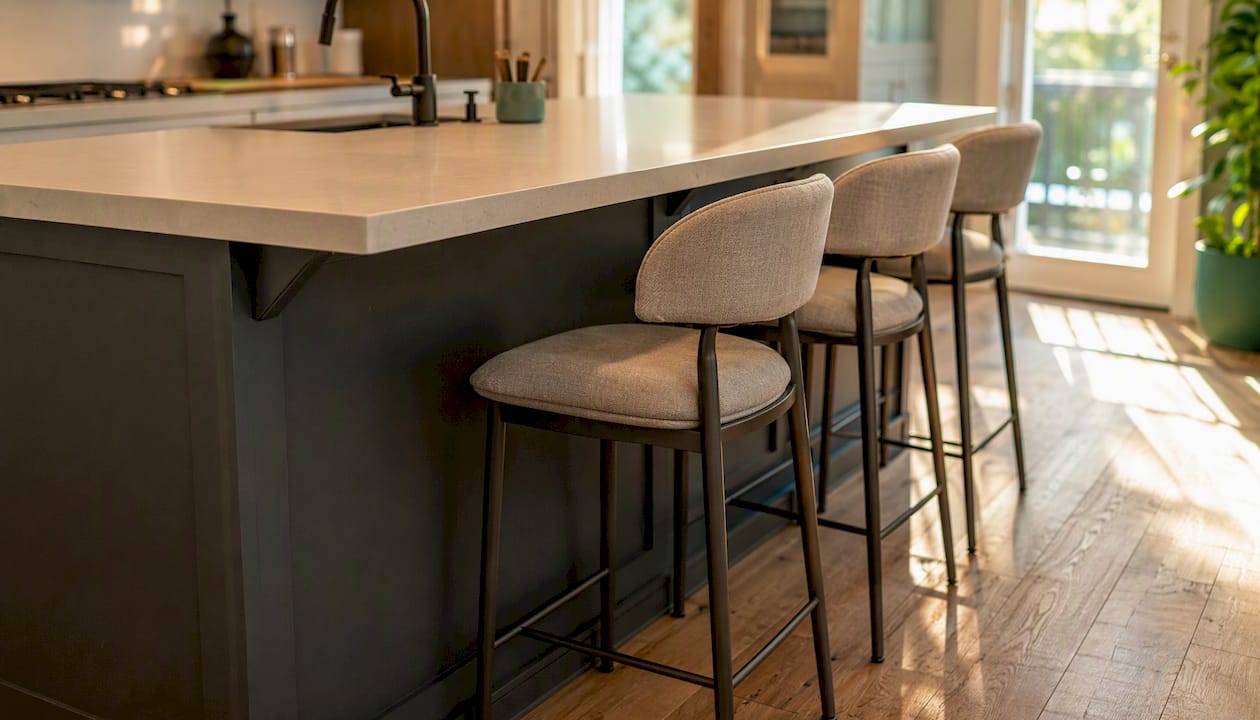
Plan about 24 inches of linear counter length per seat. A 6-foot (72-inch) island seats three; an 8-foot (96-inch) island seats four. If you want to seat people on two sides, add the overhang depth to both sides of the base cabinet width.
| Counter Height | Stool Height | Recommended Overhang | Knee Clearance |
|---|---|---|---|
| 36" (standard) | 24" | 12"–15" | ~15" |
| 42" (bar) | 30" | 12" | ~12" |
| 30" (table) | 18"–20" | 18" | ~18" |
Structural support matters once overhangs exceed 12 inches. A 3-cm stone slab can typically span up to 12 inches unsupported; anything beyond that generally requires corbels, steel brackets, or a knee wall built into the island base. Counter-height seating typically needs about 15 inches of knee clearance, and overhangs beyond 12 inches usually require engineered support regardless of the counter height chosen.
- Confirm overhang support requirements with your fabricator before ordering the slab.
- Corbels and brackets must be anchored to the island’s structural frame, not just the cabinet box.
- For 2-cm slabs, the unsupported span is shorter than for 3-cm material; ask your fabricator for the specific threshold.
How to choose the right island size for your kitchen
The 10% rule gives you a proportional starting point: keep the island footprint under roughly 10% of the kitchen’s total floor area to preserve workflow and avoid a space that feels blocked. A 10×12 kitchen (120 sq ft) should have an island no larger than about 12 sq ft, which is roughly 48"×30". A 12×14 kitchen (168 sq ft) can support up to about 17 sq ft, or roughly 60"×34". A 16×20 kitchen (320 sq ft) can comfortably hold an island around 48"×60" or larger.
Here are three worked examples with clearances verified:
- 10×12 kitchen (120 sq ft): Island at 48"×24" leaves 48 inches of clearance on the long sides and 36 inches at each end. Prep-only; no seating on this footprint without tightening clearances below the preferred range.
- 12×14 kitchen (168 sq ft): Island at 60"×30" with a 12-inch seating overhang on one long side. Three stools fit. Clearance on the seating side: 42 inches. Clearance on the working side: 48 inches.
- 16×20 kitchen (320 sq ft): Island at 96"×42" with a 15-inch overhang on one side. Four stools. Working aisle: 48 inches. Traffic corridor to the back door: 48 inches. Room for a prep sink on the island without compromising either aisle.
You can relax the 10% rule slightly in open-concept kitchens where the island borders a dining or living area rather than a closed run of cabinets. In those layouts, one side of the island faces open space, so the effective clearance is larger than the footprint math suggests.
Pro Tip: Sketch your work triangle (refrigerator, stove, sink) before placing the island. The island should sit inside or adjacent to the triangle, not across it. An island that forces you to walk around it to get from the stove to the sink adds steps every time you cook.
For layout ideas that address appliance positioning relative to the island, this kitchen workflow guide covers sink, stove, and appliance placement in practical terms.
How does island function change the size you need?
A prep-only island can be as shallow as 24 inches and as short as 48 inches. Once you add a function, the footprint grows.
- Sink island: Add at least 6–8 inches of depth to accommodate the sink basin and plumbing rough-in below. The island base needs to be at least 36 inches deep. Plan clearance for the open dishwasher door on the same side; with the door fully open, you need at least 36 inches of clear passage behind it.
- Cooktop island: Depth should be 42 inches minimum to allow safe working space on both sides of the burners. A range hood or downdraft ventilation system is required; the NKBA advises testing full appliance-door swings in the final layout. Clearance to combustible surfaces (wood cabinets, walls) must meet local code, typically 30 inches above the cooktop to the hood.
- Electrical: Any island with outlets, a cooktop, or under-counter appliances requires conduit routed through the floor or a structural wall. Plan the routing path before finalizing island placement; moving it later means reopening the floor.
- Plumbing: A sink or dishwasher in the island requires a drain line and supply lines run under the floor slab or through a crawl space. This affects both island placement and the cost of the project.
Code note: Electrical outlets on an island must meet NEC requirements for GFCI protection. Your contractor or electrician will confirm local jurisdiction requirements, but plan for at least two duplex outlets on the island face for typical use.
For guidance on integrating compact or hidden appliances into the island base without expanding the footprint, this resource on hidden appliance integration covers practical cabinetry approaches.
A step-by-step checklist to measure and plan your island
Work through these steps before you order anything or commit to a layout.
- Measure the room footprint. Record length and width in inches. Note any bump-outs, columns, or fixed runs of cabinets that reduce usable floor space.
- Measure fixed cabinet depth on every wall. Standard base cabinets run 24 inches deep. Subtract cabinet depth from room dimensions to get the open floor area the island will sit in.
- Mark appliance door swings. Tape the full arc of the refrigerator, oven, and dishwasher doors on the floor. This shows exactly how much floor space each appliance consumes when open.
- Lay out your island footprint with painter’s tape or cardboard. Use your target dimensions. Walk around it, open every door, and carry something bulky through the aisles.
- Verify aisle widths. Measure from the tape edge to the nearest cabinet face on every side. Confirm no aisle falls below 36 inches; adjust the island size if needed.
- Calculate seating. Divide the seating-side length by 24 inches to get the maximum stool count. Confirm the overhang depth you need and check whether structural support is required.
- Check countertop delivery dimensions. Measure doorways, hallways, and stairwells on the delivery path. A 96-inch slab may not clear a 36-inch doorframe at an angle; confirm with your fabricator before ordering.
- Mark plumbing and electrical routing paths. If the island will have a sink, cooktop, or outlets, identify where supply lines and conduit will enter the island base from below.
Once the tape layout feels right for two or three days of normal kitchen use, you have a reliable footprint to take to your contractor or fabricator.
- Recheck clearances after any design change, even a small one.
- Confirm the island base can be assembled in the kitchen if the finished unit won’t fit through the door.
When should you hire a contractor for island installation?
Some island projects are straightforward cabinet swaps. Others require permits, structural work, and licensed trades. Here is how to tell the difference.
Hire a professional when:
- The island will include a sink, dishwasher, or cooktop (plumbing and electrical permits required in most jurisdictions).
- The island requires a custom slab with an overhang beyond 12 inches (structural support must be engineered and anchored correctly).
- You are removing a wall or modifying a load-bearing structure to create space for the island.
- The island will have built-in appliances, a range hood, or a downdraft ventilation system.
- You are unsure whether your floor can support the combined weight of a stone slab, base cabinets, and appliances.
Questions to ask any contractor or fabricator before signing:
- Have you installed islands with plumbing and electrical in this county before, and can you pull the required permits?
- How do you support overhangs beyond 12 inches — corbels, steel brackets, or a structural knee wall?
- What is your process for coordinating the countertop fabricator with the cabinet installation schedule?
- Can you provide references for two or three completed island projects, including at least one with a sink or cooktop?
- How do you handle slab delivery and installation in homes with narrow doorways or tight hallways?
Jaghomesnow handles all of these scenarios for homeowners in Bucks County and the surrounding area, including design coordination, structural support, plumbing and electrical rough-in, and countertop procurement. For guidance on choosing the right remodeling contractor before you start interviewing, that resource walks through the vetting process in detail.
What most homeowners get wrong about island sizing
The single most common mistake we see at Jaghomesnow is an island that is sized for the kitchen’s square footage but not for its actual traffic pattern. A homeowner measures the room, applies the 10% rule, and ends up with an island that technically fits but sits directly across from the dishwasher. Every time the dishwasher door opens, the aisle drops to 18 inches. Nobody catches it until the cabinets are in.
The second mistake is ignoring slab transport. A client in Bucks County had a beautiful 9-foot quartz island designed for their kitchen, only to discover on delivery day that the slab could not turn the corner from the garage into the kitchen without a seam. The fix was a planned seam near the prep sink, which ended up invisible in daily use, but the redesign added two weeks to the project. Confirming the delivery path costs nothing and saves real time.
The third mistake is underestimating overhang support. Homeowners see a 15-inch overhang on a showroom island and assume their fabricator will handle it. Sometimes they do. Sometimes the slab arrives with no provision for brackets, and the overhang deflects within a year. Ask your fabricator in writing what support method they recommend for your specific slab thickness and overhang depth, and make sure that support is built into the island frame before the countertop is set.
Good planning is mostly about asking the right questions before anything is ordered. The dimensions are the easy part.
Ready to plan your kitchen island with Jaghomesnow?
Getting the dimensions right on paper is one thing. Building an island that holds up, looks right, and works the way you planned is another. Jaghomesnow brings full-service kitchen remodeling in Bucks County to homeowners who want the job done correctly the first time, from layout planning and structural support to plumbing and electrical coordination and countertop procurement.

We serve Bucks County, Montgomery County, and nearby areas in Pennsylvania. If you are sizing an island and want a professional set of eyes on your floor plan before you commit, reach out to Jaghomesnow for a free consultation. We will measure your kitchen, walk through clearance and seating options with you, and give you a clear picture of what the project involves before you sign anything.
Sources
These references informed the dimensional guidance and clearance recommendations throughout this guide.
- Homes & Gardens — Kitchen clearances, measurements and spacing
- Fabuwood — Kitchen island size guide
- RoomSketch3D — Kitchen counter and island dimensions
- Countertop Authority — Countertop overhang guidelines and structural requirements
- Hernest — 2026 Kitchen Island Size Guide: How Tall and Wide Should It Be
- Masters Countertops — The perfect kitchen island size
- Novatile and Stone — Standard countertop overhang: measurements, seating and support guide
Ranges across these sources vary slightly because kitchen configurations differ. Where sources disagreed, this guide used the more conservative figure for clearances and the NKBA-aligned recommendation for work aisles.