

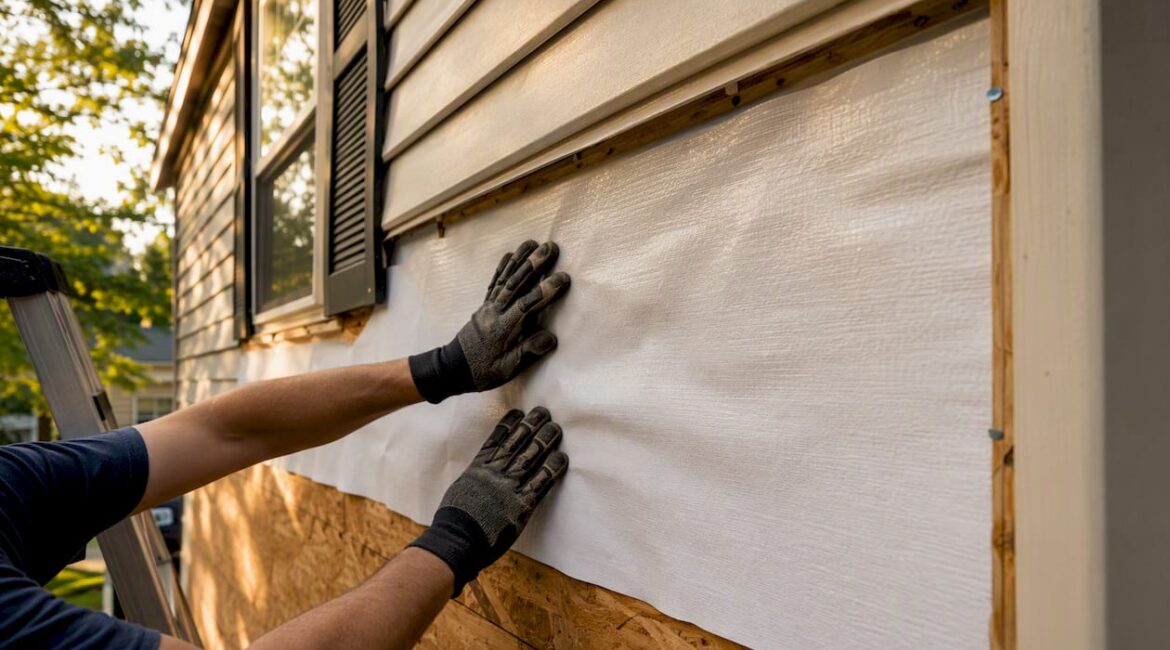
Yes, you need house wrap under siding in most cases, and skipping it is one of the costliest mistakes a homeowner can make. A weather-resistive barrier (WRB) is the industry term for what most people call house wrap. It belongs between your sheathing and your siding on nearly every residential wall assembly. If you’re re-siding now, plan to install a WRB before the new cladding goes up. If you’re hiring a contractor, ask them directly how they’ll integrate the WRB with window and door flashing before you sign anything.
Two trust signals worth knowing upfront:
- The 2006 International Residential Code (IRC) update made WRBs a clear requirement behind vinyl siding for most new construction and re-siding projects, as confirmed by code evolution research from Vertex Engineering.
- Building Science Corporation and Building America both recommend a properly installed WRB as a standard component of any durable wall assembly, regardless of siding type.
Key Takeaways
A weather-resistive barrier installed under siding is required by the 2006 IRC for most vinyl siding assemblies and is the single most effective way to prevent moisture damage, mold, and energy loss in a wood-framed wall.
| Point | Details |
|---|---|
| WRB is required for most siding | The 2006 IRC made WRBs standard behind vinyl siding; pre-2000 homes often lack one entirely. |
| Perm rating drives product choice | Polymeric wraps run 10–60 perms vs. ~5 perms for felt; higher perms support faster outward drying. |
| Placement with foam matters | Building America recommends WRB exterior of rigid foam for durability and simpler flashing integration. |
| Installation quality is the deciding factor | Untaped seams and poor flashing integration cause moisture problems even with premium wrap products. |
| Jaghomesnow documents every WRB layer | Photo documentation of seams and flashing details is standard on every JAG siding project in Bucks County. |
Table of Contents
- What is house wrap and how does it differ from a vapor barrier?
- Why house wrap matters for siding, especially vinyl
- Which WRB materials work best for your siding assembly?
- Where should house wrap go when you’re using rigid foam?
- How to install house wrap: a step-by-step overview
- Questions to ask your contractor before work starts
- What does house wrap installation cost during a re-siding project?
- When can you skip or substitute a WRB?
- A remodeler’s perspective on what actually matters in the field
- Jaghomesnow handles siding and WRB installation the right way
- Sources
What is house wrap and how does it differ from a vapor barrier?
A weather-resistive barrier is a thin, flexible membrane installed over wall sheathing to block liquid water and reduce air infiltration while still allowing water vapor to escape outward. That last part is what separates it from a vapor barrier. A vapor barrier (typically polyethylene sheeting) goes on the warm side of insulation inside the wall to stop moisture-laden interior air from reaching cold surfaces. A WRB goes on the exterior, and its job is almost the opposite: let the wall breathe while keeping rain out.
Three functions define what a WRB does:
- Blocks liquid water driven by wind and rain from reaching the sheathing and framing.
- Reduces air infiltration through gaps and seams in the sheathing layer.
- Allows water vapor to diffuse outward so trapped moisture can dry toward the exterior.
Two specs you’ll see on product packaging are worth understanding. Perm rating measures how easily water vapor moves through the material; a higher perm means better outward drying. Hydrostatic head measures how much water pressure the material resists before liquid passes through. According to InspectApedia’s comparative data on sheathing wraps, polymeric housewraps typically report perm ratings of 10–60 perms, while No. 15 asphalt felt runs around 5 perms when dry. Higher permeance generally helps the wall assembly dry faster after any moisture intrusion.
Permeance is a more useful spec than vague marketing language. When comparing products, ask for the perm rating number, not just the claim that a wrap “breathes.”
Why house wrap matters for siding, especially vinyl
Vinyl siding is not watertight. Wind-driven rain routinely gets behind the panels through laps, seams, and penetrations, and when it does, it hits whatever is behind the siding directly. Without a WRB, that means wet OSB or plywood sheathing, wet insulation, and eventually wet framing. Today’s Homeowner’s guide on vinyl siding and WRBs confirms that a properly installed WRB combined with effective flashing can extend wall assembly lifespan by preventing moisture accumulation in insulation and framing.
The risks of skipping a WRB are concrete and expensive:
- Sheathing rot that requires full panel replacement before re-siding is possible.
- Mold growth inside the wall cavity, which creates health concerns and remediation costs.
- Saturated insulation that loses its R-value and drives up heating and cooling bills.
- Reduced wall assembly lifespan, which affects resale value and inspection outcomes.
The code history matters for older homes. The IRC and ASTM vinyl siding installation standards shifted around 2006 to explicitly require a WRB behind vinyl. Homes built before 2000 often have no WRB at all. If you’re re-siding a pre-2000 house, you’re not just updating the look; you’re also getting the chance to add moisture protection that was never there. That’s worth doing right.
Which WRB materials work best for your siding assembly?
Not all house wraps perform the same way, and the right choice depends on your climate, your siding type, and whether you’re adding exterior rigid foam. Here’s how the main categories compare.
| WRB Type | Perm Rating (approx.) | Liquid Water Resistance | Drainage Capability | Best For |
|---|---|---|---|---|
| Nonperforated polymeric wrap (e.g., Tyvek HomeWrap, Typar) | 10–60 perms | High | Flat; limited drainage | Most siding types; high-wind regions |
| Perforated polymeric wrap (e.g., Barricade) | Variable; can be lower | Moderate | Flat | Moderate climates; budget-conscious projects |
| Drainable housewrap (e.g., HomeSlicker-style mats) | High | High | Excellent; 3D drainage gap | High-rainfall climates; fiber cement siding |
| No. 15 asphalt felt | ~5 perms | Moderate | Flat | Older assemblies; wood siding; low-cost option |
| Rigid foam as WRB | Varies by foam type | High (if taped) | None without furring | Continuous insulation assemblies; requires taped seams |
| Fluid-applied WRB | High | Very high | None | Complex geometries; commercial-grade residential |
A few product names you’ll encounter at the supply house:
- Tyvek (DuPont) is the most widely recognized nonperforated polymeric wrap. Its HomeWrap product is the standard residential choice; CommercialWrap is stiffer and used on larger projects.
- Typar is another nonperforated option with a slightly different fiber structure, often cited for UV resistance during extended exposure before siding goes up.
- Barricade is a perforated wrap that costs less than the premium nonperforated options and works well in moderate climates where extreme wind-driven rain is less of a concern.
Drainable wraps add a textured or mat-like surface that creates a small drainage gap between the WRB and the sheathing. In high-rainfall climates or with fiber cement siding, that gap matters because it lets water drain down and out rather than sitting against the sheathing. National Siding Authority guidance notes that housewrap is generally preferred over felt for vinyl siding installed over OSB sheathing, particularly where inspections require WRB visibility before cladding is applied.
For fiber cement siding installations, a drainable wrap or a rainscreen gap is often the better choice because fiber cement is heavier and holds more moisture at the surface.
Where should house wrap go when you’re using rigid foam?
This is where assemblies get more complex, and where many contractors make decisions that affect long-term performance. There are three common sequences when exterior rigid foam is part of the wall:
- WRB over sheathing, foam over WRB: The WRB sits against the sheathing, and foam goes on top. Flashing at windows integrates with the WRB layer, which is straightforward. The foam adds R-value outside the drainage plane.
- Foam over sheathing, WRB over foam: The foam goes on first, and the WRB is taped or applied over it. Flashing integrates with the WRB at the foam face. This is the sequence Building America recommends for many high-performance assemblies because it protects the drainage plane and simplifies flashing integration.
- Foam acting as the WRB (no separate wrap): The foam panels are taped at seams and serve as the moisture barrier. No separate WRB is installed. This works, but it depends entirely on tape longevity, and builders generally recommend a dedicated WRB over foam for long-term durability.
Building Science Corporation’s Guide to Insulating Sheathing (GM-0702) walks through multiple wall section options and explains that the right choice depends on climate zone, wind exposure, and how flashing details are handled. In high-rain regions like the Mid-Atlantic, WRB exterior of foam tends to be the more durable choice.
Window and door flashing integration checklist:
- Flash the sill pan before the window unit goes in, sloping toward the exterior.
- Integrate the WRB with the sill flashing using shingle-style laps (WRB over the top of flashing at the sides and head).
- Seal all penetrations (pipes, outlets, hose bibs) with compatible flashing tape before siding is applied.
- Confirm that head flashing above windows and doors laps over the WRB, not under it.
Pro Tip: When combining window replacement with re-siding, sequence the work so the WRB is installed before windows are set. This makes sill pan flashing and WRB integration far cleaner and reduces the chance of a gap at the rough opening.
How to install house wrap: a step-by-step overview
Installation quality matters more than product choice. Poorly lapped or untaped seams can allow moisture intrusion even with a premium wrap. Here’s the sequence that experienced installers follow:
- Prep the sheathing. Repair any damaged panels, drive protruding fasteners flush, and remove old staples or debris.
- Start at the sill. Begin at the bottom of the wall and work upward so each course overlaps the one below like shingles on a roof.
- Maintain shingle laps. Horizontal laps should overlap by at least 6 inches; vertical laps at corners and seams by at least 12 inches. Check the manufacturer’s spec sheet for your specific product.
- Tape all seams. Use a compatible seam tape (Tyvek tape for Tyvek, Typar tape for Typar). Untaped seams are one of the most common field failures.
- Integrate flashing before windows go in. Sill pan flashing goes in first, then the WRB laps over the sides and head flashing laps over the WRB.
- Fasten correctly. Use cap nails or cap staples; standard staples can tear through the wrap under wind load.
- Protect exposed wrap. If siding won’t go up immediately, limit UV exposure. Most wraps degrade after 60–90 days of direct sun exposure.
Pro Tip: If you’re re-siding a house with mounted windows already in place, flashing integration becomes significantly more complex. That’s the point where most DIYers should bring in a professional. A missed gap at a window corner can cause years of hidden water damage before it shows up inside.
For guidance on choosing the right siding options for your home, the WRB choice often follows the siding material, so it’s worth deciding on both at the same time.
Questions to ask your contractor before work starts
Hiring the right contractor for a siding and WRB project means asking specific questions before anyone picks up a nail gun. Here’s what to ask, and what to watch for.
Contractor questions worth asking:
- Which WRB product will you use, and what is its perm rating?
- Where does the WRB go relative to any exterior foam you’re adding?
- How will you integrate the WRB with existing window and door flashing?
- What seam tape do you use, and is it compatible with the wrap product?
- Will you provide inspection photos of seams, laps, and flashing details before siding goes up?
Red flags to watch for during installation:
- Horizontal laps that run the wrong direction (upper course tucked under lower course).
- Seams left untaped or taped with a non-compatible product.
- WRB cut short around window openings, leaving gaps at the rough opening corners.
- No sill pan flashing installed before windows are set.
- Wrap left exposed for more than 60 days without siding protection.
Pro Tip: Ask for photos of the completed WRB layer before siding goes up. A contractor who documents this step is one who takes the work seriously. If they resist, that’s a signal worth paying attention to.
For a broader checklist on vetting remodeling contractors in Bucks County, the same principles apply: ask for specifics, request documentation, and verify references on similar projects.
What does house wrap installation cost during a re-siding project?
Adding a WRB during a re-siding project is far less expensive than addressing moisture damage after the fact. Installed costs for WRB materials and labor typically vary depending on region and project complexity, adding a moderate amount to a re-siding project. A typical single-family house exterior will see additional costs for the WRB layer, but exact amounts depend on specific project factors. These are ballpark estimates; your actual cost will vary based on location, contractor, and the complexity of your wall assembly.
Costs rise in these situations:
- Exterior rigid foam is being added, which requires additional sequencing and tape work.
- Existing sheathing is damaged and needs repair or replacement before wrap can go on.
- Complex flashing details around multiple windows, doors, or penetrations add labor time.
- A drainable wrap or drainage mat is specified instead of a standard flat wrap.
Timeline-wise, WRB installation on a typical single-family home adds roughly one to two days to a re-siding project schedule. That includes sheathing prep, wrap installation, seam taping, and flashing integration. National Siding Authority guidance notes that some jurisdictions require a pre-cladding inspection of the WRB layer, so build that inspection window into your project schedule before siding goes up.
When can you skip or substitute a WRB?
There are legitimate exceptions, but they’re narrower than many homeowners assume.
- Masonry and brick veneer with a proper drainage cavity: A correctly detailed brick veneer with a continuous air gap and weep holes at the base manages moisture differently. A WRB is still often recommended behind the cavity, but the assembly logic differs from a direct-applied siding system.
- Fully adhered fluid-applied WRBs: These spray- or roller-applied membranes replace sheet-type wraps and can offer superior continuity around complex geometries. They’re more common in commercial construction but appear in high-performance residential work.
- Certain pre-coated OSB sheathing systems: Some manufacturers produce OSB with a factory-applied moisture-resistant coating designed to function as the WRB. These systems require careful attention to seam taping and are only as good as the installation quality at joints.
- Rigid foam acting as the WRB: As noted earlier, this works but relies entirely on tape integrity at seams. GreenBuildingAdvisor discussions caution that foam-as-WRB systems may present long-term durability concerns as tape ages, and most builders recommend a dedicated WRB over foam for redundancy.
Omitting a WRB entirely on a standard wood-framed wall with vinyl or fiber cement siding carries real risks: hidden moisture damage that doesn’t surface until sheathing is rotted, inspector concerns during resale, and potential code violations for homes built or re-sided after 2006. If you’re buying or selling a pre-2000 home, a WRB inspection during re-siding is worth the conversation with your contractor.
A remodeler’s perspective on what actually matters in the field
After working on siding projects across Bucks County and the surrounding area, the pattern we see most often isn’t homeowners choosing the wrong wrap product. It’s good products installed with poor flashing integration. A premium Tyvek wrap with untaped seams at window corners performs worse than No. 15 felt installed with careful attention to laps and flashing. The product matters less than the sequence and the details.
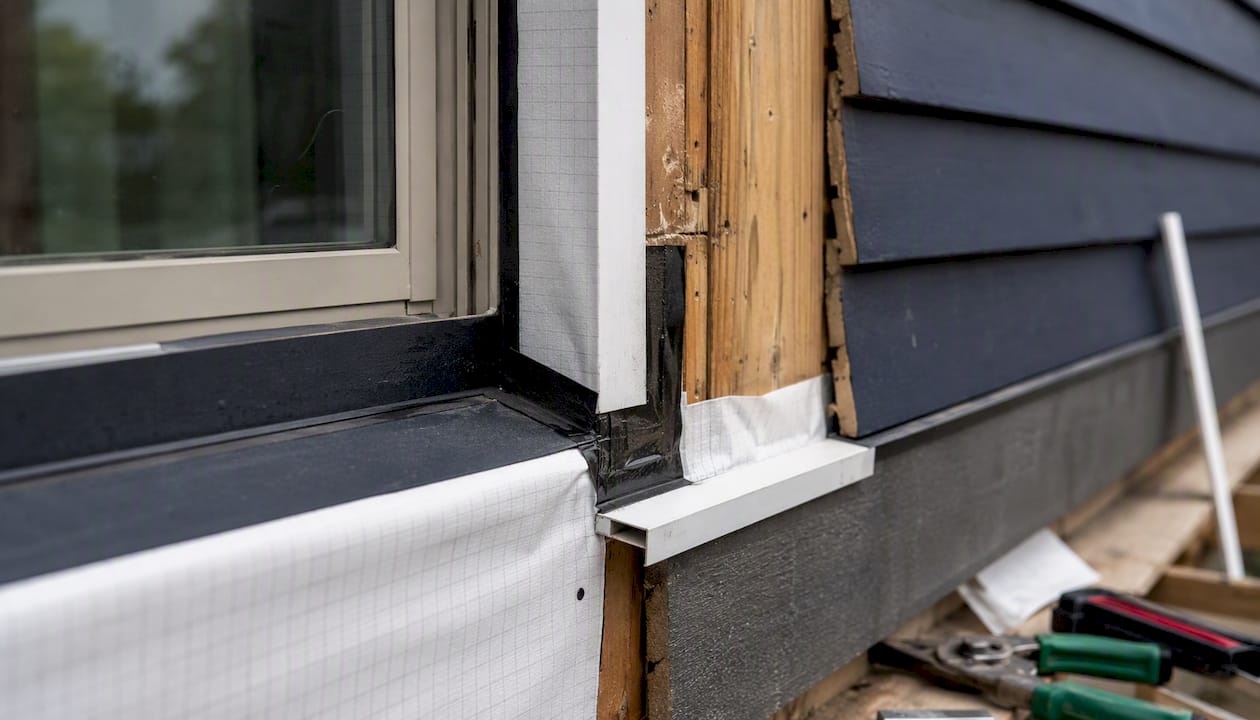
When we assess a re-siding project, the first thing we look at is the condition of the existing sheathing and whether there’s any evidence of past moisture intrusion. If sheathing is soft or discolored, that tells us the WRB story before we even pull the first panel. We document those findings with photos and walk homeowners through what we find before any new material goes on.
If you’re planning a re-siding project and want to know exactly what’s behind your current siding, an on-site assessment is the right starting point. We’re happy to take a look and give you a clear picture of what you’re working with.
Jaghomesnow handles siding and WRB installation the right way
When you hire Jaghomesnow for a siding project in Bucks County or the surrounding area, WRB installation isn’t an afterthought. It’s part of the plan from the first estimate. We document the WRB layer with photos before siding goes up, so you have a record of what’s behind your walls.

Our team handles the full sequence: sheathing inspection and repair, WRB installation with compatible seam tape, flashing integration at every window and door opening, and final siding installation. We keep the job site clean throughout and stay available to answer your questions at every stage. Whether you’re adding exterior foam for energy performance or doing a straightforward vinyl re-side, we’ll walk you through the right assembly for your home and climate. Request an estimate and we’ll schedule an on-site visit to assess your current wall assembly and give you a detailed, no-surprise quote.
Sources
These are the primary sources used in this article. Each one is worth bookmarking if you’re planning a re-siding project or want to verify code and product guidance.
- Continuous Rigid Insulation Sheathing | Building America Solution Center
- Do I Need House Wrap Behind Vinyl Siding? | Today’s Homeowner
- Sheathing wrap requirements and comparative data | InspectApedia
- Siding underlayment and housewrap: Weather barrier requirements | National Siding Authority
- Vinyl siding: the evolution of the WRB requirement | Vertex Engineering
Recommended
- Board and Batten Siding: What Homeowners Need to Know
- How Winter Weather Impacts Your Home’s Exterior — and What Bucks County Homeowners Can Do Now – JAG Home Enhancements How Winter Weather Impacts Your Home’s Exterior in Bucks County, PA | JAG Home Enhancements
- Roof Insurance Claim Process: What Homeowners Need to Know
- Energy Efficient Window Tax Credit 2026: What Homeowners Need to Know