

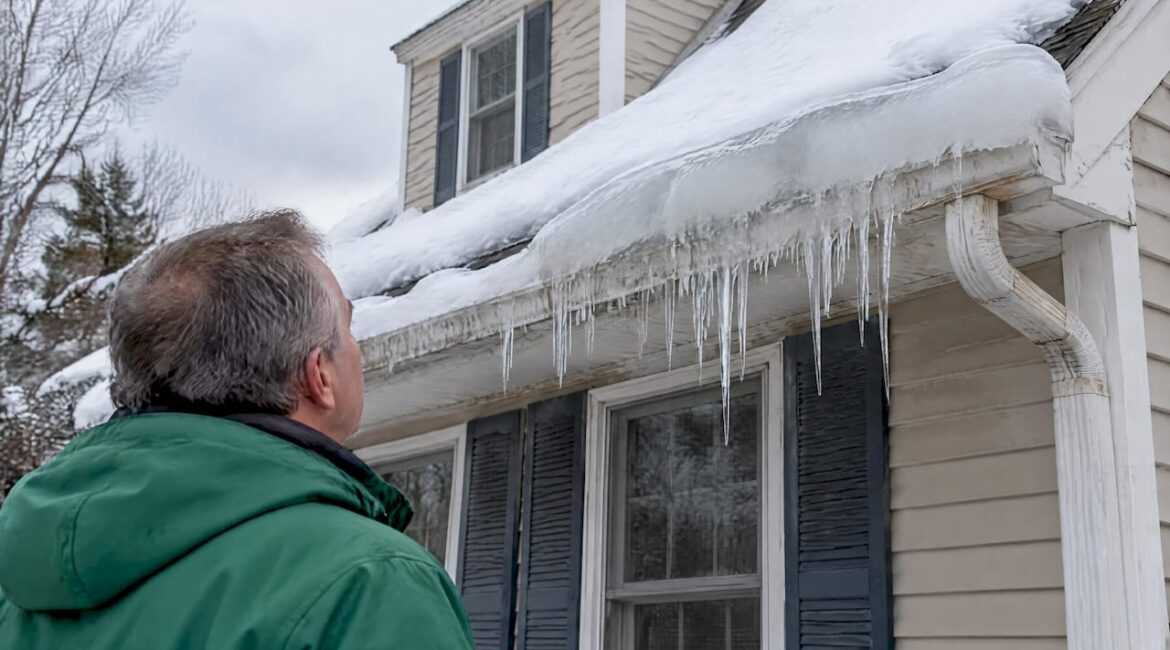
Yes, ice dams can force water under shingles and cause roof, ceiling, insulation, and mold damage. If you spot one forming or already leaking, your priorities are simple: stop the active leak, document everything for your insurer, and plan an attic fix so it doesn’t come back. The roof itself usually isn’t the problem; the heat escaping into your attic is.
TL;DR:
- Insulating and sealing attic leaks are the most effective long-term solutions to prevent ice dam formation, with R-38 or higher recommended in cold climates.
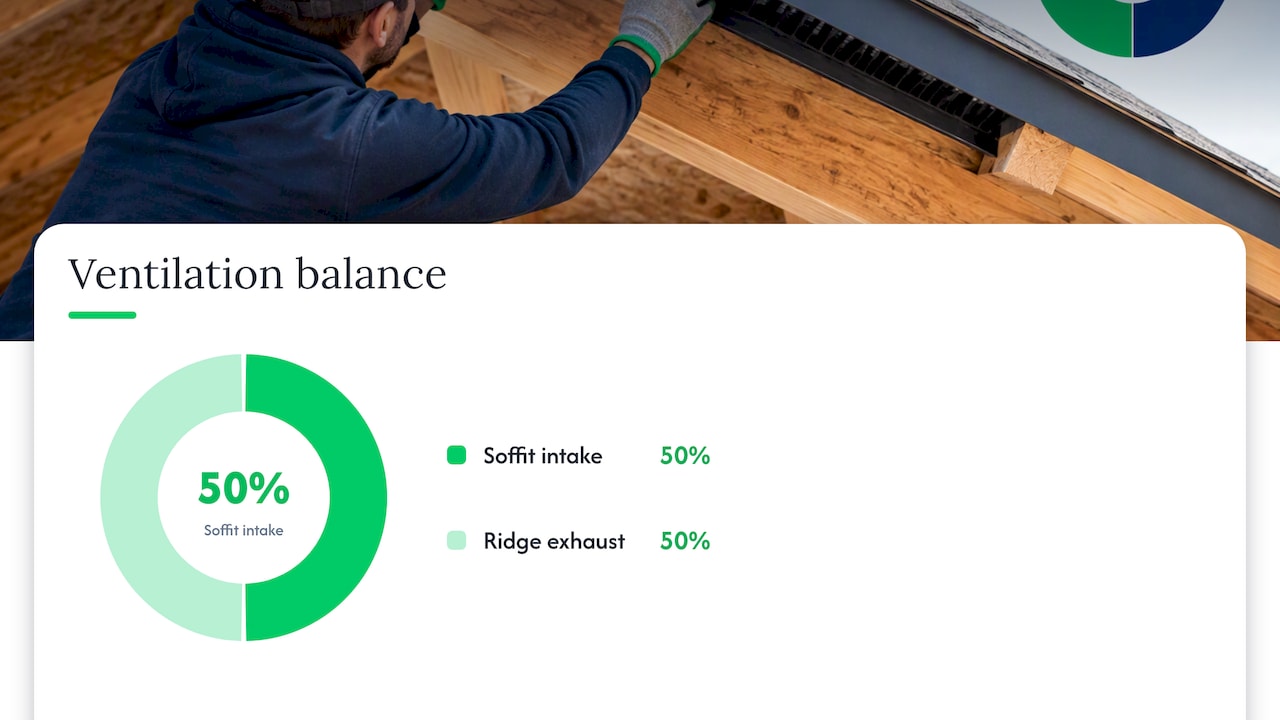
- Effective attic ventilation requires about one square foot of net-free vent area per 300 square feet of attic space, balanced between soffit and ridge vents.
- Addressing active leaks involves removing snow, using calcium chloride socks, and capturing documentation for insurance claims before conducting repairs.
- Insurance coverage for ice dam damage typically requires prompt documentation and often excludes damage caused by neglect or preexisting issues.
- Metal roofs do not prevent ice dam formation if attic heat loss and ventilation problems remain unaddressed.
Table of Contents
- What is an ice dam and how does it damage your roof?
- How do you spot active or past ice-dam damage?
- Safe steps to take when an ice dam starts leaking
- Long-term prevention: building a cold roof that won’t dam
- Repairing ice-dam damage and when to call a professional
- What to expect from your homeowners insurance claim
- How a professional approaches ice-dam assessment and repair
- Contractor perspective: triage priorities and realistic timeframes
- Get your attic and roof assessed before the next storm
- FAQ
- Sources
What is an ice dam and how does it damage your roof?
An ice dam forms when heat trapped in your attic warms the upper roof deck enough to melt snow, even while the eaves stay cold. That meltwater runs down and refreezes right at the edge, building a ridge of ice that backs water up under your shingles. From there, gravity does the rest: water seeps through the roof deck, into insulation, and down into ceilings and walls.
The real driver is thermal difference across your roof surface, not the shingles or the snow load itself. A few conditions make it worse:
- A poorly insulated or leaky ceiling plane lets warm indoor air rise into the attic.
- Heavy, prolonged snow cover insulates the roof and traps that heat against the deck.
- Cold overnight temperatures refreeze the runoff right at the eaves and valleys, where ice dams typically start.
How do you spot active or past ice-dam damage?
Some signs show up outside before you ever see a drip indoors. Others only appear once water has already found its way in. Check for these:
- Icicles and ice ridges hanging along the eaves or packed into your gutters.
- Gutters pulling away from the fascia under the weight of trapped ice.
- Ceiling stains or bubbling paint, especially near exterior walls or around chimneys.
- Damp or compressed attic insulation, which loses its insulating value once wet.
- Daylight visible at roof seams or soft spots on the roof deck when you check the attic.
If you see water actively dripping indoors or insulation that’s soaked through, treat it as an emergency rather than something to monitor over the weekend.
Safe steps to take when an ice dam starts leaking
Once water is coming through, your goal is to slow the damage without putting yourself on an icy roof. A few actions make the biggest difference in the first hours:
- Use a roof rake from the ground to clear snow from the first few feet above the eaves. This removes the meltwater source feeding the dam.
- Run calcium chloride in mesh “socks” laid vertically across the dam to melt drainage channels; avoid rock salt, which can corrode metal flashing and gutters, and never chisel or use a torch on the ice, since both can tear shingles and start fires.
- Point a box fan at the leak location from inside the attic to cool that section of roof deck and slow further melting, as long as the area is safe to access.
- Watch for ventilation issues around combustion appliances like furnaces or water heaters if you’re running fans or sealing up attic access points temporarily.
Pro Tip: Photograph and video the damage, gutters, and ice formation before you touch anything, and keep every receipt for temporary fixes. Your insurer will want dated evidence, not a verbal description after the fact.
For a local, step-by-step version of this triage, our emergency-response and prevention checklist walks through what to do in the first hours after you spot a dam.
Long-term prevention: building a cold roof that won’t dam
Emergency steps buy you time, but they don’t fix why the dam formed. The permanent solution is what builders call a cold roof: an attic that stays close to outdoor temperature so snow melts evenly, if at all, instead of thawing unevenly and refreezing at the eaves.
That starts with air sealing, not insulation. Warm air escaping through can light, attic hatches, plumbing stacks, and chimney chases is usually the biggest heat source warming your roof deck, and no amount of insulation fixes a leaky ceiling plane underneath it. Contractors typically find these leaks with a blower-door test or an infrared scan before recommending any insulation work.
Once the ceiling plane is sealed, insulation and ventilation do the rest:
Heat cables and mechanical attic fans can reduce symptoms in a pinch, but neither addresses the heat loss causing the problem, so they tend to become recurring expenses rather than one-time fixes.
Repairing ice-dam damage and when to call a professional
Once the leak stops and the attic is dry, repair work usually falls into a few categories, roughly in order of what gets fixed first:
- Roof assembly repairs: damaged underlayment, shingles, and flashing, plus any soft or rotted sections of the roof deck itself.
- Attic restoration: replacing wet or compressed insulation and re-establishing a continuous air barrier.
- Interior repairs: drywall, paint, and trim, plus mold remediation if moisture sat long enough to support growth.
For removing an active dam safely, professionals generally use low-pressure steam equipment, which melts ice without gouging shingles or granules the way chisels, axes, or torches can. Before committing to repairs, a contractor should run the same diagnostics mentioned above, a blower-door test and infrared imaging, so the root cause gets addressed rather than just the visible damage. Fixing drywall before sealing and insulating the attic almost guarantees you’ll be repairing the same ceiling again next winter. If the scope looks bigger than patch repairs, it’s worth reading through the difference between repair and full replacement before signing a contract.
What to expect from your homeowners insurance claim
Whether ice-dam damage is covered depends heavily on your specific policy wording. Sudden, accidental water intrusion is commonly covered, but insurers can deny claims tied to damage they consider preexisting or the result of deferred maintenance, so documentation timing matters.
Build your claim file as the event unfolds:
- Dated photos and video of the ice dam, gutters, and interior damage, taken as soon as you notice them.
- Receipts for any temporary mitigation, including calcium chloride, roof raking, or emergency tarping.
- A written contractor estimate describing both the visible damage and the attic conditions that caused it.
- Prompt notice to your insurer; delays can complicate a sudden-damage argument.
If a claim is denied or underpaid, you generally have a few paths forward: requesting an independent appraisal, pursuing mediation, or filing a complaint with your state’s department of insurance. Be cautious of unlicensed contractors or public adjusters who show up uninvited after a storm offering to “handle everything.” Our guide to the roof insurance claim process covers documentation and timing in more detail.
How a professional approaches ice-dam assessment and repair
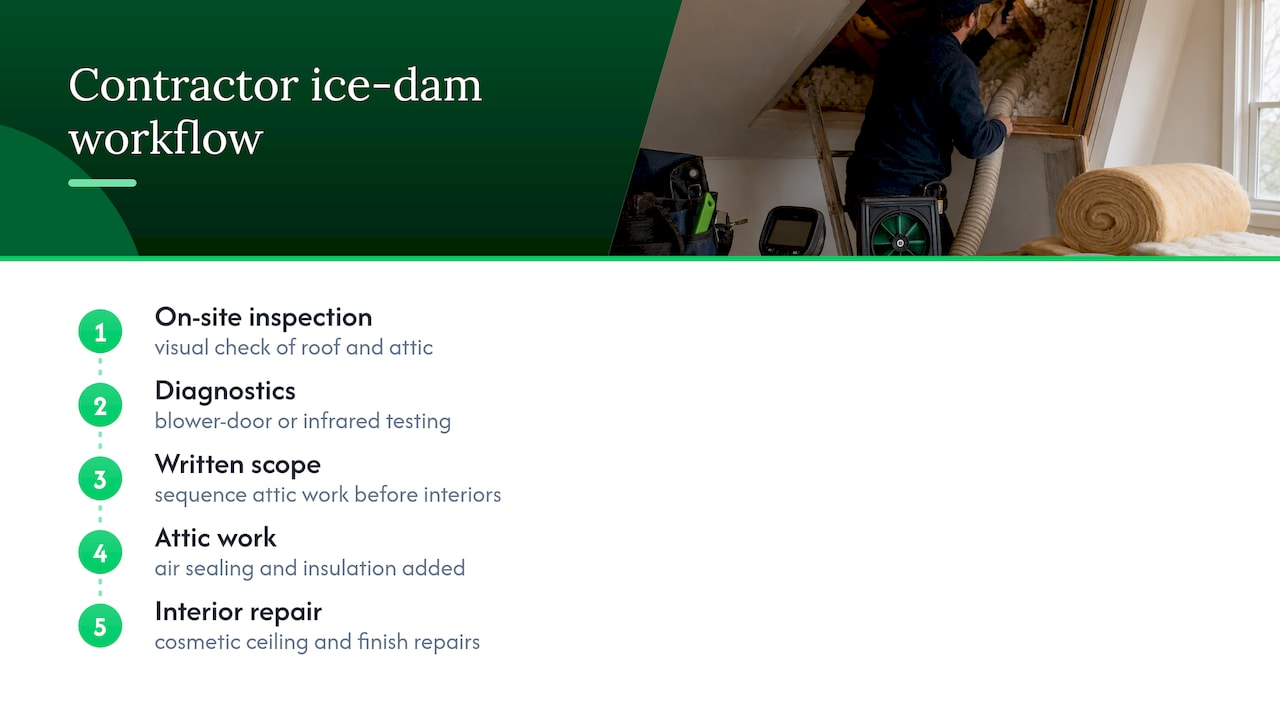
A thorough contractor treats an ice dam as an attic problem first and a roofing problem second. That typically means an on-site inspection, blower-door or infrared diagnostics to find hidden heat leaks, and a written scope that sequences attic air sealing and insulation ahead of any interior cosmetic repairs.
Before hiring anyone, confirm licensing and insurance, ask how they protect your home during cleanup, get a realistic timeline in writing, and request documentation you can hand directly to your insurer. That paperwork matters as much as the repair itself when a claim is in play.
Contractor perspective: triage priorities and realistic timeframes
In our experience, the order of operations rarely changes: stop the leak, document everything, protect what’s inside, then schedule an attic audit. Emergency mitigation happens immediately, attic remediation often takes weeks depending on weather and permitting, and interior repairs wait until everything is fully dry. One rule we never bend: never climb onto an icy roof yourself. That’s a job for someone with the right equipment and footing.
— Jeff
Get your attic and roof assessed before the next storm
If you’re dealing with an active leak or repairing damage from last winter, we offer roofing services and storm damage repair built around fixing the attic conditions that caused the problem, not just patching shingles. That means an on-site inspection, a written scope covering both the roof assembly and attic insulation or air sealing, and documentation you can hand straight to your insurance adjuster.

A typical consultation with our team includes:
- A roof and attic walkthrough to identify heat loss sources and existing damage.
- A written estimate covering repair, insulation, and ventilation work together.
- Documentation formatted to support your insurance claim, not just a repair invoice.
If you’re in Bucks County or the surrounding area and want eyes on the problem before it gets worse, reach out to schedule an inspection and get a clear plan for fixing it right the first time.
FAQ
Will insurance cover damage from ice dams?
Coverage depends on your specific policy, but many insurers cover sudden water damage from ice dams while excluding damage tied to long-term neglect or preexisting leaks. Document the damage with dated photos and contact your insurer promptly, and if a claim is disputed, your state department of insurance can help.
Are roofers responsible for ice damming?
Not usually, since ice dams are primarily caused by attic heat loss and ventilation imbalances rather than roofing material or installation defects. A roofer may share responsibility if flashing or underlayment was installed incorrectly, but the underlying fix almost always involves attic air sealing and insulation.
What can I put on my roof to prevent ice dams?
There’s no product you apply to the roof surface itself that solves the problem, since ice dams start with heat escaping from inside your home. The lasting fix is sealing attic air leaks, adding insulation to recommended levels, and balancing soffit-to-ridge ventilation so the roof deck stays consistently cold.
Do metal roofs prevent ice dam damage?
Metal roofing sheds snow more easily than asphalt shingles, but it doesn’t change the attic heat loss that causes ice dams in the first place. Without proper air sealing, insulation, and ventilation, a metal roof can still develop ice buildup at the eaves.
Sources
For homeowners who want the underlying technical guidance, the National Weather Service and University of Minnesota Extension both cover prevention mechanics in detail. For insurance disputes, your state department of insurance remains the primary resource beyond your own policy documents.
- Preventing Roof Ice Dams — National Weather Service