
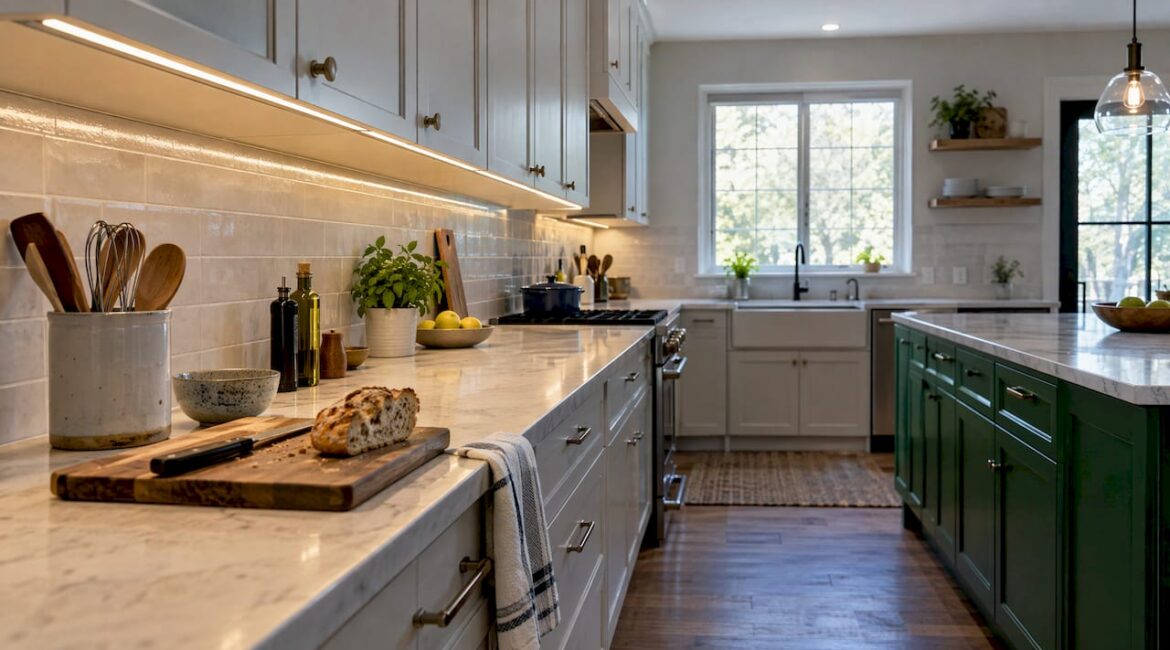
Good kitchen cabinet lighting comes down to four decisions: the type of fixture, where you mount it, how bright and warm the light is, and how it gets power. Get those right and your counters stay shadow-free, your cabinets are easier to use, and the room feels finished. Get them wrong and you end up with glare on the granite, bright spots along the backsplash, or a dimmer that hums.
This guide walks through each choice in plain terms, so you can plan with confidence whether you are updating one wall of cabinets or planning a full remodel.
TL;DR
- The main types are LED tape, hard strips or light bars, and pucks. Strips and bars give the most even light along a counter, while pucks suit small, accented areas.
- Mount fixtures toward the front of the upper cabinet, with the light aimed down. On shiny counters, place them toward the back to cut glare.
- Aim for a warm-neutral color temperature that matches your other kitchen lights, and put the lights on a dimmer.
- Plug-in and battery lights are simple to add. Hardwired lights look cleanest and need a licensed electrician.
- If you are remodeling, decide on lighting before the walls close. It is far cheaper to plan wiring than to retrofit it.
Table of Contents
- Types of kitchen cabinet lighting
- Where to place under-cabinet lights
- Brightness, color temperature and dimming
- Hardwired, plug-in or battery-powered
- Under-cabinet lighting ideas that go beyond the counter
- Plan lighting before the walls close
- Our perspective on cabinet lighting
- Let us plan your kitchen lighting
- FAQ
- Sources
Types of kitchen cabinet lighting
There are several fixture styles, and they differ in light output, look and installation. According to Lowe’s buying guide, the common styles are pucks, strips, tape, ropes and LED light bars. Here is how they compare in a real kitchen.
| Type | How it looks | Light quality | Installation |
|---|---|---|---|
| LED tape | Ultra-thin, nearly invisible | Softer, lower output | Peel-and-stick, trimmable |
| Hard strip or light bar | Slim, solid fixture | Brighter, more even | Screw or clip mount, set lengths |
| Puck | Round, individual spots | Pools of light | Surface mount, needs spacing |
| Rope | Flexible tube | Gentle, decorative | Clipped in place |
LED tape
Tape lights are flexible LED strips that attach beneath cabinets with peel-and-stick adhesive. Kichler’s planning guide notes that tape is thin, flexible and trimmable, but it generally produces less light than LED fixtures. That makes it a good fit for accents, toe-kicks and the inside of cabinets, and a weaker choice as your only counter light.
Hard strips and light bars
The same Kichler guide says hard strip lighting generally produces more light and is easier to clean, though it cannot be trimmed to length as freely as tape. For the main work counters, this is the type we most often steer homeowners toward. The light is even, the fixture sits flat, and there is no adhesive to fail over a warm range.
Puck lights
Pucks are small, round fixtures. They are easy to place, but spacing matters: Lowe’s notes that spacing helps avoid pooling, the scalloped bright spots that show up on a backsplash when pucks sit too far apart. Pucks work best for glass-front cabinets, small hutches or short runs, where one or two spots are enough.
LED strip vs. puck lights
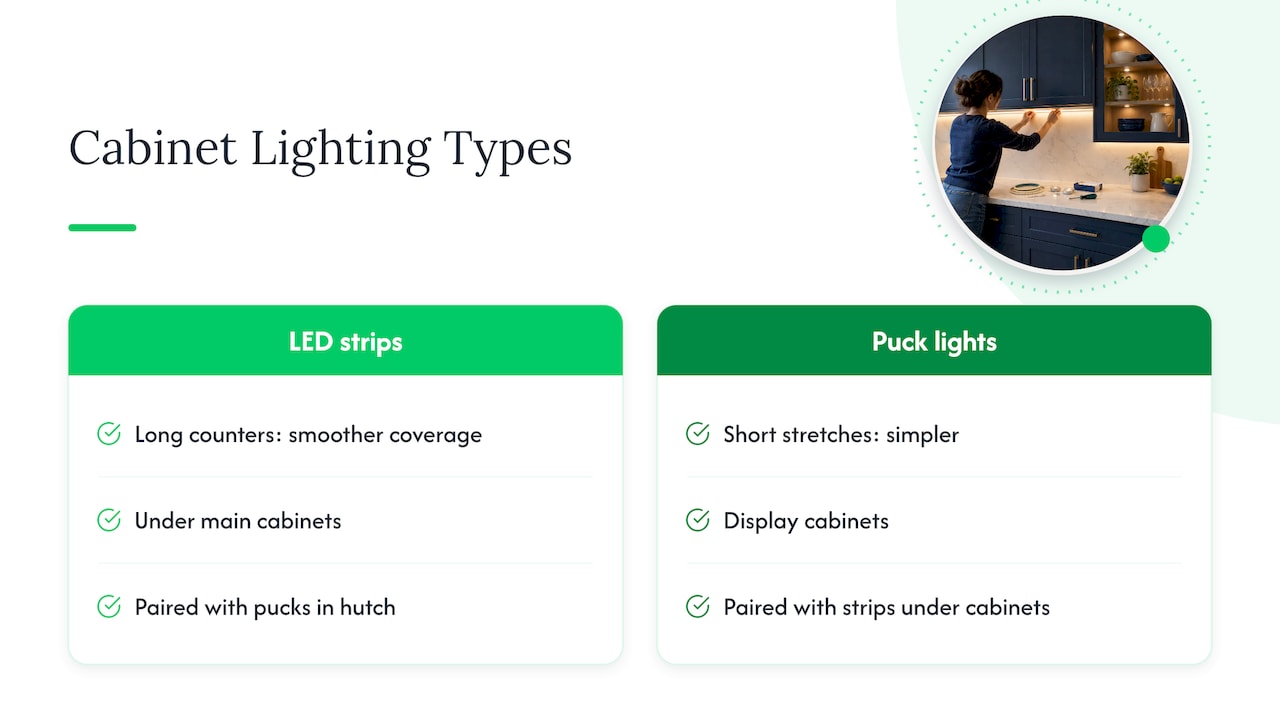
If you are choosing between the two, ask what the surface looks like. For a long counter with a tile backsplash, a continuous strip or bar gives smoother coverage. For a short stretch or a display cabinet, pucks are simpler. Many kitchens use both: strips under the main cabinets and pucks inside a glass-front hutch.
Where to place under-cabinet lights
Placement matters as much as the fixture. Under-cabinet light is low-intensity light below eye level, so, as Pro Remodeler explains, its success depends on placement, glare control and how it works with the rest of the room’s lighting.
Start at the front of the cabinet
KraftMaid’s placement guide recommends mounting strips or pucks near the cabinet front, closest to the door, with the LEDs facing down. The reason is simple. Light from the front lands in front of you, so your body does not cast a shadow over the cutting board. Ceiling fixtures behind you are what create those shadows in the first place.
Handle shiny countertops
Polished stone and glossy quartz can bounce a bright reflection right back at your eyes. KraftMaid suggests mounting the lights inside the back of the face frame, aimed at the backsplash, and using a light rail to conceal them. That bounces soft light off the wall instead of creating a mirror on the counter.
Use the longest fixture that fits
Pro Remodeler’s guidance is to locate fixtures at the front of the upper cabinet, choose lensed fixtures over bare LED tape, and pick the longest fixture that fits. Longer fixtures with fewer gaps mean fewer dark spots between lights. A lens also softens the individual LED dots so you do not see a row of bright pinpoints reflected in the backsplash.
A quick placement checklist
- Mark where your work zones are: the sink, the range and the main prep area.
- Run light across the full width of each zone, not just the center.
- Keep fixtures toward the front edge unless your counter is glossy.
- Choose lensed fixtures where you can see the light source from seated or standing positions.
- Check where the cabinet bottom has a lip or rail that could expose the fixture.
Your backsplash also changes how the light looks. Glossy tile reflects more, matte stone absorbs more. Our guide to kitchen backsplash materials covers how finishes behave, which is worth reading before you pick fixtures.
Brightness, color temperature and dimming
How bright is bright enough?
Pro Remodeler recommends fixtures that deliver at least 400 lumens per foot, and suggests measuring actual light levels at the work zone rather than trusting the box. For a prep counter where you chop vegetables and handle knives, brighter is a safety feature, which is why a dimmer is so useful: you get full output when you cook and a low glow when you do not.
Pick a color temperature that matches the room
Color temperature is measured in kelvins. Lower numbers look warm and yellow, higher numbers look cool and bluish. 1000Bulbs calls 3000K to 3500K the safest all-purpose range because it blends warm and cool palettes. Kichler adds that color temperature should fit the room’s function and finishes and be coordinated with the broader lighting plan.
The practical rule: match your under-cabinet lights to your recessed lights. If one is warm and the other is cool, the mismatch is obvious the moment you switch both on. Pro Remodeler gives the same advice, matching under-cabinet color temperature to the downlights.
How dimmable under-cabinet lighting works
A dimmable system has three parts: a dimmer control, a dimmable LED driver (the power supply that converts household current to what the LEDs need) and the fixture itself. Golden Lighting’s installation guide says these parts should be tested together, and that mismatched components are the main cause of flickering, buzzing or unstable dimming.
Here is what that means when you shop:
- Choose the fixtures first and check that they are rated as dimmable.
- Confirm the driver is dimmable and compatible with the dimmer type you plan to use.
- Choose a dimmer listed as compatible with that driver.
- Keep the total connected load within the driver, power supply and dimmer ratings.
If you are wiring this into a remodel, your electrician can specify all three parts together so you are not hunting for a compatible switch after the drywall is painted.
Hardwired, plug-in or battery-powered
How you power the lights shapes the look and the installation. The Lowe’s guide describes the three options this way:
- Hardwired lights connect to your home’s wiring for a seamless look, and require professional electrical work.
- Plug-in lights are easier to install but need an accessible outlet.
- Battery-powered lights are the most portable and DIY-friendly, but the batteries need replacing.
For a kitchen you plan to live in for years, we generally recommend hardwired lighting, controlled by a wall switch or dimmer. There are no visible cords, no outlet stolen from your counter, and nothing to recharge. Plug-in or battery lights make sense for a short-term fix, such as a rental pantry or a dark corner you want to brighten this weekend.
Safety and access
Wiring lights into your kitchen is electrical work. Hire a licensed electrician and ask whether your township requires a permit. Our page on the kitchen remodel permit process in Bucks County explains what to expect locally.
Two more points matter when the system is hardwired. Golden Lighting advises keeping the driver accessible and compliant with applicable electrical requirements. Waveform Lighting suggests putting it somewhere reachable, such as an accessible cabinet or pantry, so that replacing it later does not mean opening a wall.
Under-cabinet lighting ideas that go beyond the counter
The best kitchens use layers. Kichler’s guide lays out several, and each one solves a different problem.
Task light under the uppers
This is the workhorse: light for counters, sinks and the stove. If you only add one layer, add this one.
Backsplash accent
A light aimed at the backsplash makes tile, stone or a pattern visible in the evening. It also adds depth, since the wall brightens instead of staying a dark backdrop. Before you commit, look at your tile choice in person under similar lighting.
Over-cabinet light
Light placed on top of upper cabinets washes the ceiling and shows off architectural details, which can make a room feel taller. It suits kitchens with crown molding, or décor on top of the cabinets.
Inside-cabinet light
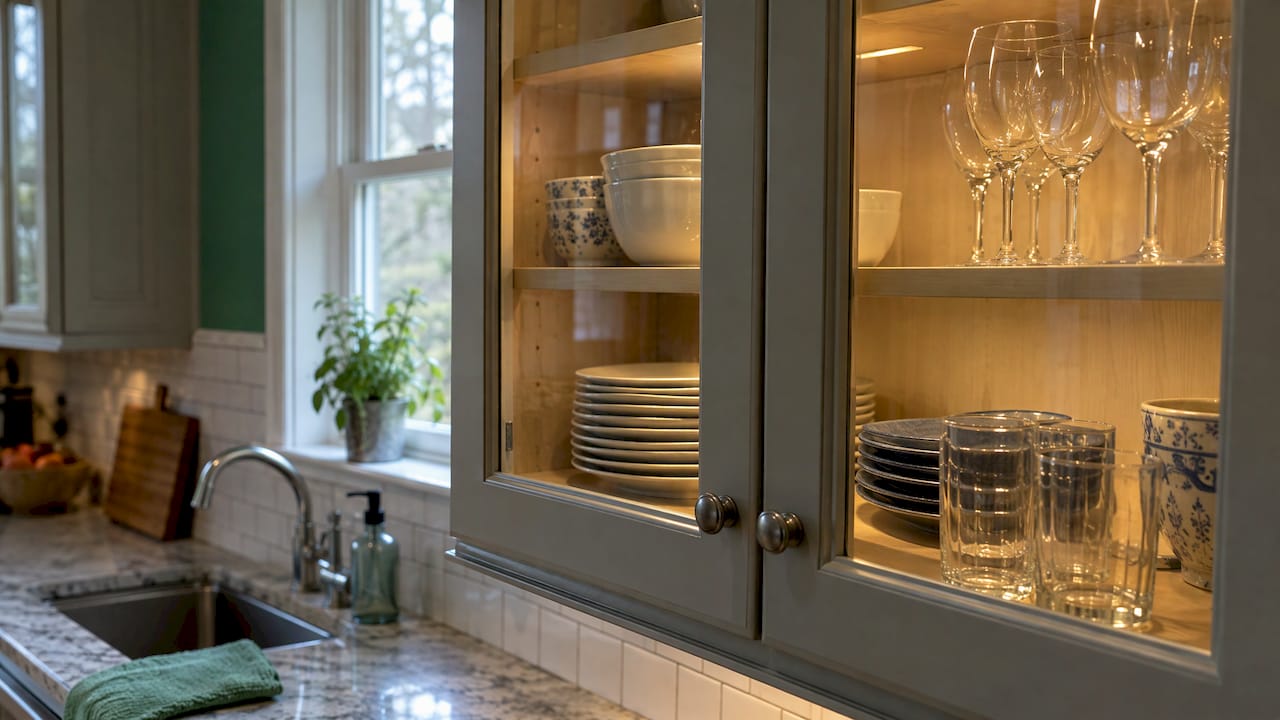
Inside glass-front cabinets, light shows off dinnerware. Inside deep storage, it helps you see what is at the back. Our tips for small kitchen storage and pantry design pair well with lighting for exactly that reason. For homeowners who like layered lighting and clever storage together, this guide to stainless outdoor kitchen storage shows how cabinet choices carry over outside.
Under-counter and drawer light
Small strips beneath the counter edge or inside drawers make interiors easier to see and give the kitchen a custom finish.
Toe-kick light
A low glow along the base of the cabinets helps you cross the kitchen at night, and Kichler notes it can create a floating-cabinet effect. Under-cabinet fixtures can also double as night lighting after dark, so you are not flipping on the overheads for a glass of water.
Plan lighting before the walls close
The cleanest installations are planned early. When wiring is run during framing, switches and dimmers go where you want them, drivers have a proper home, and there is no scarring to patch. Our article on the kitchen lighting plan explains why it pays to lock in where every light drops before drywall goes up, and the kitchen remodel timeline shows where electrical rough-in fits in the schedule.
When you are weighing which upgrades to include, think about how much a bright, well-planned kitchen adds to daily life and to your home’s appeal. This overview of home repairs that add value is a good companion when you are prioritizing a budget. Your cabinet layout also affects fixture lengths, so look at kitchen layout types before ordering.
Our perspective on cabinet lighting
We see the same pattern in kitchens across Bucks and Montgomery counties. Homeowners spend months choosing cabinets and counters, then treat lighting as an afterthought. A few weeks later, they notice the shadow across the cutting board, or the harsh glare on a new quartz surface.
Our advice is to treat cabinet lighting as part of the design, not an accessory. We plan fixtures, wiring, dimmers and drivers alongside the cabinet layout, so the lights land where your hands actually work. That is part of what we mean by full project management from consultation through completion.
We also give honest recommendations. If a simple plug-in fix suits your situation, we will say so. If you are already opening walls for a remodel, hardwired lighting on a dimmer is usually the cleaner, longer-lasting answer, and we build it in while the walls are open. We keep the job site clean and tell you what is happening each step of the way.
Jeff
Let us plan your kitchen lighting
If you are remodeling, we can fold cabinet lighting into the whole project: layout, wiring, finishes and installation, with one team keeping it on schedule. JAG Home Enhancements handles kitchen and bathroom remodeling for homeowners in Bucks County and nearby areas, with personalized service and clear communication.

See our kitchen and bathroom remodeling services or browse kitchen remodeling ideas for Bucks County to start the conversation. Bathrooms benefit from the same layered thinking, as our bathroom lighting layout guide shows.
FAQ
What is the best kitchen cabinet lighting for countertops?
For most kitchens, a lensed LED bar or hard strip mounted near the front of the upper cabinet gives the most even light. Strips and bars generally produce more light than tape, according to Kichler. Match the color temperature to your other kitchen lights.
What color temperature should under-cabinet lights be?
A range of 3000K to 3500K is described by 1000Bulbs as the safest all-purpose choice, since it blends warm and cool tones. The most important thing is matching your recessed or ceiling lights so the kitchen looks consistent.
Can I put under-cabinet lights on a dimmer?
Yes, as long as the fixtures, driver and dimmer are all compatible. Mismatched parts are the main source of flicker and buzzing. Choose dimmable fixtures, a dimmable driver and a dimmer listed for that driver, and stay within the rated load.
Do I need an electrician to install cabinet lighting?
Hardwired lighting needs professional electrical work. Plug-in and battery-powered lights are DIY-friendly, though plug-in lights need a nearby outlet and batteries need regular replacement. If you are remodeling, have your electrician plan the wiring before the walls close.
Where should I place lights if my counters are shiny?
Mount the lights inside the back of the face frame, aimed at the backsplash, and consider a light rail to hide them. KraftMaid recommends this to help prevent glare on glossy surfaces.
Sources
- Under Cabinet Lighting Buying Guide, Lowe’s
- Project Planning for Cabinet Lighting, Kichler Lighting
- Under Cabinet Lighting Placement Guide, KraftMaid
- Undercabinet Lighting Dos & Don’ts, Pro Remodeler
- Complete Guide to Under Cabinet & Puck Lights, 1000Bulbs
- Dimmable Under Cabinet Lights: Complete Installation Guide, Golden Lighting
- Everything You Need to Know About Under Cabinet Lighting, Waveform Lighting