
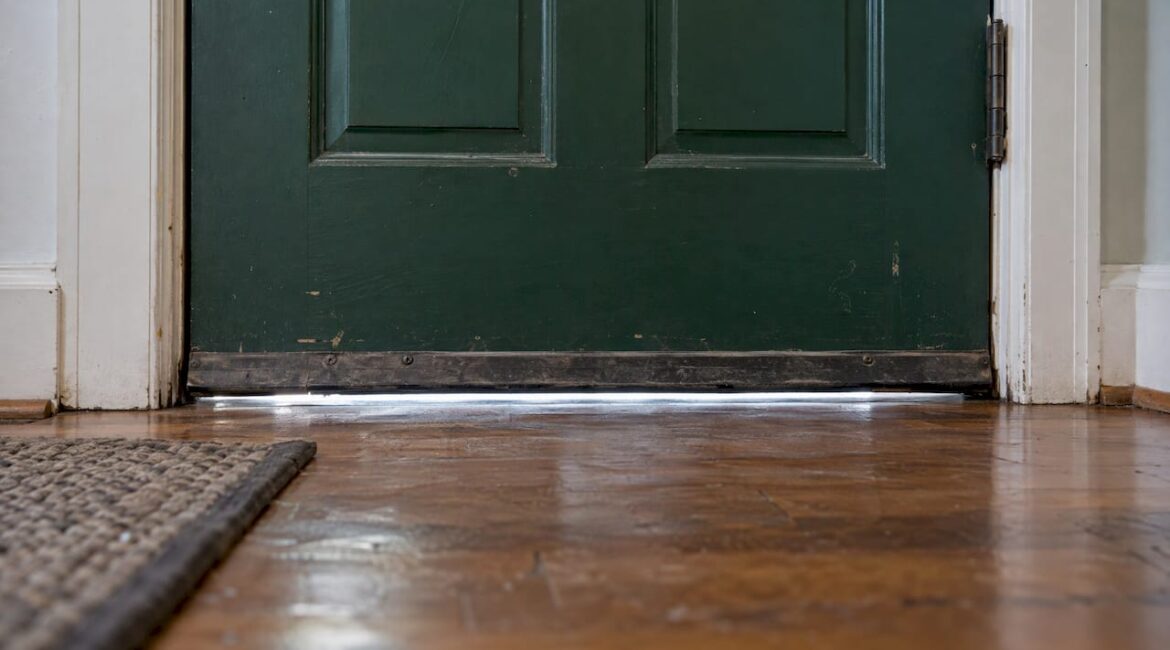
A door that does not seal at the bottom usually has one of four problems: a worn sweep, a threshold that has worn down or shifted, a door that has dropped out of alignment, or a damaged sill underneath. A few minutes of testing tells you which one. A worn sweep is a 30-minute fix. A sagging door or a soft, rotted sill is a repair job, and we handle those for homeowners across Bucks and Montgomery Counties.
This guide walks through the tests, the sweep replacement, the sliding door fixes, and the signs that a simple weatherstrip will not be enough.
TL;DR
- Close the door and look for daylight along the bottom, then run a hand or a strip of tissue along the edge to find where air moves.
- Bottom-center leaks usually point to a worn sweep or threshold. Leaks at the corners point to the seams where seals meet.
- Replacing a sweep means measuring the door width, cutting the new sweep to fit, and setting it so it just touches the threshold without dragging.
- If the door closes at the bottom before the top, hangs unevenly, or the sill is soft, the cause is structural and needs a repair, not a new sweep.
- A sliding door has its own fixes: a worn bottom seal, dirty tracks, and rollers that need adjusting.
Table of Contents
- Why the bottom of a door leaks
- Step 1: Find where the air is getting in
- Step 2: Match the symptom to the cause
- Step 3: Replace a worn door sweep
- Step 4: Adjust the threshold or sill
- Step 5: When the door closes at the bottom before the top
- Sealing a drafty sliding glass door
- What to do about insects and water
- How much gap is too much?
- When a repair beats a patch
- Why homeowners ask us to handle it
- Our perspective
- FAQ
- Sources
Why the bottom of a door leaks
The bottom of an exterior door is the hardest place to seal. The door has to swing freely, yet it also has to press against a threshold that people walk over, mop and drag mats across for years. Something has to give.
The U.S. Department of Energy lists visible daylight and a loose-fitting door as signs of air leakage. It recommends checking that the weatherstripping and the door sweep stop air from getting through without keeping the door from operating. In other words, the seal has to work and the door has to move. Both matter.
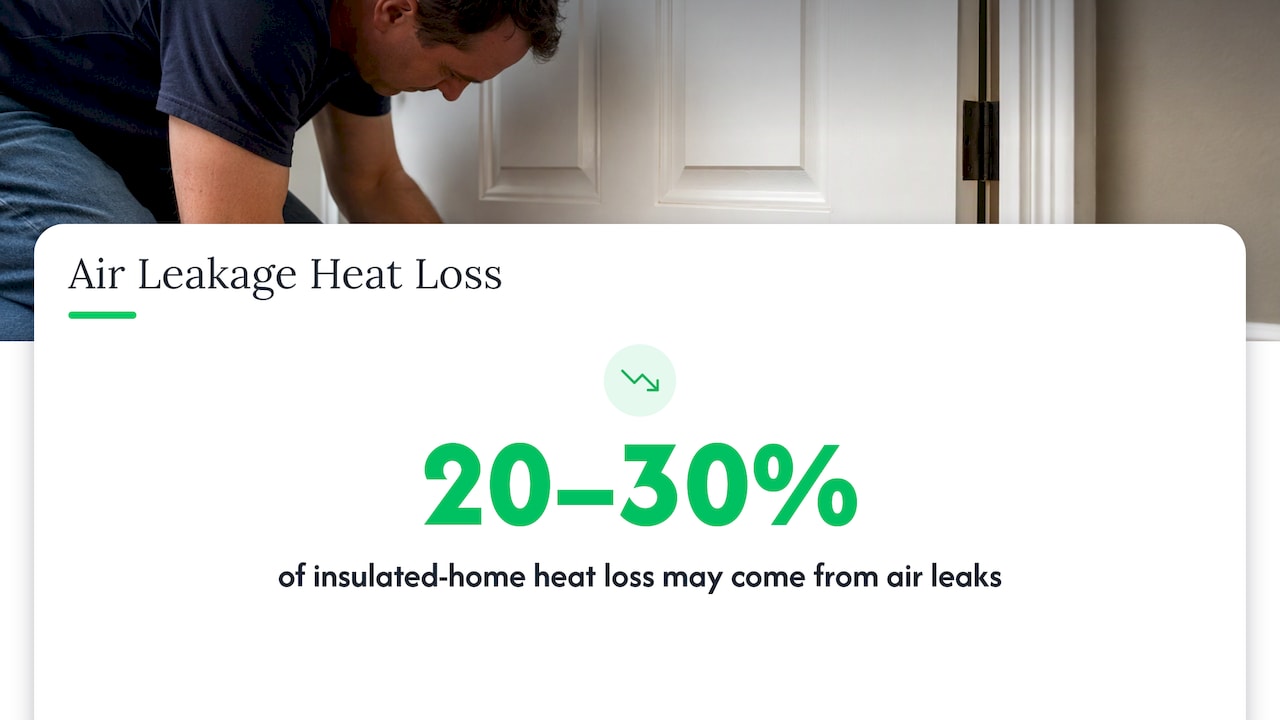
The cost of ignoring it is real. Fine Homebuilding reports that air leaks around windows and doors can account for roughly 20% to 30% of the heat loss in an insulated house, and it names a tight-fitting threshold as a first priority. For a Bucks County home, that means cold floors in January, higher heating bills, and, in warm months, insects and humidity coming in through the same gap.
Two terms help before you start. The piece attached to the bottom of the door is called a sweep or shoe. The piece attached to the floor under the door is the threshold, also called the sill. Fine Homebuilding uses the same split. A good seal needs both to meet properly.
Step 1: Find where the air is getting in
Do not buy anything yet. A product that fixes the center of the door will not fix a leak at the corner. This Old House makes the same point: weatherstripping handles the sides and top, while the sweep fills the space at the bottom, so using one product for the whole door will not stop a leak in the other part.
Try these three tests with the door closed and latched:
- Look for daylight. Turn off the lights in the room on a bright day, or shine a flashlight from outside. Any light along the bottom edge is a gap.
- Feel and watch for movement. The Building America Solution Center, a Department of Energy program, suggests feeling for drafts with your hand or holding tissue near the frame to see if it moves. On a windy day this is very easy to read.
- Try the dollar bill test. The same guide says to close the door on a dollar bill. If the bill pulls out easily, air is probably leaking there. Test it at several points along the bottom, not just in the middle.
Note where the leak is. A contractor-style rule of thumb helps here. Leaks in the middle of the bottom edge often come from a worn sweep or a threshold that has worn low. Leaks at the corners often come from where the sweep meets the side weatherstripping, or from the joint at the end of the sill. Noting the location now saves you a second trip to the hardware store.
Step 2: Match the symptom to the cause
| What you see | Likely cause | Typical fix |
|---|---|---|
| Gap or daylight across the whole bottom, sweep looks flat or cracked | Worn sweep | Replace the sweep |
| Gap only in the middle, threshold feels low or worn | Threshold worn or bowed | Adjust or replace the threshold |
| Leak at one or both corners | Seam between sweep and side seals | Add a corner pad or match the seals |
| Door touches at the bottom before the top | Door out of alignment, loose hinges | Tighten or adjust hinges, re-shim the frame |
| Sweep bunches up or wrinkles in one spot | Damaged or uneven sill | Repair the sill |
| Soft or spongy wood under the door | Rot | Sill repair or replacement |
Floors matter too. A floor that is out of level across the swing of the door, or a door that was trimmed shorter when new flooring went in, will leave a gap that a standard sweep cannot always cover. If the gap varies a lot from one side of the door to the other, you are looking at alignment, not just a worn part.
Step 3: Replace a worn door sweep
If your testing pointed to a worn sweep, this is the fix. The Building America Solution Center lists the common types: aluminum, rubber, brush, kerf-snap, vinyl adhesive, metal screw-in and wrap-around. Choose one that works with the thickness of your door. A kerf is the narrow slot cut into the bottom of the door that some sweeps snap into.
Here is the sequence, drawn from that guide and from This Old House:
- Remove the old sweep. A snap-in sweep can usually be pried out with a flat-head screwdriver or small pry bar. An adhesive-backed sweep can be pulled away carefully, and warming it with a blow dryer may help it release.
- Measure the width of the door at the bottom edge.
- Cut the new sweep to fit, if it is longer than the door.
- Close the door and position the sweep so its bottom edge touches the threshold. Keep it level.
- Mark the screw holes, and pre-drill if needed.
- Test the fit before you tighten everything. The guide says to adjust until there is no gap between the sweep and the threshold.
- Open and close the door. If it drags or sticks, raise the sweep slightly. The energy guidance is clear that the sweep must not impede how the door operates.
Where this goes wrong
Most failed sweep jobs come down to a few mistakes:
- Pressing too hard. A sweep that is jammed tight against the threshold will wear out fast and make the door hard to close. It should touch, not fight.
- Wrong type for the threshold. This Old House notes that some sweeps compress against the threshold when the door closes, while others use fins that rub against it. Pick the style that suits your gap.
- Ignoring water. Fine Homebuilding points out that sweeps and thresholds need to resist water seeping or blowing under the door, not only air. If rain gets in, the seal alone may not be the problem.
- Skipping the corners. A new sweep that stops short of the side weatherstripping leaves a small gap at each end. Check the corners with your hand after installing.
When you are done, repeat the dollar bill test along the bottom. If the bill grips with some resistance at every point, the job is done.
Step 4: Adjust the threshold or sill
Many modern entry doors have an adjustable threshold, with screws that raise or lower the top cap. If the sweep is new and a gap remains in the middle, the threshold may have settled or worn down. Turn the adjustment screws a little at a time, and retest with the dollar bill at each screw location. The goal is firm contact along the entire width, with no spot that is much tighter than the rest.
If the threshold has no adjustment, or the adjustment has run out, a worn or bowed threshold can be replaced. A threshold that is noticeably humped or sunken can exceed what any sweep can bridge. That is a repair, not a weatherstrip problem.
Watch for soft wood. If you press a screwdriver tip into the sill and it sinks in, or the sweep keeps bunching up in one spot, water has probably been getting in underneath. Our guide to rotted door sill repair explains how to decide between fixing and replacing it. Sealing over rot only hides a problem that grows.
Step 5: When the door closes at the bottom before the top
If the bottom edge meets the frame first, or the gap is wider at the top, the door is out of alignment. Common causes are loose or sagging hinges, a frame that has shifted, or a house that has settled. Because a door hangs on its hinges, small changes there move the whole slab.

Start with the simple things. Check that every hinge screw is tight. If screws spin without gripping, the holes are stripped and need longer screws or wood filler. Some hinges can also be adjusted slightly. For a clear look at how adjusting door hinges changes the way a door sits against its frame, read this walkthrough on adjusting door hinges.
If hinges are fine and the door still does not meet the weatherstrip evenly from top to bottom, the frame itself is likely out of square or twisted. Correcting that means re-shimming the frame, which requires removing trim and sometimes the door. This is the point where a carpenter saves you time. We do this kind of repair work as part of our door and exterior services, and it is often quicker than a homeowner expects once the cause is clear.
Sealing a drafty sliding glass door
A sliding or patio door leaks differently. There is no swinging edge, so air gets in along the track, the center where two panels meet, and the sides.
Work through these in order:
- Clean the track. Dirt and debris keep the panel from sitting properly and keep seals from contacting. Vacuum and wipe the track before judging anything.
- Check the rollers. Most sliding panels sit on rollers with adjustment screws near the bottom. If the panel sits too low it drags on the track. If it sits too high, the weatherstrip loses contact. Adjust a little at a time so the panel clears the track but still closes snugly against the seals.
- Replace worn weatherstripping. Family Handyman describes a process for patio doors: snap the outer and header jamb seals into place, push an inner leaf seal into its groove, and slide the bottom seal into the track. Match the replacement to the profile that came out.
- Check the latch. If the lock does not pull the panel tightly against the frame, the seals will not compress even when new.
For older sliding doors with warped frames, cloudy glass or tracks that no longer hold a seal, replacement is often the better long-term answer. Our patio door replacement options guide covers the styles available. If other windows in the house feel cold too, finding the leak in drafty windows follows the same logic.
What to do about insects and water
A gap that lets in air also lets in ants, spiders and rainwater. For a double door, the center where the two leaves meet is a frequent weak point. The fix is the same principle as the bottom: a seal that fits the gap without blocking the door. If you can see daylight at the center where two doors meet, check the astragal, the vertical strip between the two leaves, as well as the bottom.
Water is more serious than air. If you see staining, swelling at the bottom of the door, or damp flooring just inside, stop focusing on the sweep. The cause may be a failed sealant joint under the sill or flashing that no longer sheds water. Water that gets in under a sill rots the framing below it, and the repair gets more expensive each season. Winter freeze and thaw is hard on exterior openings, and our piece on how winter weather affects your home’s exterior shows what to check before the cold sets in.
How much gap is too much?
There is no single number to aim for. The Department of Energy guidance does not set one. Instead it asks for a door that seals against infiltration and still operates freely. In practice, judge the gap by what it does: no visible daylight, no air you can feel, a dollar bill that grips, and a door that opens without scraping.
A gap that a standard sweep can cover is fine. A gap so large that the sweep has to be pushed down hard to reach the threshold, or a gap that changes noticeably from one side of the door to the other, tells you the underlying cause needs fixing first.
When a repair beats a patch
A new sweep is the right answer when the old one is worn. Do not keep adding weatherstripping to a door that has deeper problems. These signs say it is time for a repair or a new door:
- The door is warped or the slab has swollen, so it does not sit flat against the stop.
- The frame is out of square and the gap shifts with the seasons.
- The sill or the wood under it is soft.
- The door is old, single-pane glass is cold to the touch, and the weatherstripping has been replaced more than once.
- You see water stains or damp flooring at the bottom edge.
A door replacement also gives you a chance to upgrade the whole opening: new frame, new threshold, proper flashing and a seal built for the door. If you are weighing a fix against a replacement, a short visit to look at the door and sill is the quickest way to know.
Why homeowners ask us to handle it
If you have tightened hinges, replaced the sweep and adjusted the threshold and the door still leaks, the cause sits in the frame, the sill or the way the door was hung. Those are the jobs where a second pair of experienced eyes saves weeks of trial and error. JAG Home Enhancements, based in Bucks County, PA, installs entry doors and replacement windows and does small and large repair work. We also keep a clean job site and stay readily available while the work is under way.
If your door needs more than a new sweep, you can see what we do on our exterior remodeling services page.

Our perspective
Almost every call about a drafty door starts the same way: the homeowner has already tried a sweep, then a second sweep, and the gap is still there. In our experience the product is rarely the issue. The door is.
A door is a system. The slab, hinges, frame, threshold and sill all have to line up, and a seal is only the last piece. When the pieces do not line up, a seal covers the symptom for a season and then fails again.
That is why we start by asking where the air is coming in and why. If the answer is a worn sweep, we will tell you to replace the sweep. If the answer is a sagging frame or a sill that has taken on water, we explain what is happening and give you an honest recommendation on whether to repair it or replace the unit.
Doors are one of the places where small decisions pay off for years. A properly hung, properly sealed entry door is quieter, more comfortable and easier on the heating bill, and it makes a house feel solid every time you walk in. That is the kind of result we build toward on every project, from a single door to a full exterior renovation.
Jeff
FAQ
How much gap should be under an exterior door?
There is no single number, and the Department of Energy guidance does not give one. The gap should be small enough that a sweep touches the threshold along the whole width without dragging. If you can see daylight or feel air with the door closed, the seal is not doing its job.
Why does the bottom of my door close before the top?
Usually the door has dropped out of alignment, most often from loose hinge screws, sagging hinges or a frame that has shifted. Tighten the hinge screws first. If the door still does not meet the weatherstripping evenly from top to bottom, the frame probably needs to be re-shimmed.
Can I fix a drafty sliding door without replacing it?
Often you can. Clean the track, adjust the rollers so the panel clears the track but still closes snugly, and replace worn weatherstripping. If the frame is warped or the seals no longer hold, replacing the door is the longer-lasting answer.
Do I need a new threshold or just a new sweep?
Test first. If the sweep is flat or cracked, replace it. If a new sweep still leaves a gap in the middle, the threshold may need adjusting or replacing. If the wood under it is soft, the sill needs repair before anything else.
Sources
- Install Weatherstripping on an Exterior Door, U.S. Department of Energy
- Add Weatherstrip to Windows and Doors, Building America Solution Center
- Install or Replace Door Sweeps, Building America Solution Center
- Weatherstripping Door Frames, Fine Homebuilding
- How to Seal Door Gaps in 7 Steps, This Old House
- The Essential Guide to Weatherstripping, This Old House
- Drafty Patio Door? Weatherstripping Stops Drafts Cold, Family Handyman