

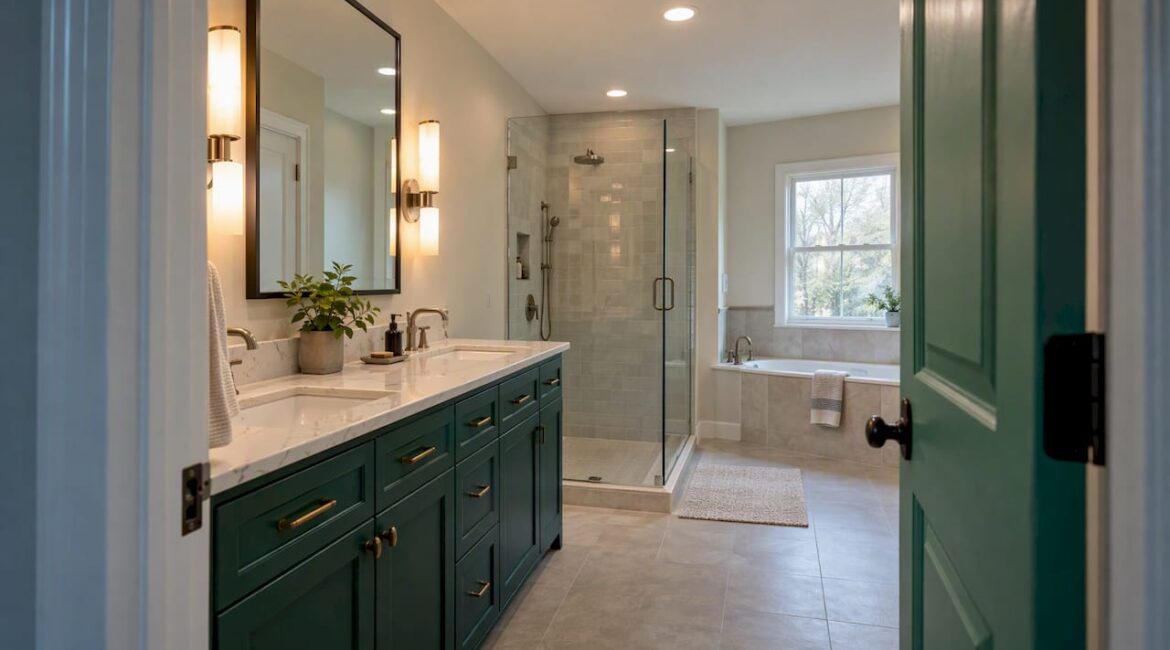
A good bathroom lighting layout uses three layers: general light from the ceiling, task light on both sides of the mirror at about eye level, and a small amount of accent light. Side sconces usually go 60 to 72 inches above the floor, about 36 to 40 inches apart. Any fixture inside the shower zone must be rated for damp or wet locations. Settle all of this before drywall goes up, because moving wiring later costs far more than planning it now.
This guide walks through the layout room by room: what each layer does, how high and how far apart to hang vanity lights, how to light a shower safely, and how to adapt the plan to a small bathroom or an older Bucks County home.
TL;DR
- Plan three layers: ambient light for the whole room, task light at the vanity, and accent light for mood and night use.
- Light the face, not the mirror. Put fixtures on both sides of the mirror, or a long diffused bar above it when side space is tight.
- Typical numbers: side sconces centered 60 to 72 inches off the floor and 36 to 40 inches apart; over-mirror bars at 75 to 80 inches.
- Fixtures over a tub or shower, within 8 feet vertically of the rim or threshold, must be marked for damp or wet locations.
- Decide fixture locations, switches and dimmers during the rough-in stage, not after the walls are closed.
Table of Contents
- Start with three layers, not one ceiling fixture
- Vanity lighting: where the layout succeeds or fails
- Lighting the shower and tub safely
- Switches, dimmers and zones
- Adapting the layout to your bathroom
- Our perspective on bathroom lighting
- Plan your lighting as part of a full bathroom remodel
- A pre-construction lighting checklist
- FAQ
- Sources
Start with three layers, not one ceiling fixture
The most common mistake we see is a single fixture in the middle of the ceiling, with a bar of bulbs over the mirror as an afterthought. That setup lights the top of your head and leaves a shadow under your eyes and chin.
Effective bathroom lighting combines three layers: ambient light, task light around the mirror or sink, and accent light that adds atmosphere and highlights features. Each layer has a different job, so each needs its own place in the plan.
| Layer | Job | Typical fixtures | Where it goes |
|---|---|---|---|
| Ambient | Even, general light for moving around | Recessed cans, flush or semi-flush ceiling fixture | Center of the room, spaced evenly |
| Task | Shaving, makeup, skin care, hair | Side sconces, long vanity bar | Both sides of the mirror, or above it |
| Accent | Mood, night navigation, highlights | Toe-kick LEDs, niche lights, cove lighting | Low on the wall, inside niches, behind the mirror |
The industry’s own research backs the importance of this. In a survey reported by the National Kitchen & Bath Association, 91% of respondents ranked lighting quality as a top bath-design priority, and 92% agreed that task lighting must always be part of a primary bath.
Ambient light: even, not harsh
Ambient light should wash the room evenly. One guide suggests planning roughly 50 lumens per square foot of general bathroom lighting. For a 5-by-8-foot hall bath (40 square feet), that is about 2,000 lumens in total from the ceiling. Treat that as a starting point and adjust for dark tile, which absorbs light, or a white room, which reflects it.
Eaton’s lighting guide notes that general lighting works best when it is not aimed directly at mirrors or other surfaces. Space recessed fixtures evenly and avoid placing one directly above where you stand at the sink, since it will cast a shadow over your face.
Overhead light on its own also tends to flatten a room. If you want ideas on how color, texture and finishes work with a layered scheme in a compact space, these decorating ideas for small bathrooms show how overhead light alone can leave a bathroom looking flat.
Task light: the layer that matters most
This is where you shave, apply makeup, check a rash or pluck an eyebrow. It needs to be bright, even and positioned correctly. The next section covers exactly how.
Accent light: small, dimmable, useful at 2 a.m.
Accent lighting adds depth and dimension, whether it highlights a plant, artwork or a tiled niche. In practice, the accent layer we recommend most is a low-level night light: an LED strip under the vanity or along a toe-kick, on its own switch or motion sensor. It lets you find the toilet at night without flipping on a bright overhead.
Vanity lighting: where the layout succeeds or fails
The rule that ties every good vanity plan together comes from lighting designer Francesca Bettridge, quoted by This Old House: don’t shine light at the mirror, light your face, neck and hair evenly. A fixture placed on both sides of the mirror, rather than one above it, reduces shadows and lights the face evenly.
The U.S. Green Home Lighting Guide from the Lighting Design Lab agrees: lighting both sides of the face gives the best illumination, and soft, diffuse light beside the mirror reduces shadows under the eyes and nose. HGTV puts it in practical terms: two wall-mounted fixtures on either side of the mirror at eye level create cross illumination and prevent shadows.
Option 1: side sconces (best for faces)
Sources differ slightly on the exact number, which is normal, because the right height depends on who is using the vanity. Here is what the published guidance says:
- This Old House: 60 to 72 inches from the floor, roughly eye level, with 36 to 40 inches between them on center.
- Foundry Lighting: centered 60 to 66 inches high and 36 to 40 inches apart.
- Lightology: roughly 60 to 70 inches from the floor.
- LightsOnline: centers at about 65 inches, or 24 to 30 inches above the counter, with typical spacing of 36 to 40 inches.
The overlap is clear: aim for the center of the fixture at about 60 to 66 inches, then adjust. If the main user is 5 feet tall, drop it an inch or two. If the household is tall, go toward 66 or 68. Stand at the vanity and have someone hold a piece of tape on the wall at your eye level before the electrician cuts the box.
Option 2: a bar above the mirror (when side space is tight)
When the mirror runs wall to wall, or a window or cabinet leaves no room for sconces, an over-mirror fixture is the fallback. This Old House suggests mounting it 75 to 80 inches above the floor, at least 24 inches long, with diffused light to limit shadows.
The Home Depot gives the same 75 to 80 inch range and adds a useful adjustment: if the mirror extends higher than that, set the bar about 3 inches above the mirror. Foundry Lighting puts it at 3 to 4 inches above the mirror’s top.
For width, a fixture about 75% of the mirror’s width looks balanced, and it should not extend past the mirror.
Option 3: both
In a primary bath with a double vanity, we often combine a sconce between or beside each mirror with a soft overhead fixture. Each person gets face-level light without anyone standing in another person’s shadow. The ideal spacing between lights on either side of a mirror is about 36 inches, and wider mirrors may need adjustments, so a double vanity with two separate mirrors is usually easier to light well than one long mirror.
Quick vanity checklist
- Mark your eye level on the wall before roughing in boxes.
- Choose side sconces if you have at least a few inches of wall beside each mirror.
- Choose a bar above the mirror only when side placement isn’t possible, and keep it long and diffused.
- Check the mirror width against the fixture width.
- Confirm where faucets, medicine-cabinet doors, trim and shelves sit relative to each light.
That last point comes from Crown Supply, which advises evaluating fixture placement with the mirror and vanity together, including mirror dimensions, side space, cabinet doors, faucets and existing electrical box locations. Since vanity height affects where your mirror and lights land, our guide to measuring bathroom vanity height is worth reading first.
Glare and bulb direction
How a bar fixture faces matters. According to Kichler, mounting a vanity light with the exposed bulb facing down provides more light but increases glare, while facing the diffuser or glass upward blocks some light but reduces glare. If you are choosing fixtures with frosted glass, the diffuser is doing the work of softening shadows, so don’t swap it for clear bulbs in an open shade.
Color temperature and color accuracy
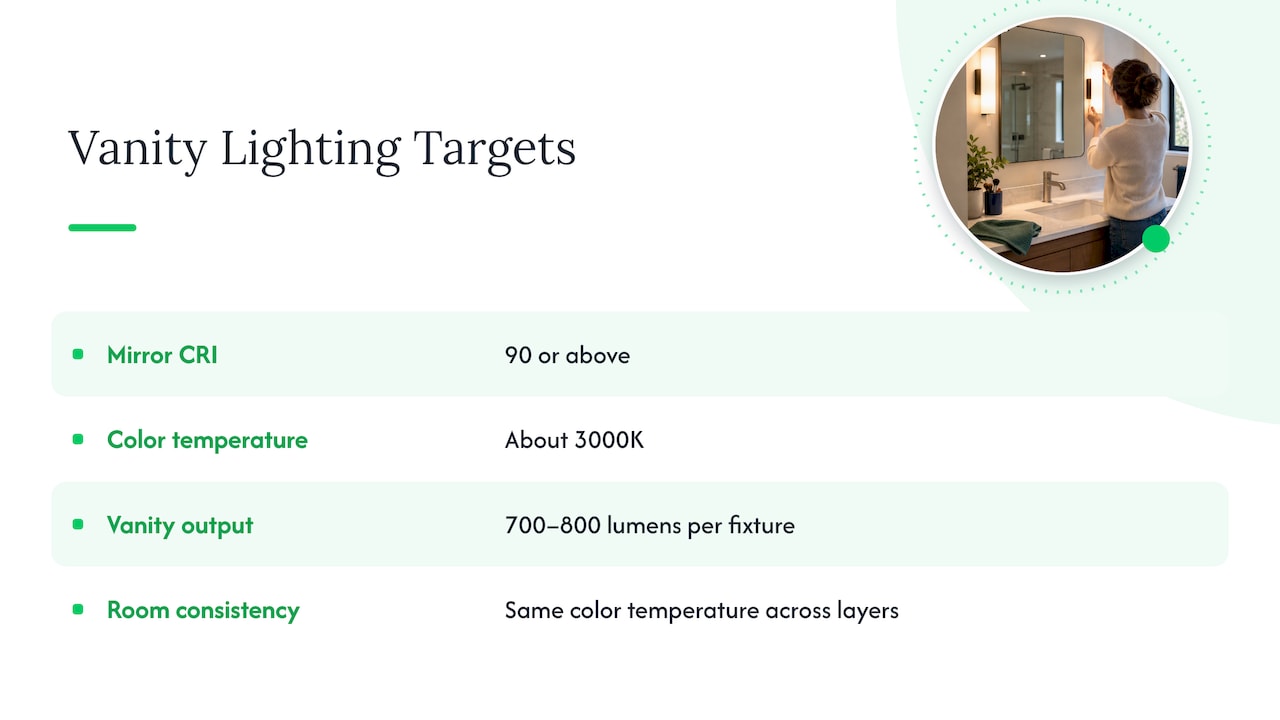
For the mirror, look for a high color rendering index (CRI). One buyer’s guide recommends a CRI of 90 or above and about 3000K for flattering, accurate light, and about 700 to 800 lumens per vanity fixture. Use the same color temperature across every layer in the room. Mixing 2700K and 4000K bulbs makes a bathroom look patchy.
Lighting the shower and tub safely
This is the one part of the layout where the rules are not optional. Under the National Electrical Code, luminaires in the zone above a tub or shower have to be rated for the moisture. In San Ramon, California’s current residential bathroom remodel handout, which follows the national model rules, luminaires within the outside dimensions of a tub or shower, up to 8 feet vertically from the rim or threshold, must be marked suitable for damp or wet locations. Recessed fixtures in shower enclosures must be listed for damp or wet locations too.
Electrical Contractor magazine explains the practical side: where a fixture is exposed to shower spray, it needs a wet rating. If the shower is fully enclosed and subject to steam, water spray or both, a damp rating is the minimum and a wet rating is allowed. For a fully tiled shower, a wet-rated fixture is the sensible choice.
The same handout lists related rules that affect layout:
- Bathroom receptacles must be GFCI-protected.
- Switches are not allowed in tub or shower spaces.
- Receptacles can’t be installed within 3 feet horizontally and 8 feet vertically of the tub rim or shower threshold.
Pennsylvania municipalities enforce their own adopted code editions, so the details in Bucks and Montgomery County townships can differ from a California handout. Your township’s building office and licensed electrician have the final word on what applies to your address.
Shower lighting options that work
- Wet-rated recessed can: the standard choice. A single can centered over the shower is enough for most standard alcoves. Choose a trim with a sealed lens.
- Wet-rated surface or flush fixture: good when the ceiling is too shallow for a can or the joist layout interferes.
- Linear LED in a niche or along a curb: a nice accent, but it must use a wet-rated product and be installed per the manufacturer’s instructions.
- Natural light from above: in compact baths, skylights or clerestory windows can bring in daylight while protecting privacy.
If you are considering a curbless shower, the lighting plan interacts with the ceiling and drain layout, so read our curbless shower pros and cons before locking in fixture positions.
Switches, dimmers and zones
A layout is only as good as the way you control it. We recommend at least three separately controlled circuits in anything bigger than a powder room:
- Ambient ceiling lights, on a dimmer.
- Vanity lights, on their own switch, ideally dimmable.
- Night light or accent layer, on a motion sensor or a separate low switch.
Put the main switch bank just inside the door, outside the shower zone. Dimmers let the same room work for a 6 a.m. shave and a 10 p.m. soak. Check that your LED bulbs or fixtures are rated as dimmable and that the dimmer is compatible with LED loads, or you’ll get flicker and buzz.
Adapting the layout to your bathroom
Small bathrooms and powder rooms
With little wall space, the ceiling does more of the work, and the mirror area becomes critical. This Old House notes that mirror lighting should come from eye-level sconces rather than overhead light alone, which can create unflattering shadows. In a tight bathroom, a pair of slim sconces or a single wide diffused bar beats a big ceiling fixture. Our small bathroom layout ideas cover how fixture, vanity and shower placement work together when every inch counts.
Primary baths with double vanities
Give each user their own pair of side lights, or a sconce between two mirrors plus one at each outer edge. Keep the 36 to 40 inch spacing for each mirror, and run the vanity circuit on a dimmer so a partner sleeping in a nearby room isn’t blinded.
Older homes
Many Bucks County houses have a single ceiling fixture and a switch from decades ago, plaster walls and limited wall cavities. Adding side sconces means opening walls, running new cable and possibly upgrading a circuit. That’s easier when the bathroom is already being gutted. If you own a farmhouse or a stone twin, our notes on remodeling older homes in Bucks County explain what we check behind the walls.
Bathrooms that need to age with you
Glare-free, even lighting and bright night lights matter more as eyesight changes. Our aging in place bathroom guide covers low-cost improvements now and blocking for grab bars later; the same thinking applies to wiring and switch placement.
Our perspective on bathroom lighting
We have walked through enough bathroom demolitions to know that lighting is the line item homeowners least often plan and most often regret. A new vanity gets weeks of discussion. The lighting gets a quick pick from a showroom shelf, and the electrician is asked to “just put it where the old one was.”
The U.S. Department of Energy points to the same pattern: new homes often come with only the minimum fixtures needed to meet code, leaving the rest to the homeowner. The same guideline says it’s far more practical to integrate task lighting into cabinetry and fixture plans from the start than to retrofit later.
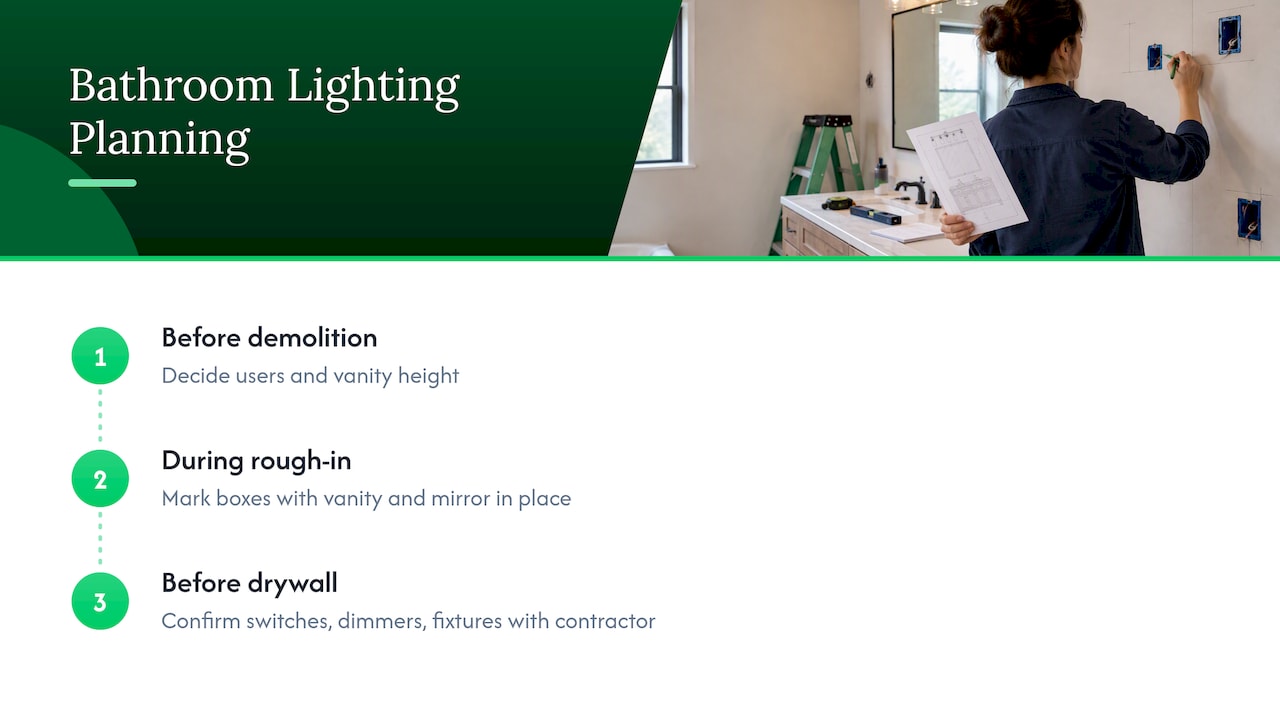
Our advice is simple. Before demolition, decide who uses the vanity and at what height. During rough-in, mark every box position with the vanity and mirror physically in place or measured to the inch. Before drywall, walk the room with your contractor and confirm each switch, dimmer and fixture. If you change your mind afterward, you pay for patched drywall and rewiring.
We would rather spend an extra hour on a layout with you than have you live with a shadow across your face every morning for fifteen years.
— Jeff
Plan your lighting as part of a full bathroom remodel
If you’re already thinking about new tile, a new vanity or a larger shower, lighting belongs in the same conversation. JAG Home Enhancements handles bathroom remodels in Bucks County and nearby areas, from the first consultation through completion, so layout, wiring and finishes get coordinated in one plan. We’ll talk through your vanity, your mirror and your daily routine before we recommend a single fixture.

See our kitchen and bathroom remodeling services or browse our bathroom remodeling tips for Bucks County to start planning.
A pre-construction lighting checklist
Bring this list to your contractor or electrician before work starts:
- Which fixtures are ambient, which are task, and which are accent?
- What is the finished mirror size and the exact eye level of each regular user?
- Are sconce centers set at your chosen height and 36 to 40 inches apart?
- Is every fixture over the tub or shower rated for damp or wet locations?
- Are switches outside the shower space and receptacles GFCI-protected?
- Do bulbs share one color temperature and a high CRI?
- Are dimmers compatible with the LED fixtures you chose?
- Is there a night-light option on its own control?
- Have you checked for conflicts with medicine-cabinet doors, trim, shelves and faucets?
- Has the work been confirmed against your township’s adopted electrical code?
FAQ
How many lights does a bathroom need?
There is no magic number, but most bathrooms need at least one general ceiling source, vanity task lighting on both sides of the mirror or a long bar above it, and a wet-rated fixture in the shower if the ceiling is dark there. A rough ambient target is 50 lumens per square foot, with roughly 700 to 800 lumens per vanity fixture.
How high should vanity lights be mounted?
For side sconces, center them about 60 to 72 inches above the floor, near eye level, and 36 to 40 inches apart. For a bar above the mirror, 75 to 80 inches is the common range. Adjust to the users’ height and mirror size, and see our guide on vanity height for the cabinet side of the equation.
Can I use regular recessed lights in the shower?
No. Fixtures within the shower or tub zone, up to 8 feet vertically from the rim or threshold, must be marked suitable for damp or wet locations. If the fixture is exposed to direct spray, choose a wet rating. Ask a licensed electrician to confirm the right product and your township’s requirements.
Should I choose sconces or a light bar over the mirror?
Sconces on both sides give the most even, flattering light on the face. A long, diffused bar above the mirror works when there isn’t room at the sides. A fixture about 75% of the mirror’s width keeps the proportions balanced.
Sources
- A guide to effective bathroom lighting design, Eaton
- U.S. Green Home Lighting Guide, Lighting Design Lab
- How To Choose the Best Lighting Fixtures for Bathrooms, This Old House
- How to Install a Wall Sconce, This Old House
- Room for Two: Planning a Shared Bathroom, This Old House
- Bathroom Lighting Design Ideas, HGTV
- Bathroom Lighting Ideas, Philips Hue
- Bathrooms are Getting Bigger, Brighter, and Better Organized, NKBA
- The Complete Bath Light Sizing Guide, LightsOnline
- Vanity Light Height, The Home Depot
- Vanity Light Size & Height Guide, Foundry Lighting
- The How To Lighting Guide, Lightology
- Bathroom Lighting Planning & Selecting Tips, Kichler
- Bathroom and Vanity Lighting, Crown Supply
- Bathroom Lighting Guide, Lumens
- Scrub-a-Dub-Dub: No lights or receptacles in the tub!, Electrical Contractor Magazine
- Bathroom Remodel handout, City of San Ramon Building and Safety Services
- Strategy Guideline: High Performance Residential Lighting, U.S. Department of Energy